

Move iCloud Drive to your own bucket

iCloud Drive is a fine desk drawer. It is a worse vault. Docs, PDFs, and old folders should live in a bucket you own if you want them to outlast an Apple subscription.
This post is the move for iCloud Drive files. Not iCloud Photos. Not Google Drive. Not Dropbox. Not OneDrive. Those belong in Move Google Photos to your own bucket, Move Google Drive to your own bucket, Move Dropbox to your own bucket, and Move OneDrive to your own bucket.
1. Get a zip of iCloud Drive
The official path is Apple's copy request. Sign in at privacy.apple.com. Choose Request a copy of your data. Check iCloud Drive. Do not select everything.
Pick a max file size. Apple splits the archive into 1 to 25 GB chunks. Then you wait. Apple says it can take up to 7 days. When the files are ready, you have 14 days to download them. Source is Apple data and privacy help. The wait is real.
If you have a Mac, skip the wait. Open Finder. Copy the iCloud Drive folder off the cloud. Zip it yourself.
Do not unpack this onto a laptop and call it done. The zips are the handoff. The bucket is the home.
2. Pick a bucket you own
You need S3-compatible object storage. Not another iCloud clone.
For the price table, see the cheapest cloud object storage comparison.
This post does not walk the console again. If you do not have a bucket hooked up yet, follow how to connect a Backblaze B2 bucket and come back.
3. Import the zip in file.rocks
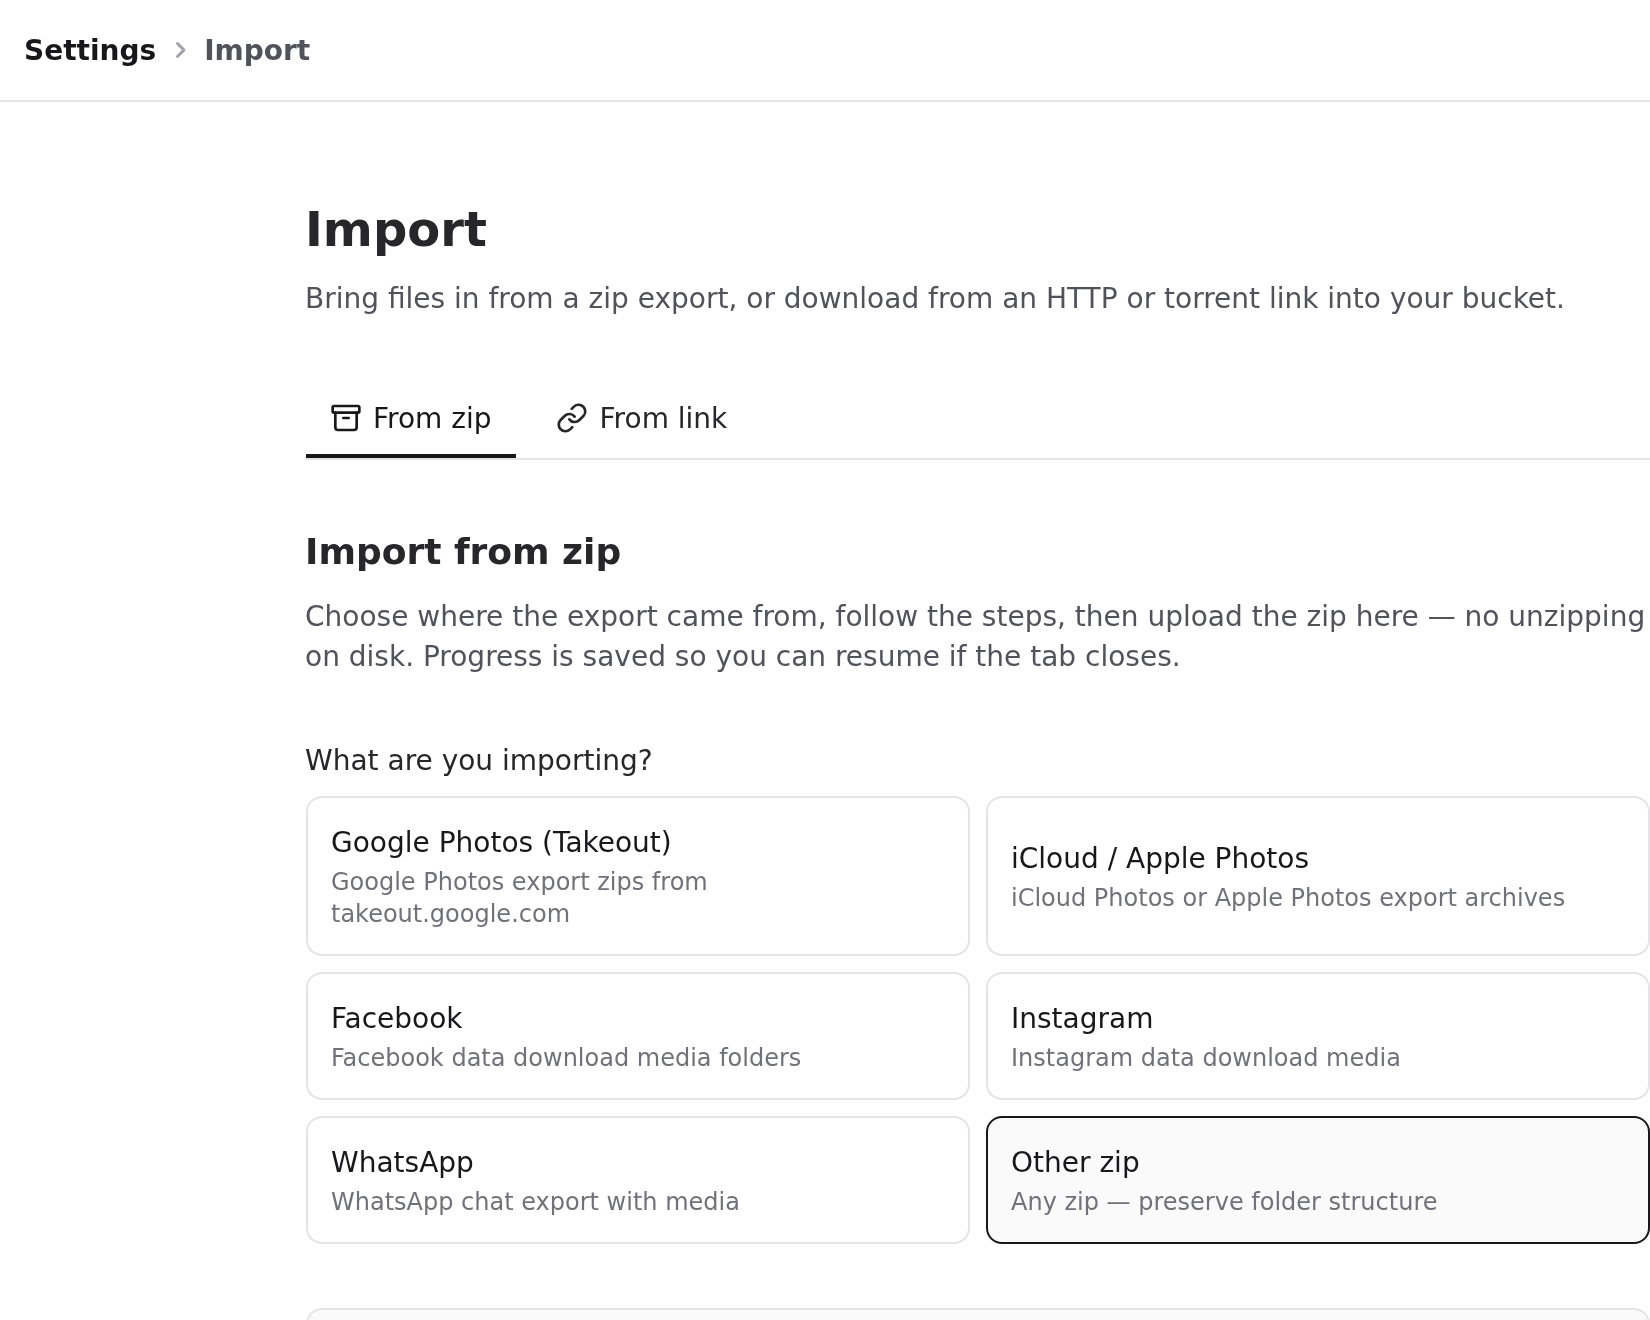
Sign in at file.rocks. Open Settings, then Import. Stay on From zip.
Pick Other zip. That is the generic zip path. The Google Photos (Takeout) tile is for the photo library, not iCloud Drive.
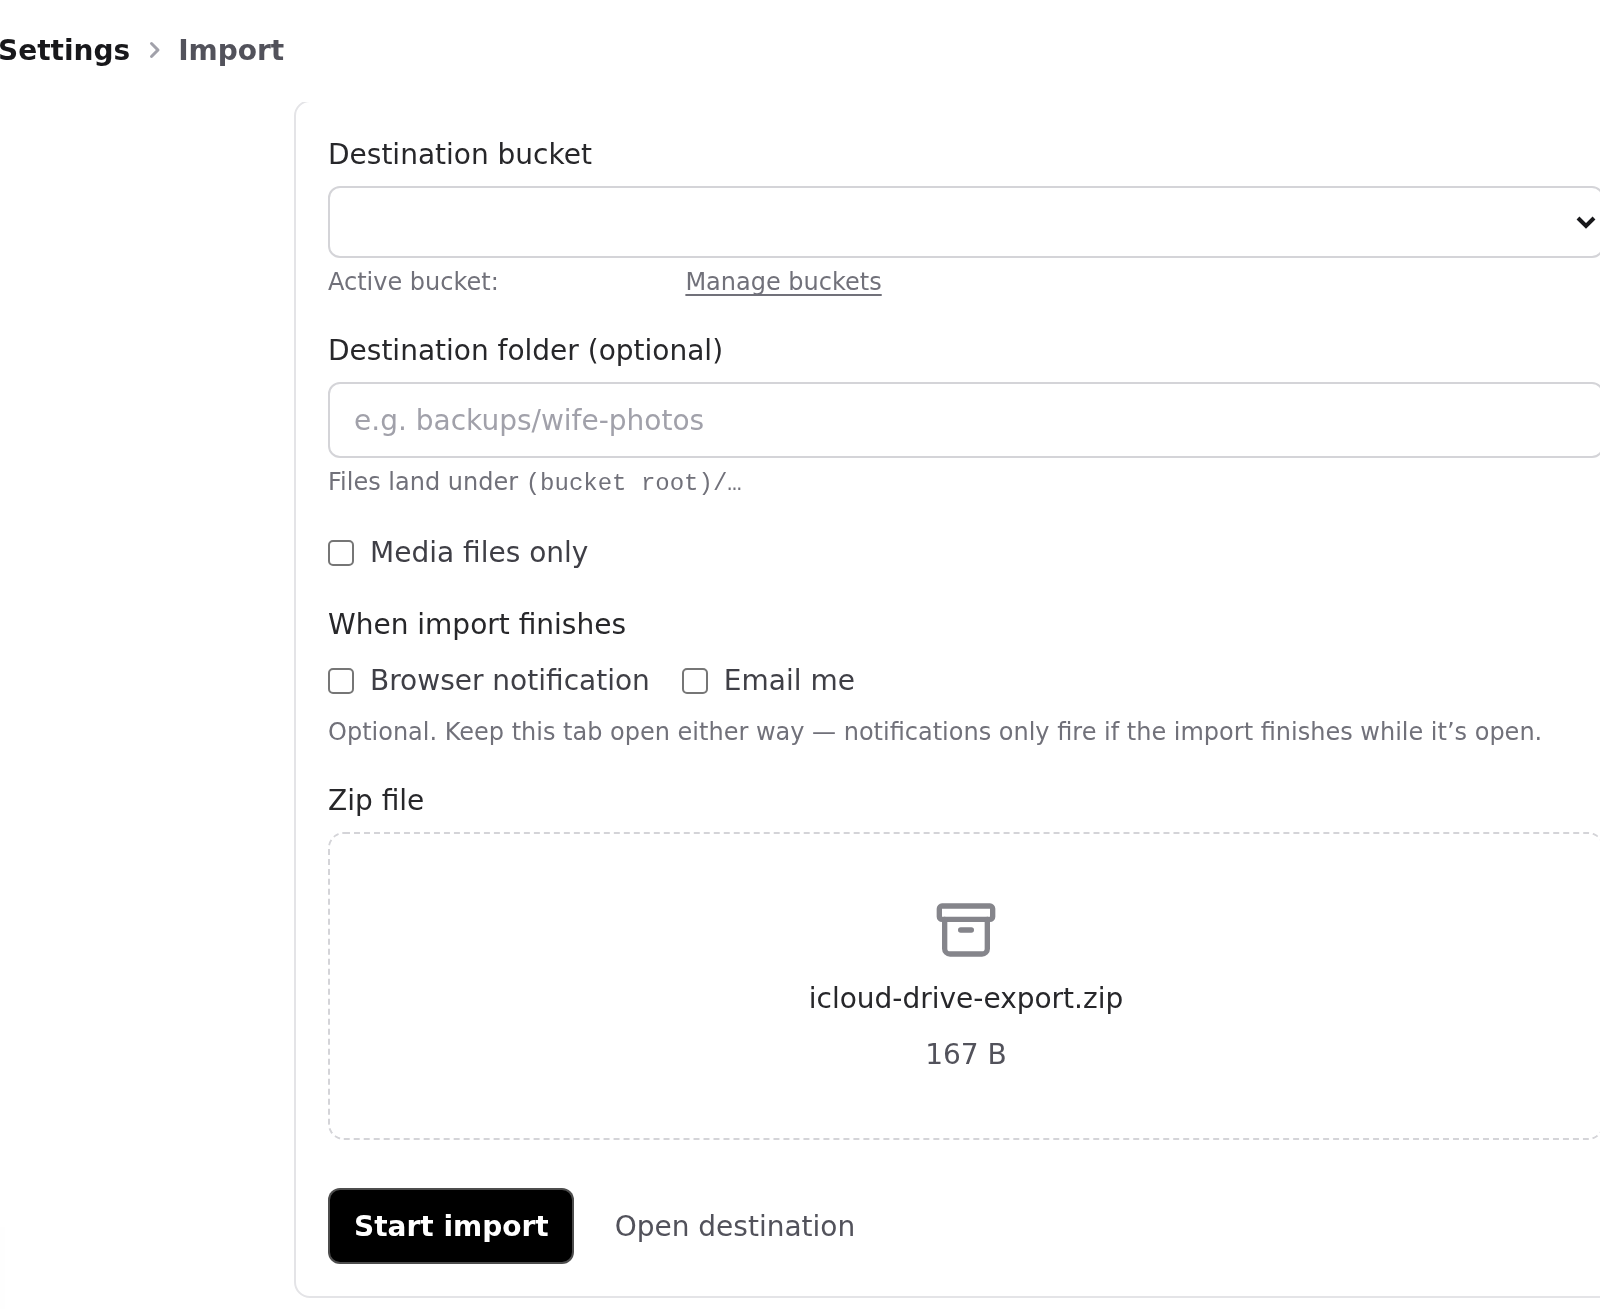
Turn Media files only off if you have docs. The box can start on. If it stays on, those files get skipped.
Drop the zip. Click Start import. file.rocks unpacks it into your bucket. You do not unzip it on your laptop.
Wait until it finishes. Open a few PDFs and docs and make sure they open.
You are not copying into file.rocks storage. file.rocks is the UI. The objects land in your bucket.
If you already unpacked the zip, drop the folders in Files instead. That is the fallback, not the main path.
4. What you lose
Be honest about this before you delete anything in iCloud.
You lose iCloud Photos. That is a different library. Do not treat this zip as the photo archive.
You lose iMessage, Keychain, and Health. Apple will not put end-to-end data in the zip.
You lose Family Sharing. People on the family plan will not keep a magic link into your new bucket.
You lose Desktop and Documents sync. The Mac folders that lived in iCloud will not stay glued to this bucket. New files need a new habit: zip again later, or import another archive through file.rocks.
You keep the files. You own the bucket. You can leave file.rocks, or B2, and the objects still sit there.
5. Then stop
Do not rebuild iCloud. Do not hunt for a live-share plugin on day one.
Open the files in file.rocks when you need a PDF. Keep the bucket paid.
Drive, Photos, Dropbox, and OneDrive are different exports. Use Move Google Drive to your own bucket, Move Google Photos to your own bucket, Move Dropbox to your own bucket, and Move OneDrive to your own bucket.
Need to send a file after it lands? That is how to share a file from your own bucket.
A direct download URL is a different path. Use import a file from a link or torrent. That is not the iCloud Drive path.