

How do I connect an Amazon S3 bucket?

Connecting an S3 bucket to file.rocks may seem daunting at first, but it really only takes a few steps to get started.
For the purposes of this tutorial, we'll use Amazon S3, but you can use any S3-compatible service to connect to file.rocks.
1. Create your S3 bucket
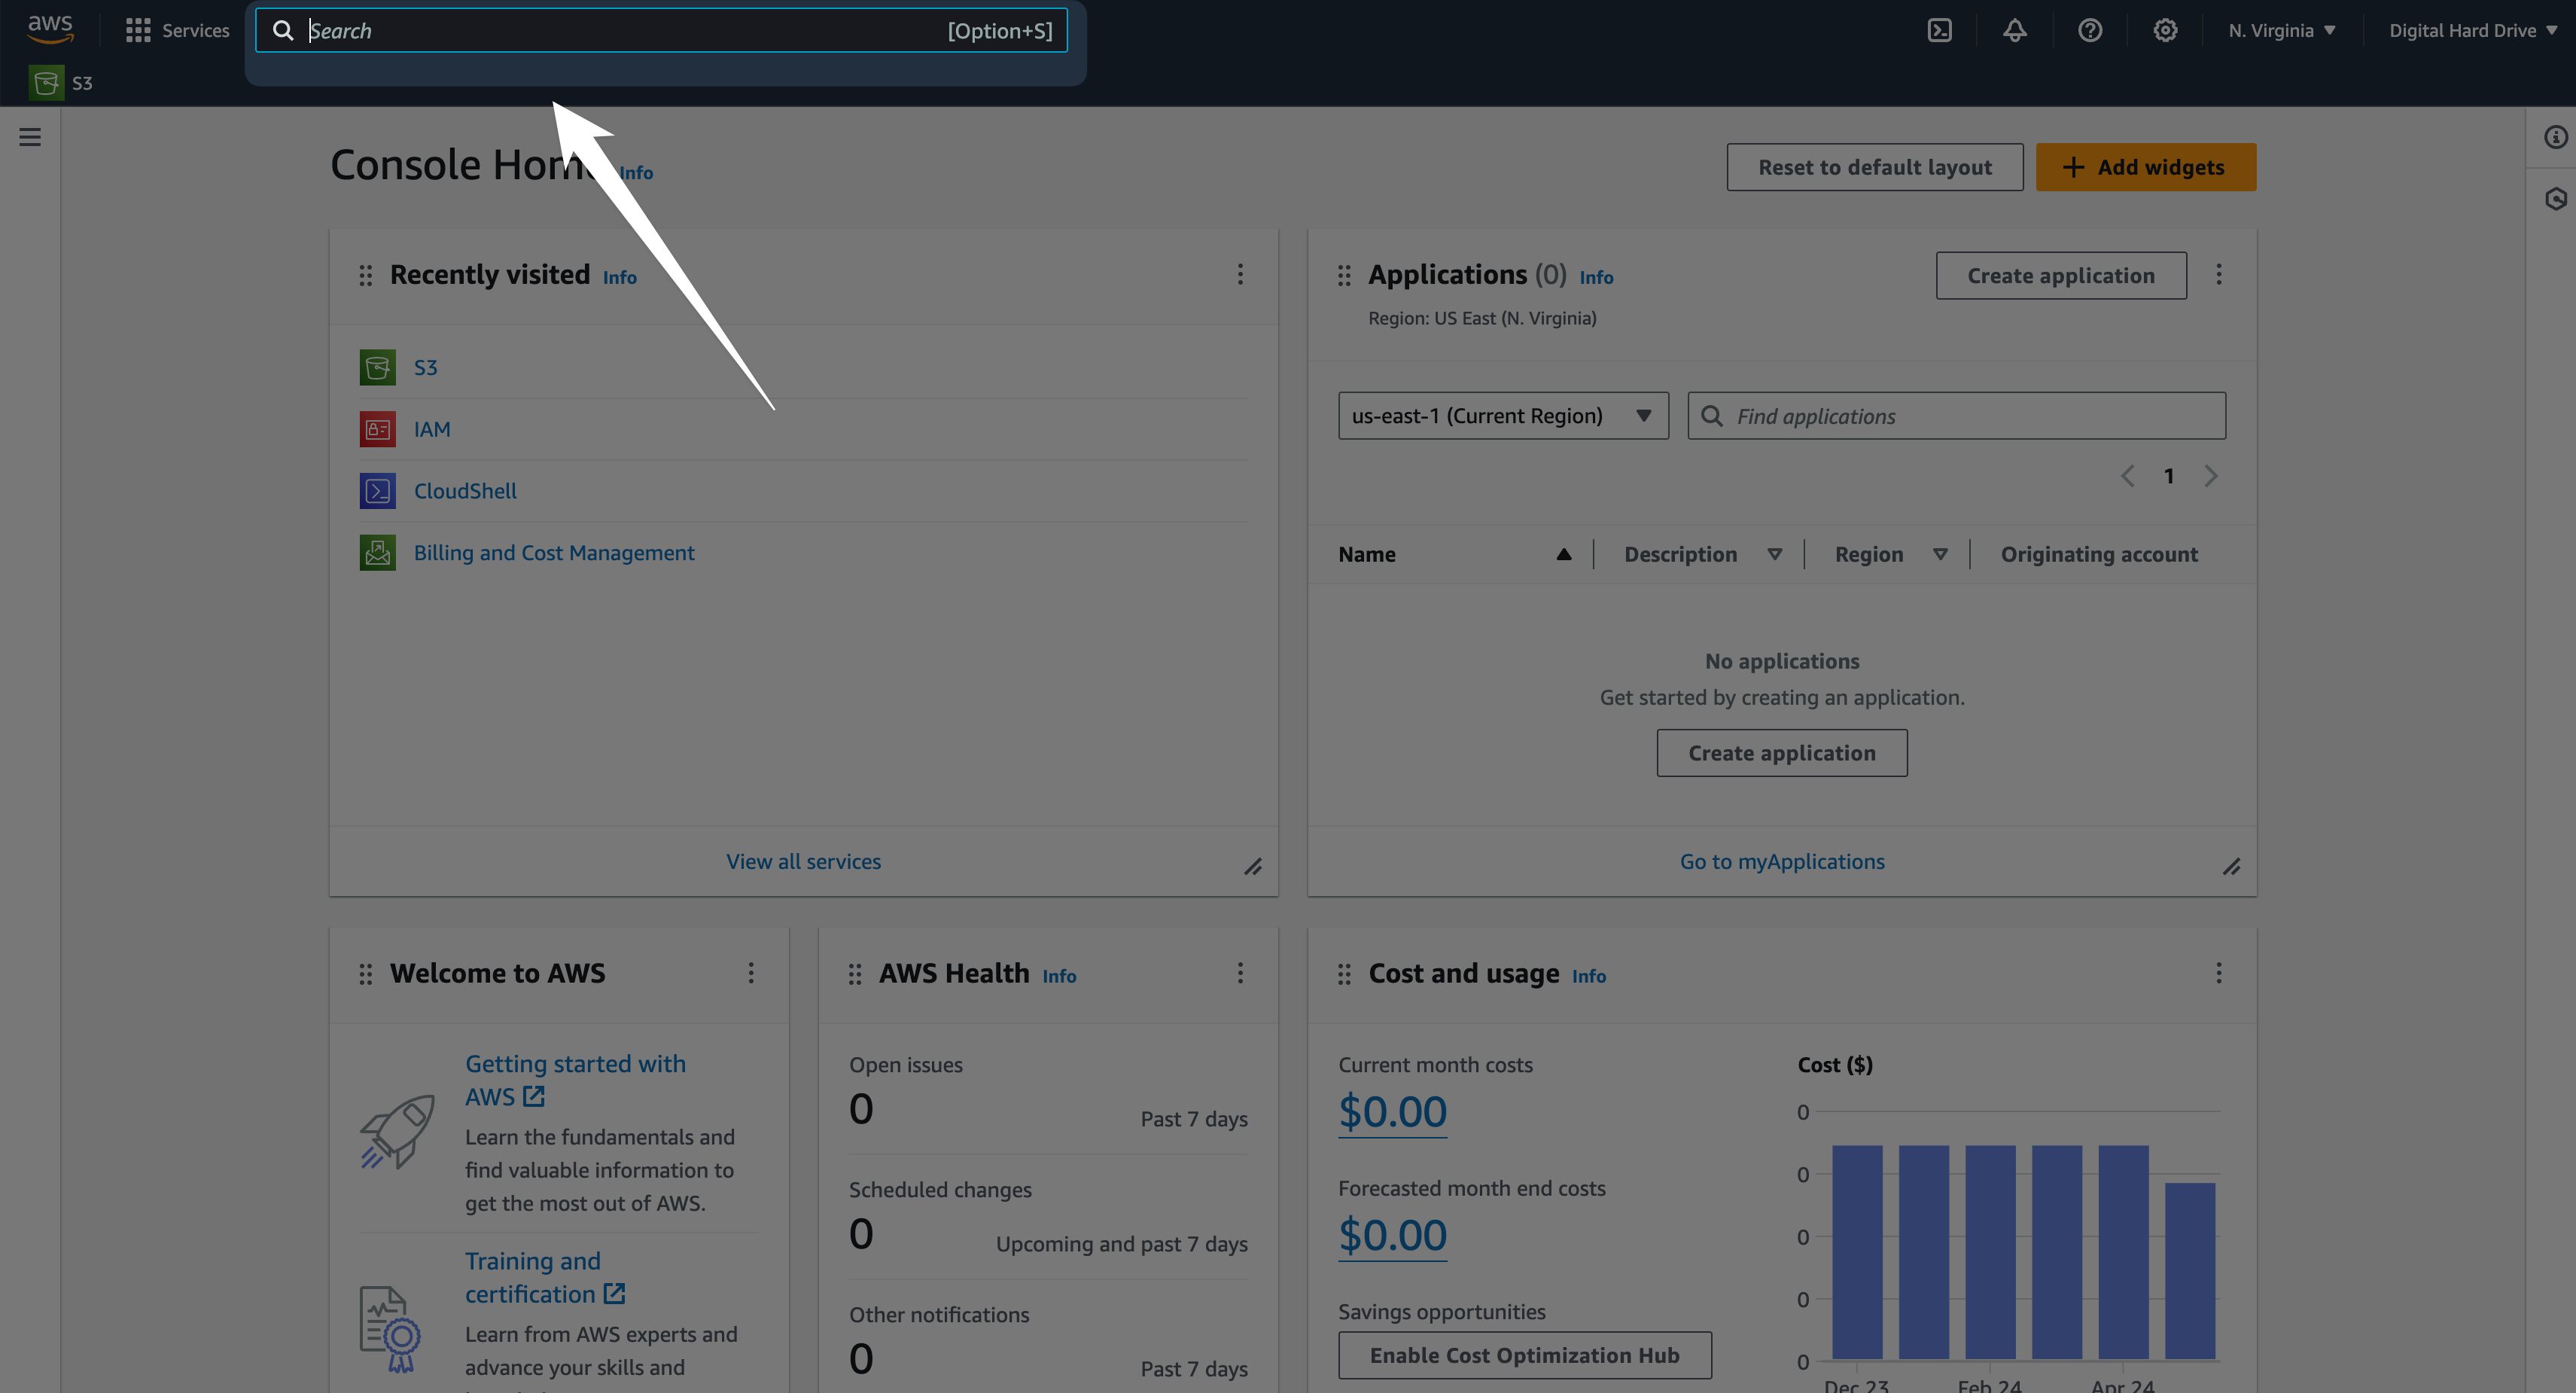
You'll need to sign up for an AWS account before anything else. Once you have an account, you need to find the S3 service in the AWS console. To do so, just search for S3 in the search bar.
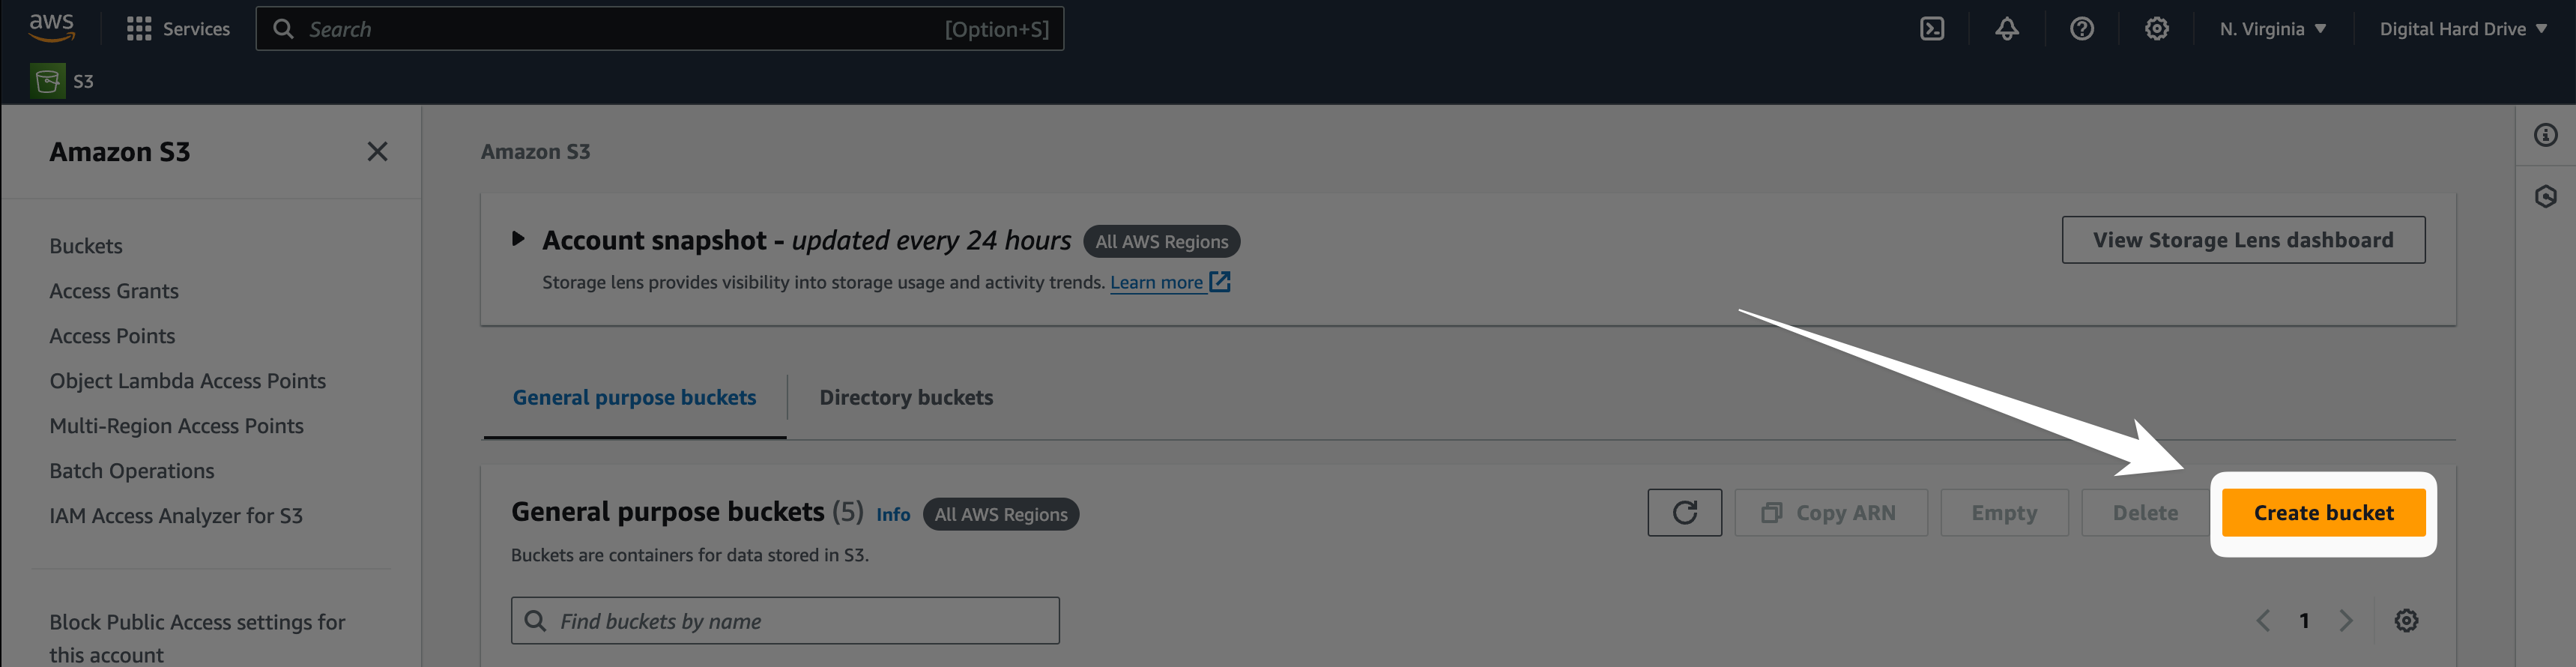
After clicking on the S3 service, you'll want to click "Create bucket".
You'll need to add a unique name to your bucket. Copy the name of your bucket for later, as we'll be adding it to file.rocks.
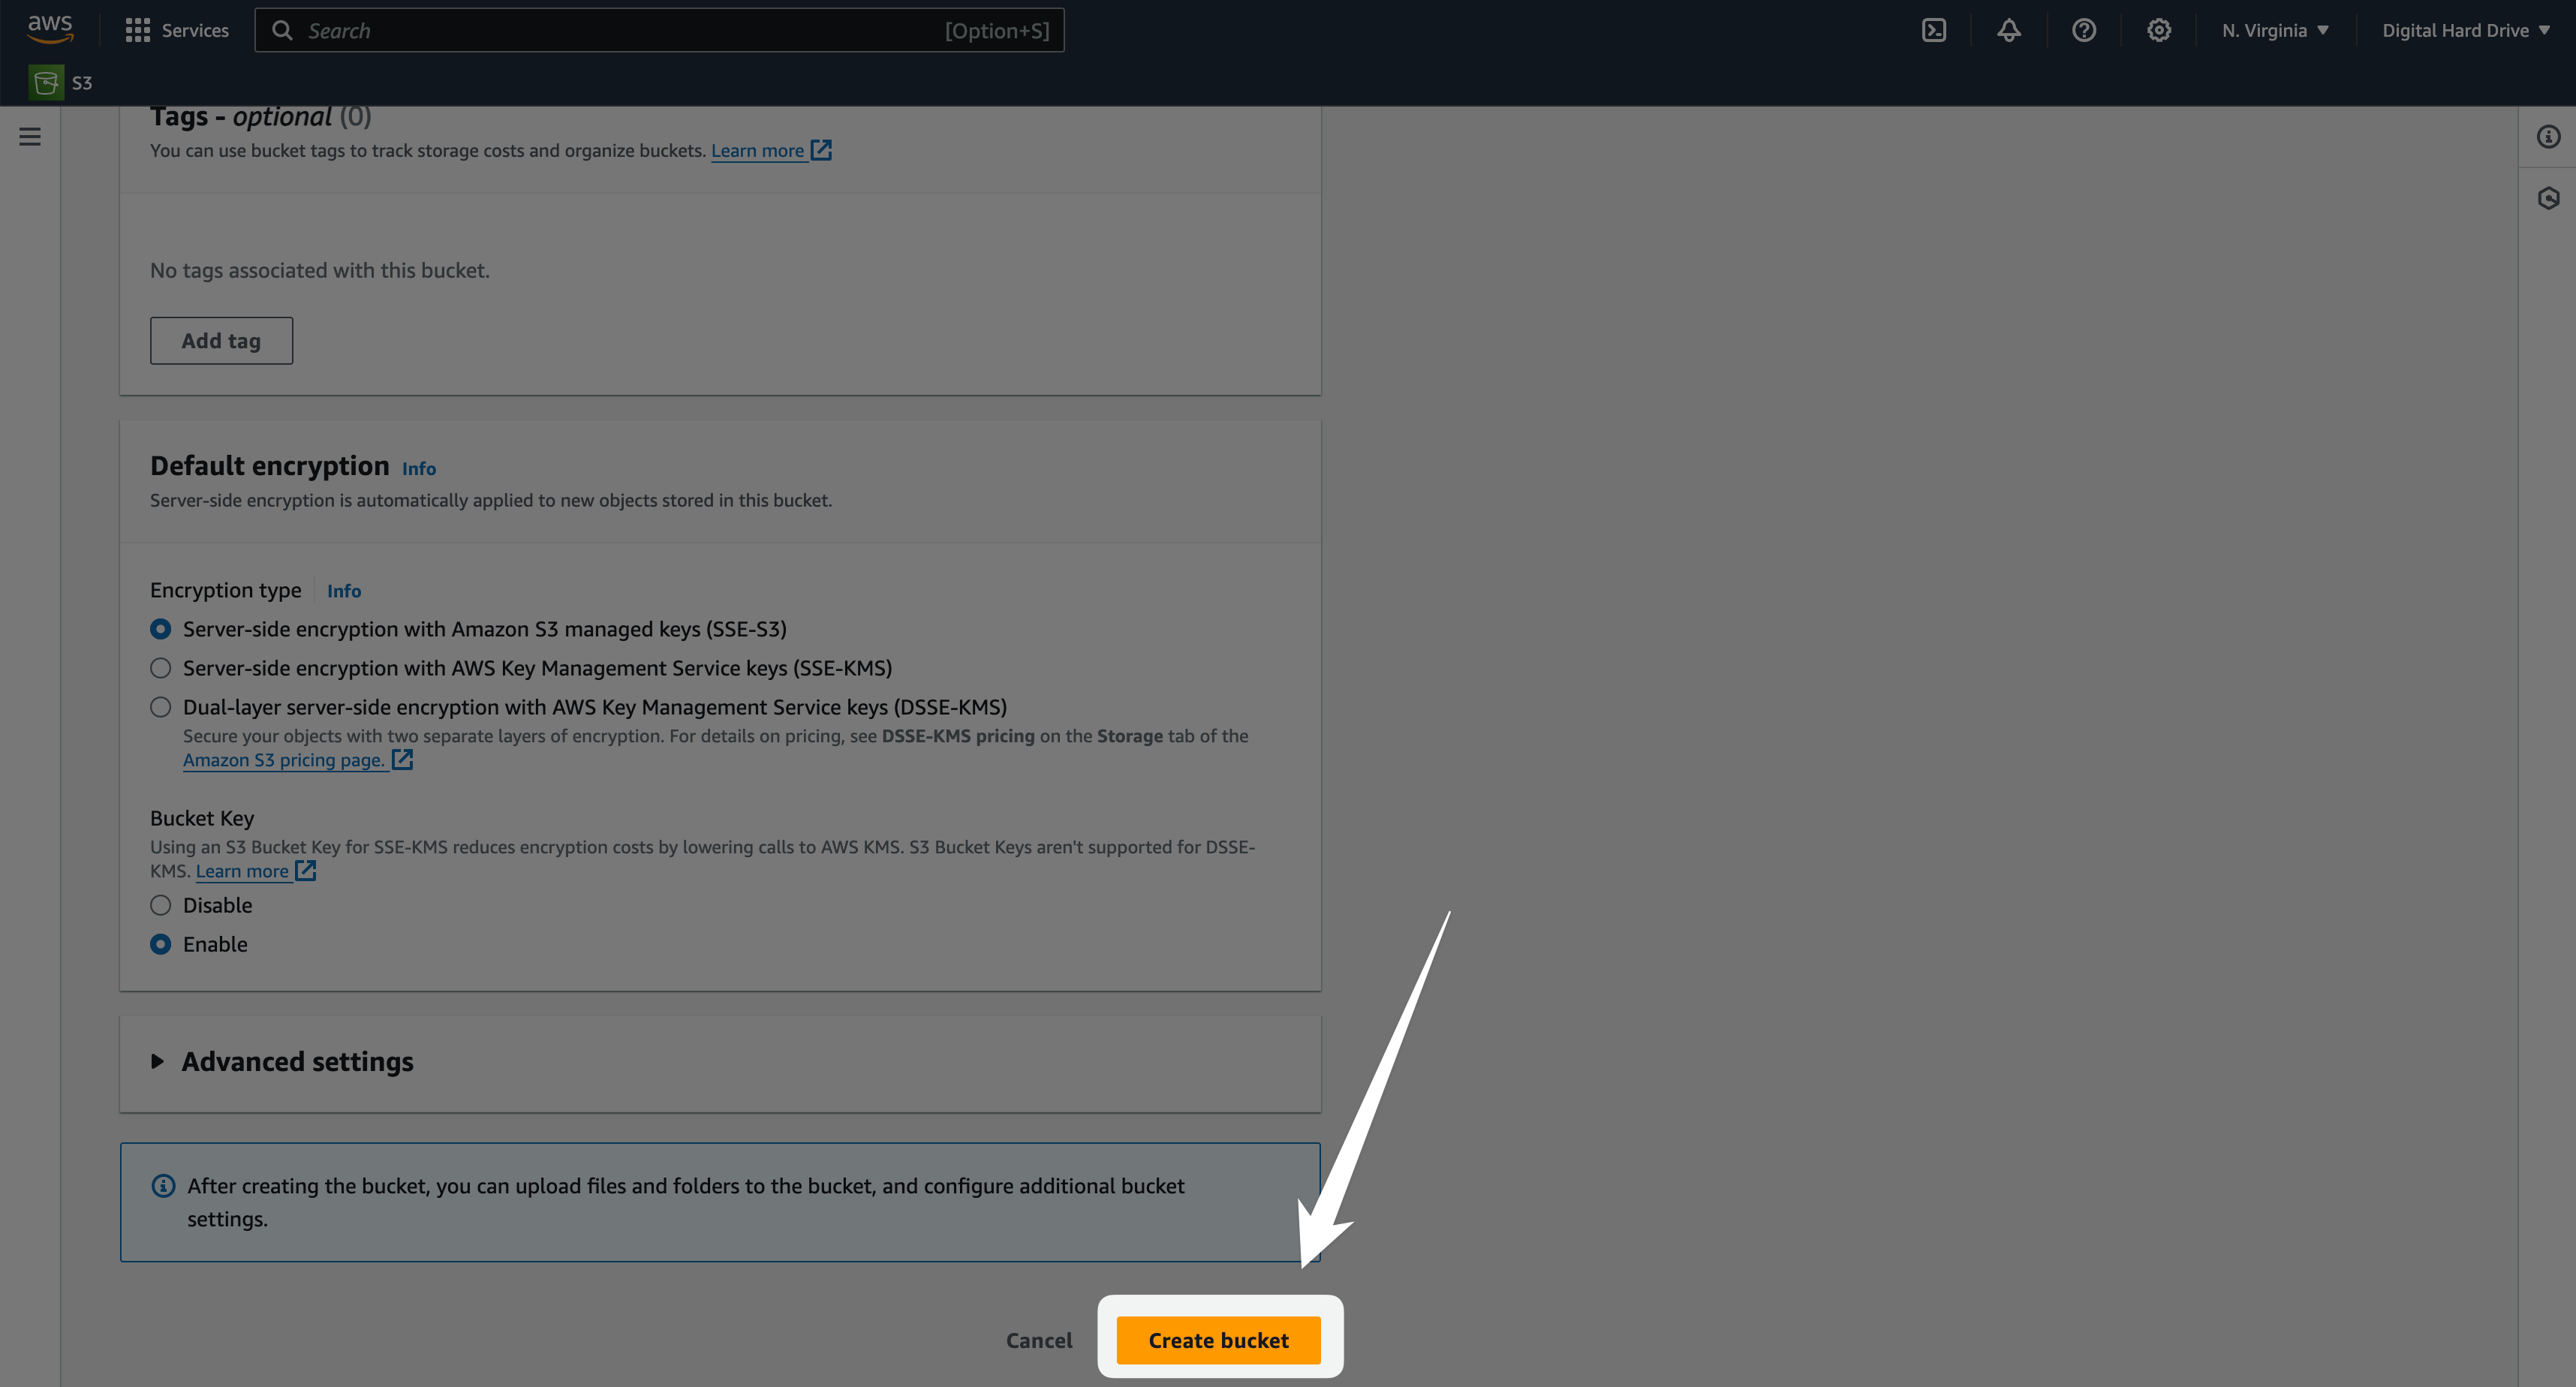
You can keep all the settings the way they are by default and click "Create bucket" at the bottom of the page.
2. Update your bucket settings
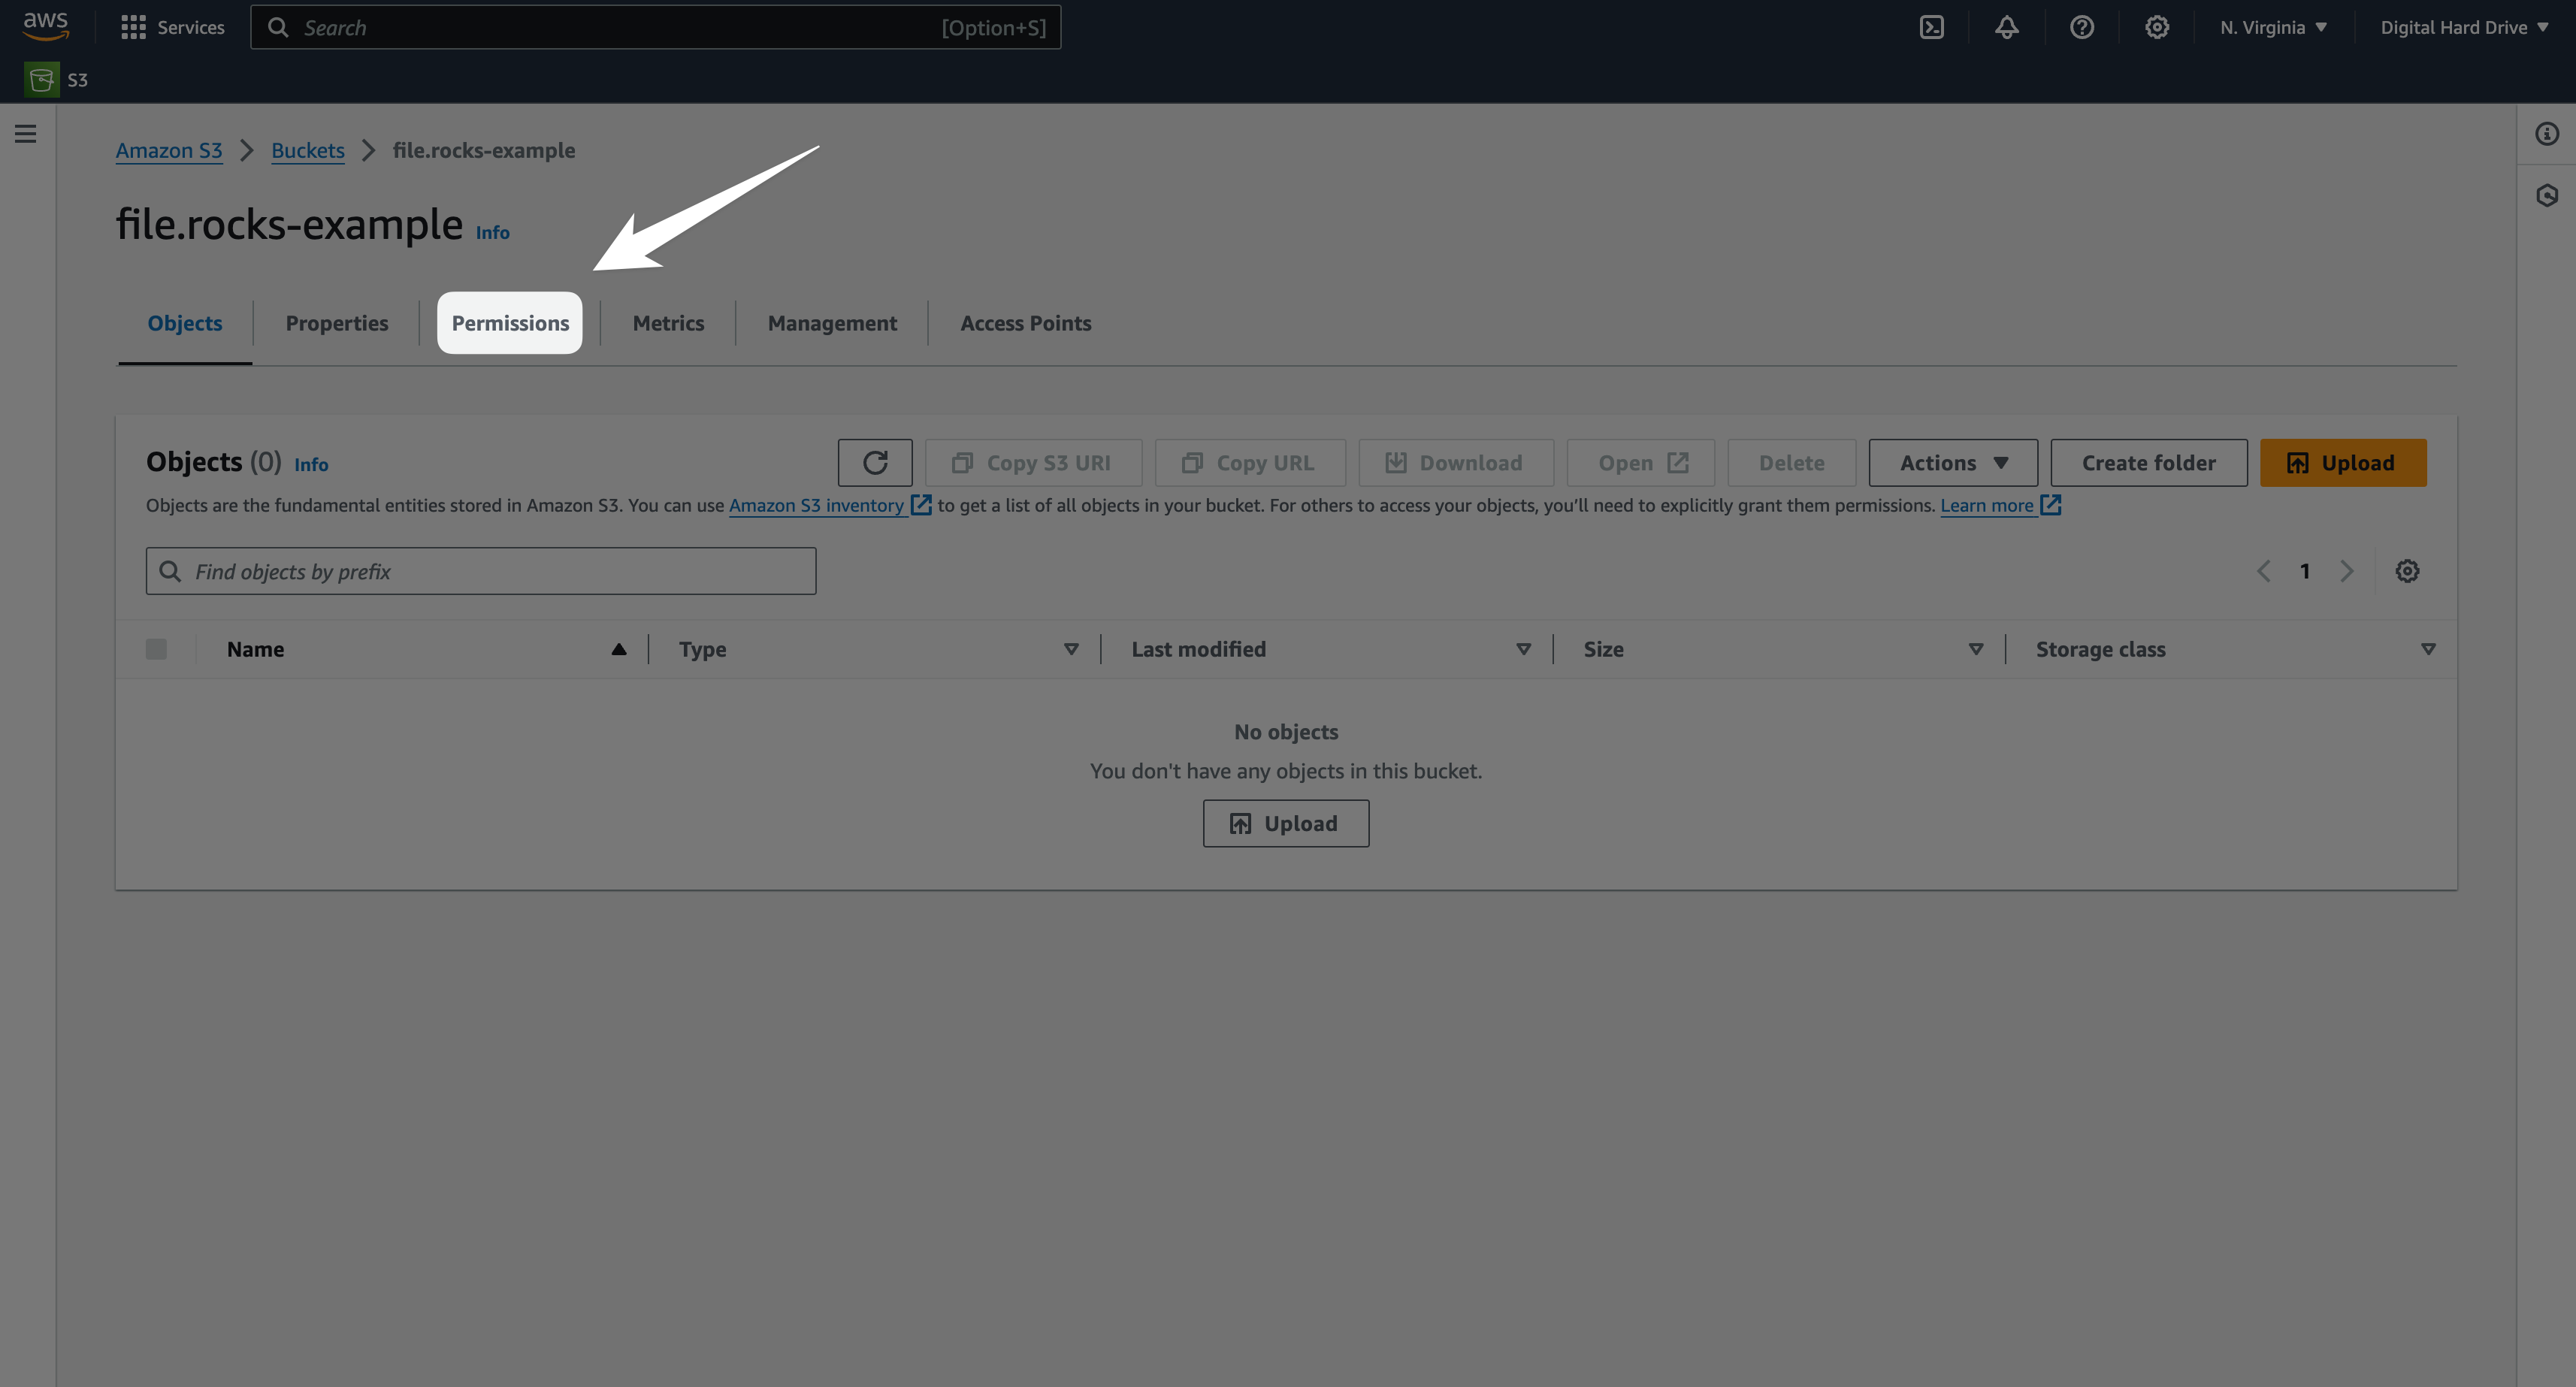
Click the name of your bucket from the list of all your S3 buckets. Then, click "Permissions" from the tabs under your bucket name.
Scroll to find "Bucket policy" and click the "Edit" button.
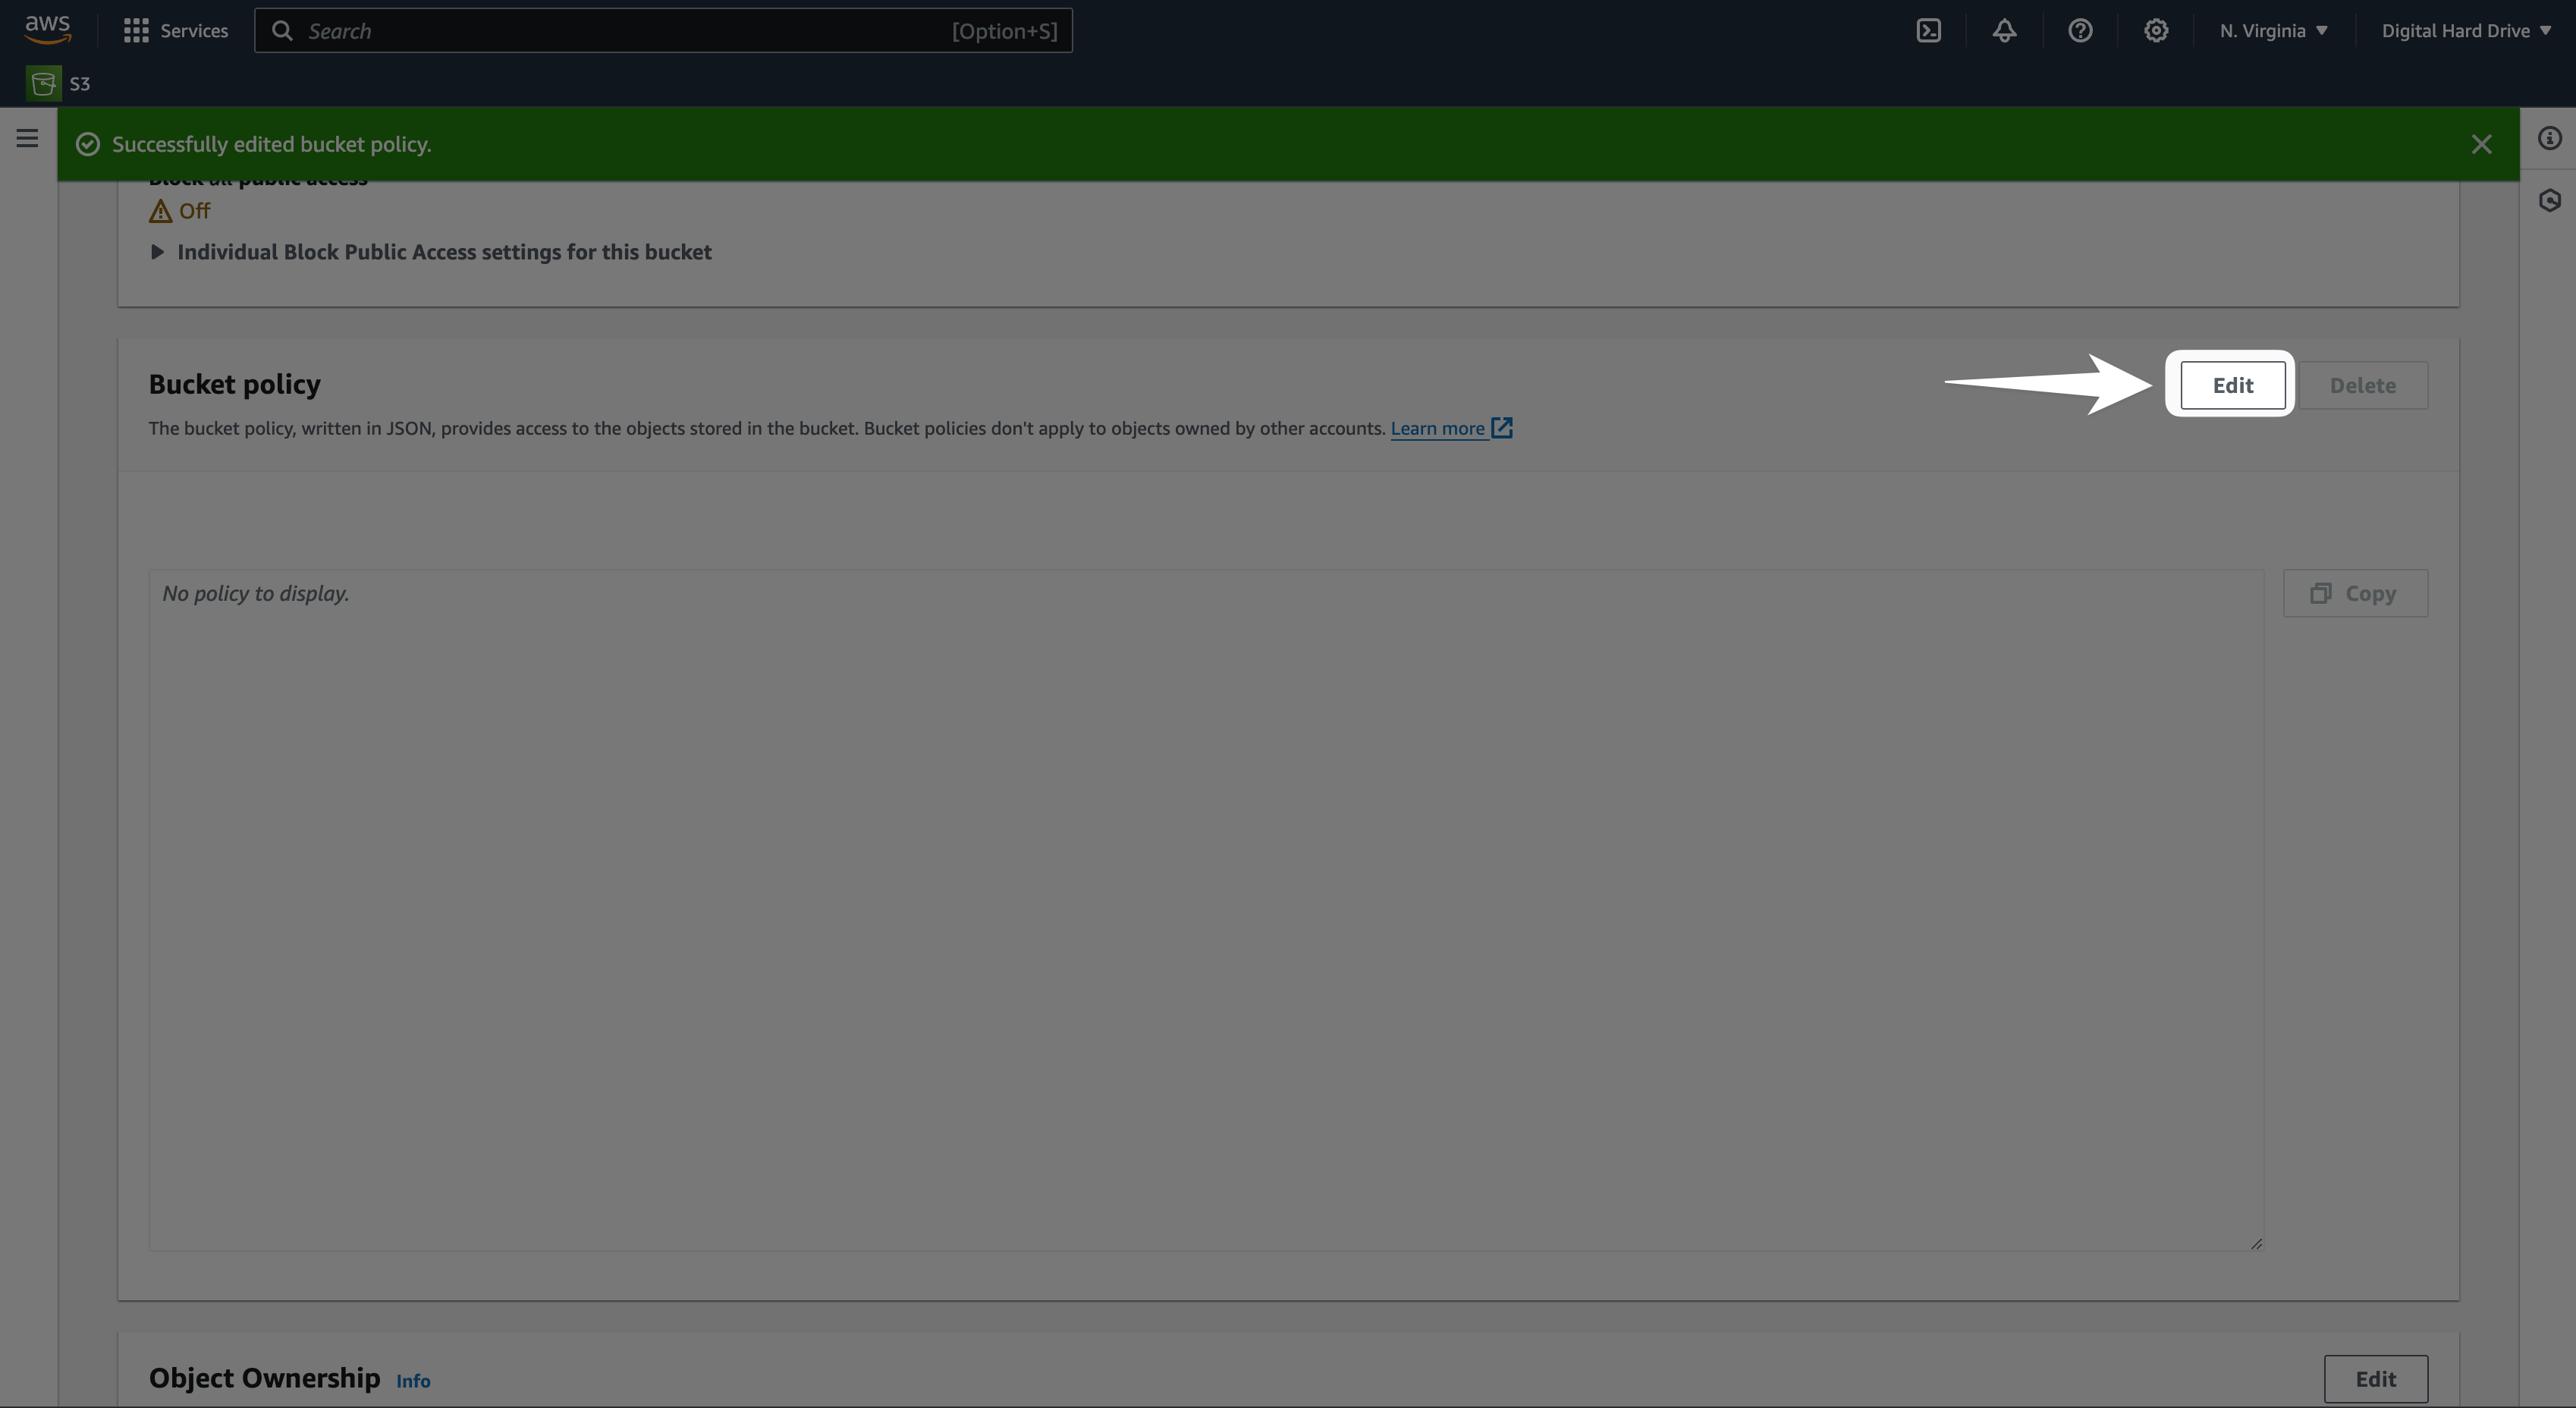
Add this policy JSON, replace BUCKET_NAME both times with your new bucket name, and click "Save changes" in the bottom-right:
{
	"Version": "2012-10-17",
	"Id": "Policy1715955038945",
	"Statement": [
		{
			"Sid": "Stmt1715955035474",
			"Effect": "Allow",
			"Principal": "*",
			"Action": "s3:*",
			"Resource": [
				"arn:aws:s3:::BUCKET_NAME",
				"arn:aws:s3:::BUCKET_NAME/*"
			]
		}
	]
}
Scroll down again until you get to "Cross-origin resource sharing (CORS)". Adding the right JSON here will let file.rocks access your bucket but keep access from anywhere else private. Click "Edit".
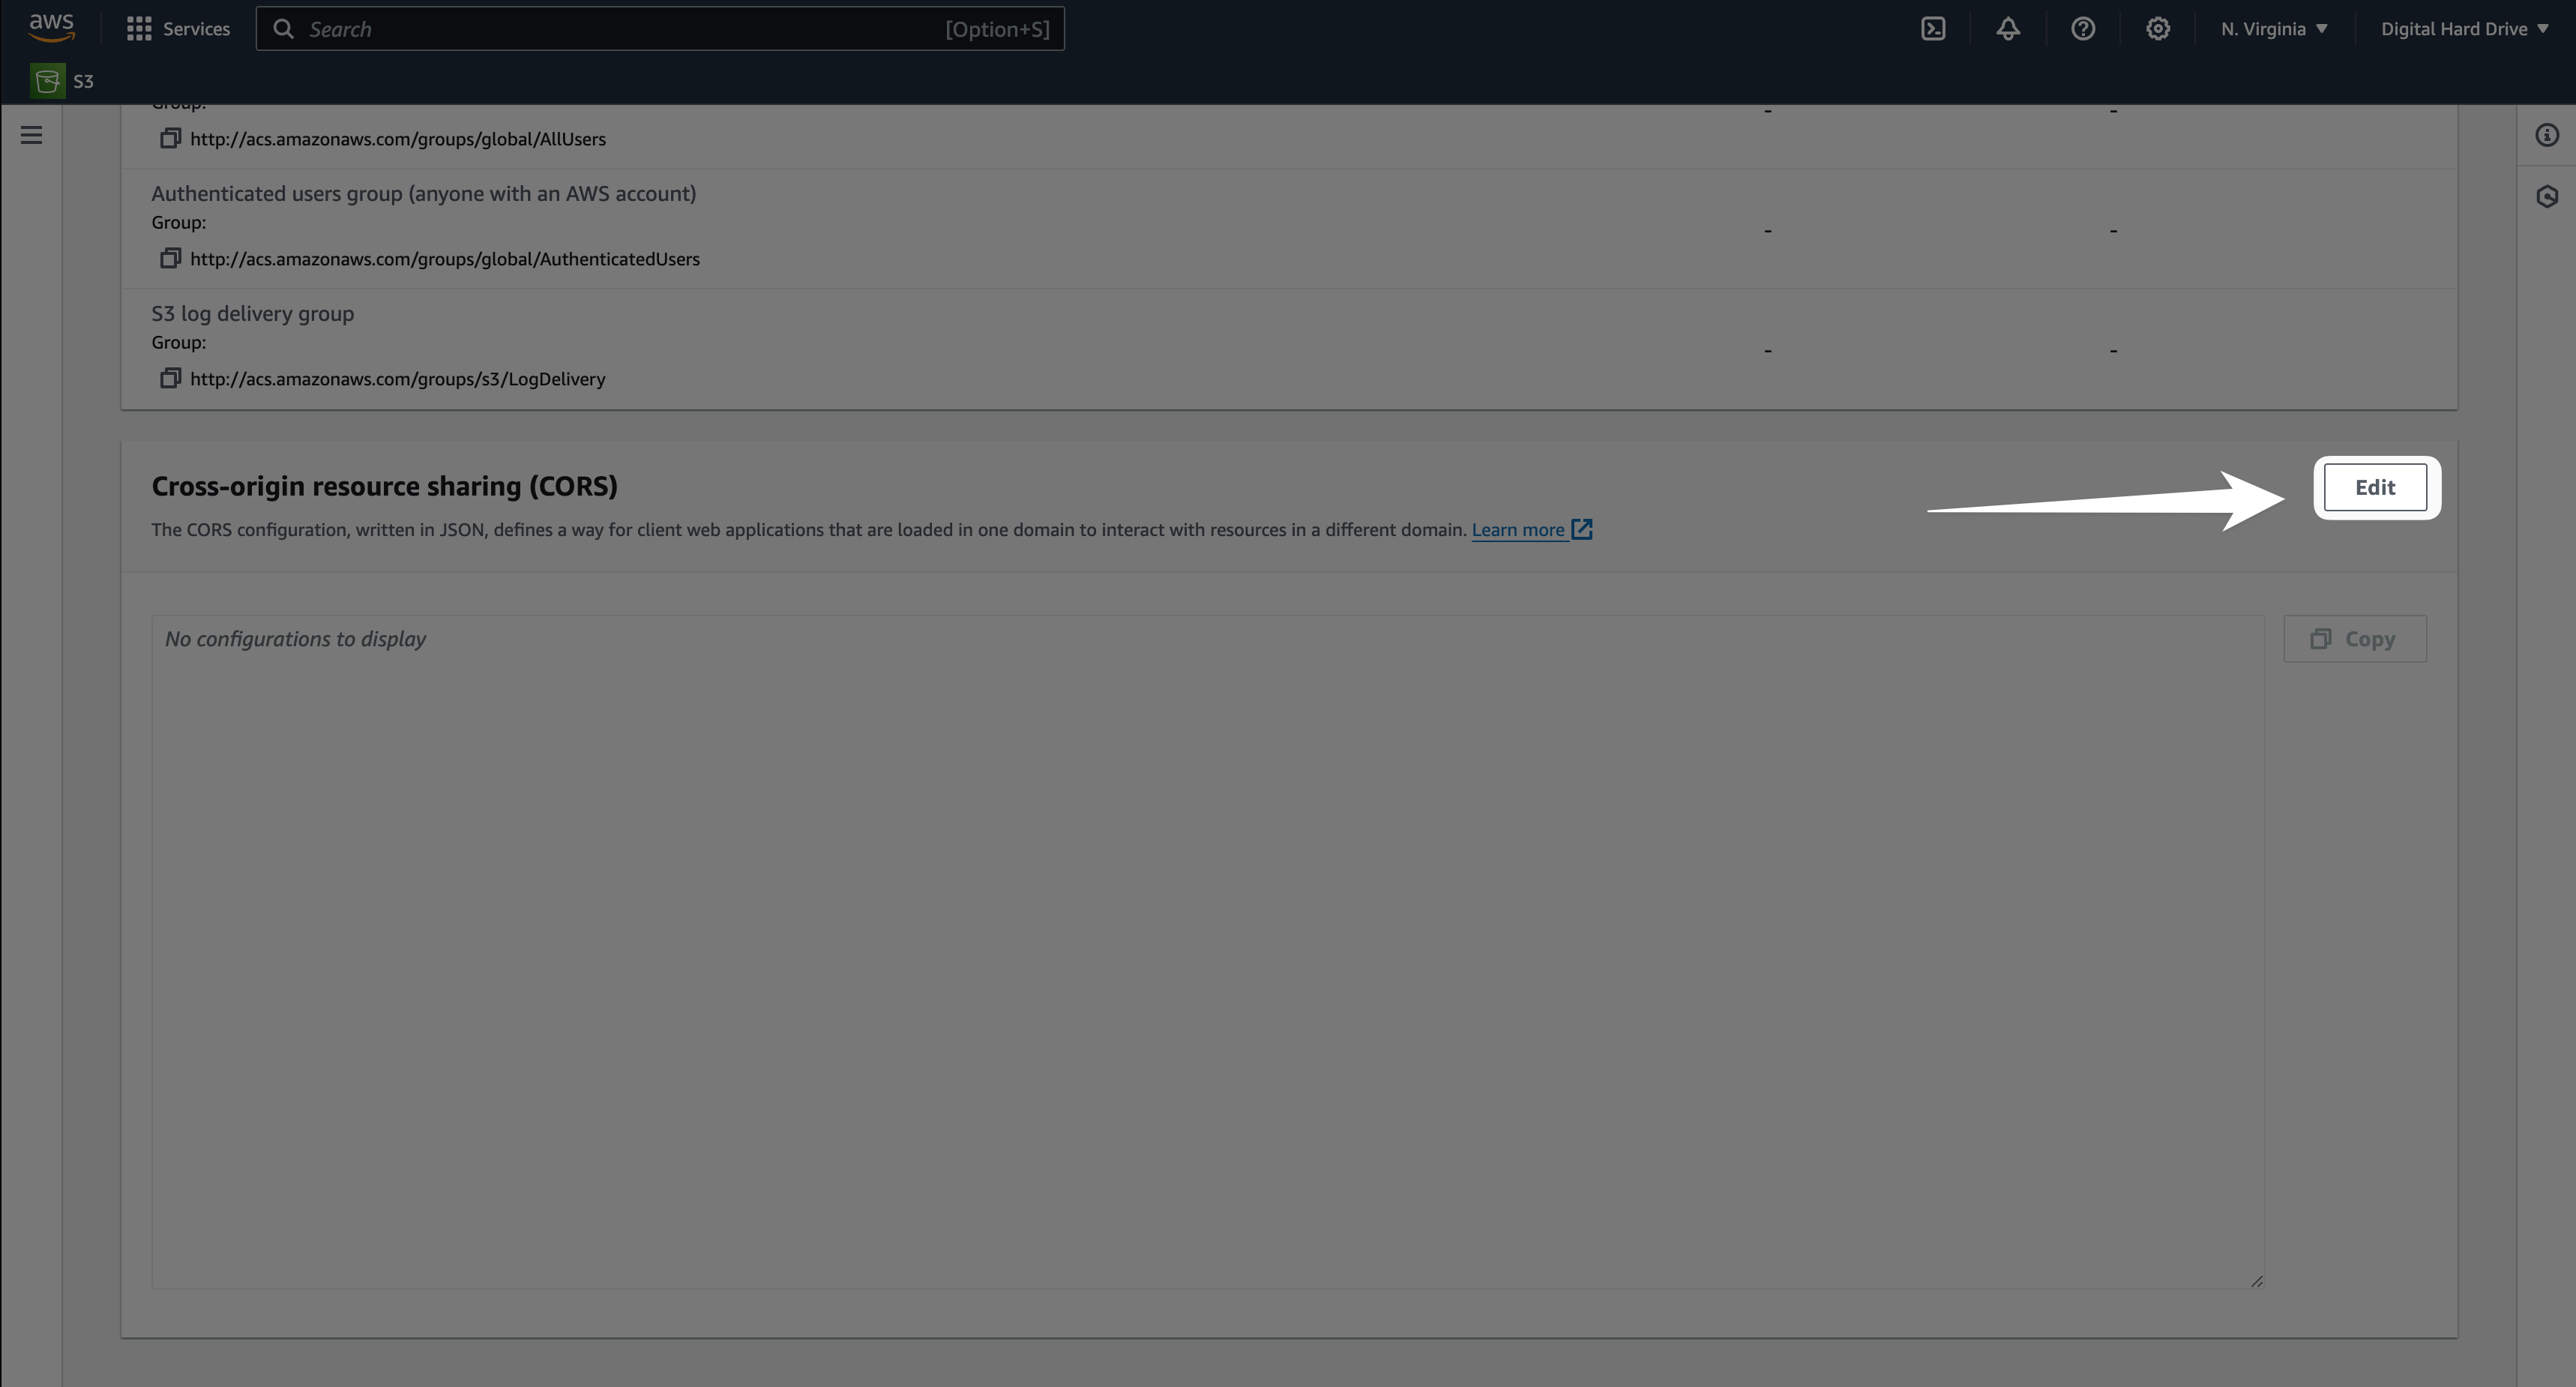
Then, paste in this JSON (don't change anything):
[
    {
        "AllowedHeaders": [
            "*"
        ],
        "AllowedMethods": [
            "GET",
            "HEAD",
            "PUT"
        ],
        "AllowedOrigins": [
            "https://file.rocks",
            "https://www.file.rocks"
        ],
        "ExposeHeaders": [],
        "MaxAgeSeconds": 3000
    }
]
Then just click "Save changes". You did it! You're done setting up your bucket! 👏
3. Create access keys
Access keys will allow file.rocks to list files, rename/move files, and even upload new files to your bucket. These keys need to remain secret, so don't share them with anyone or publish them online.
There are several ways to create access keys, but the simplest secure way is to start by creating a new User.
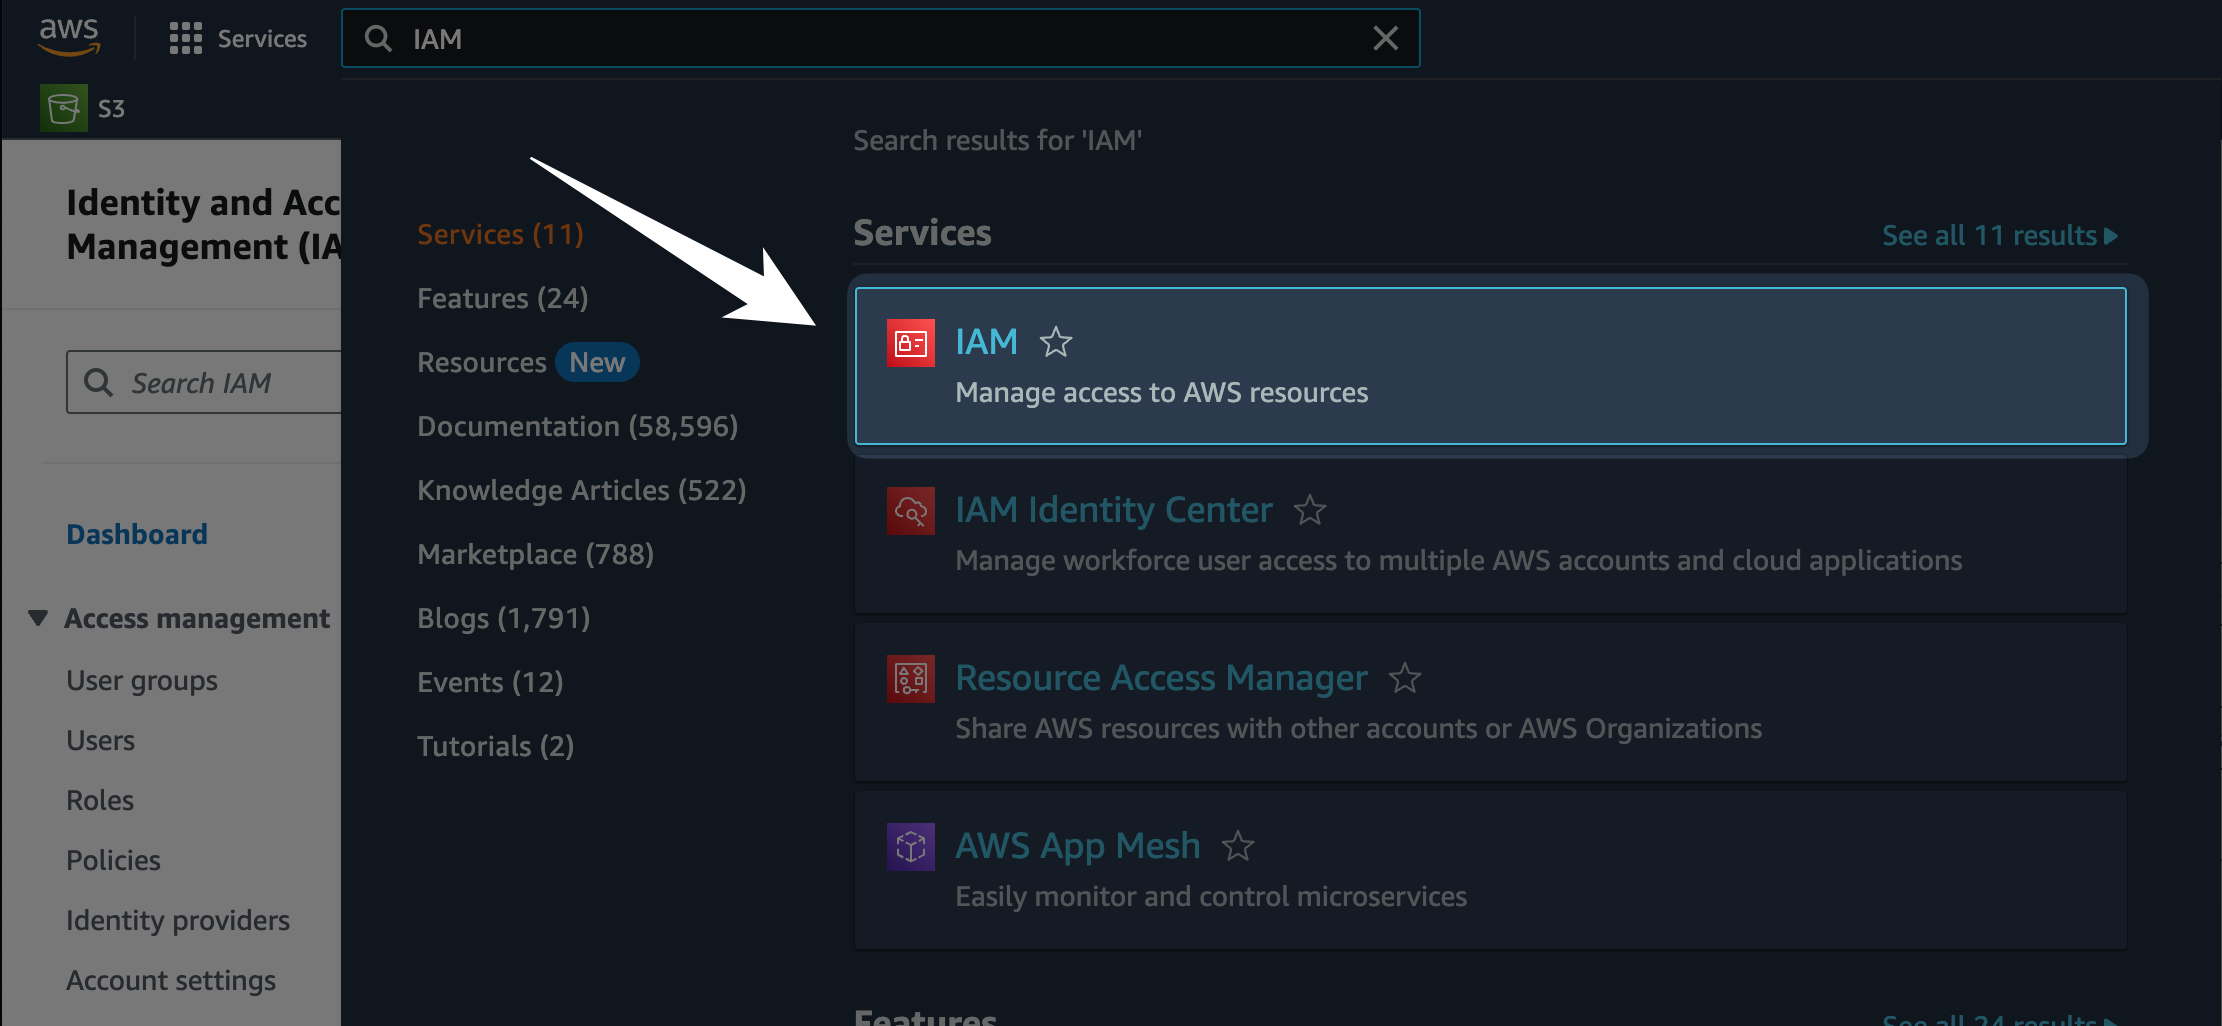
To do that, we'll need to search in the top again but this time for "IAM" to go to IAM (Identity and Access Management) dashboard:
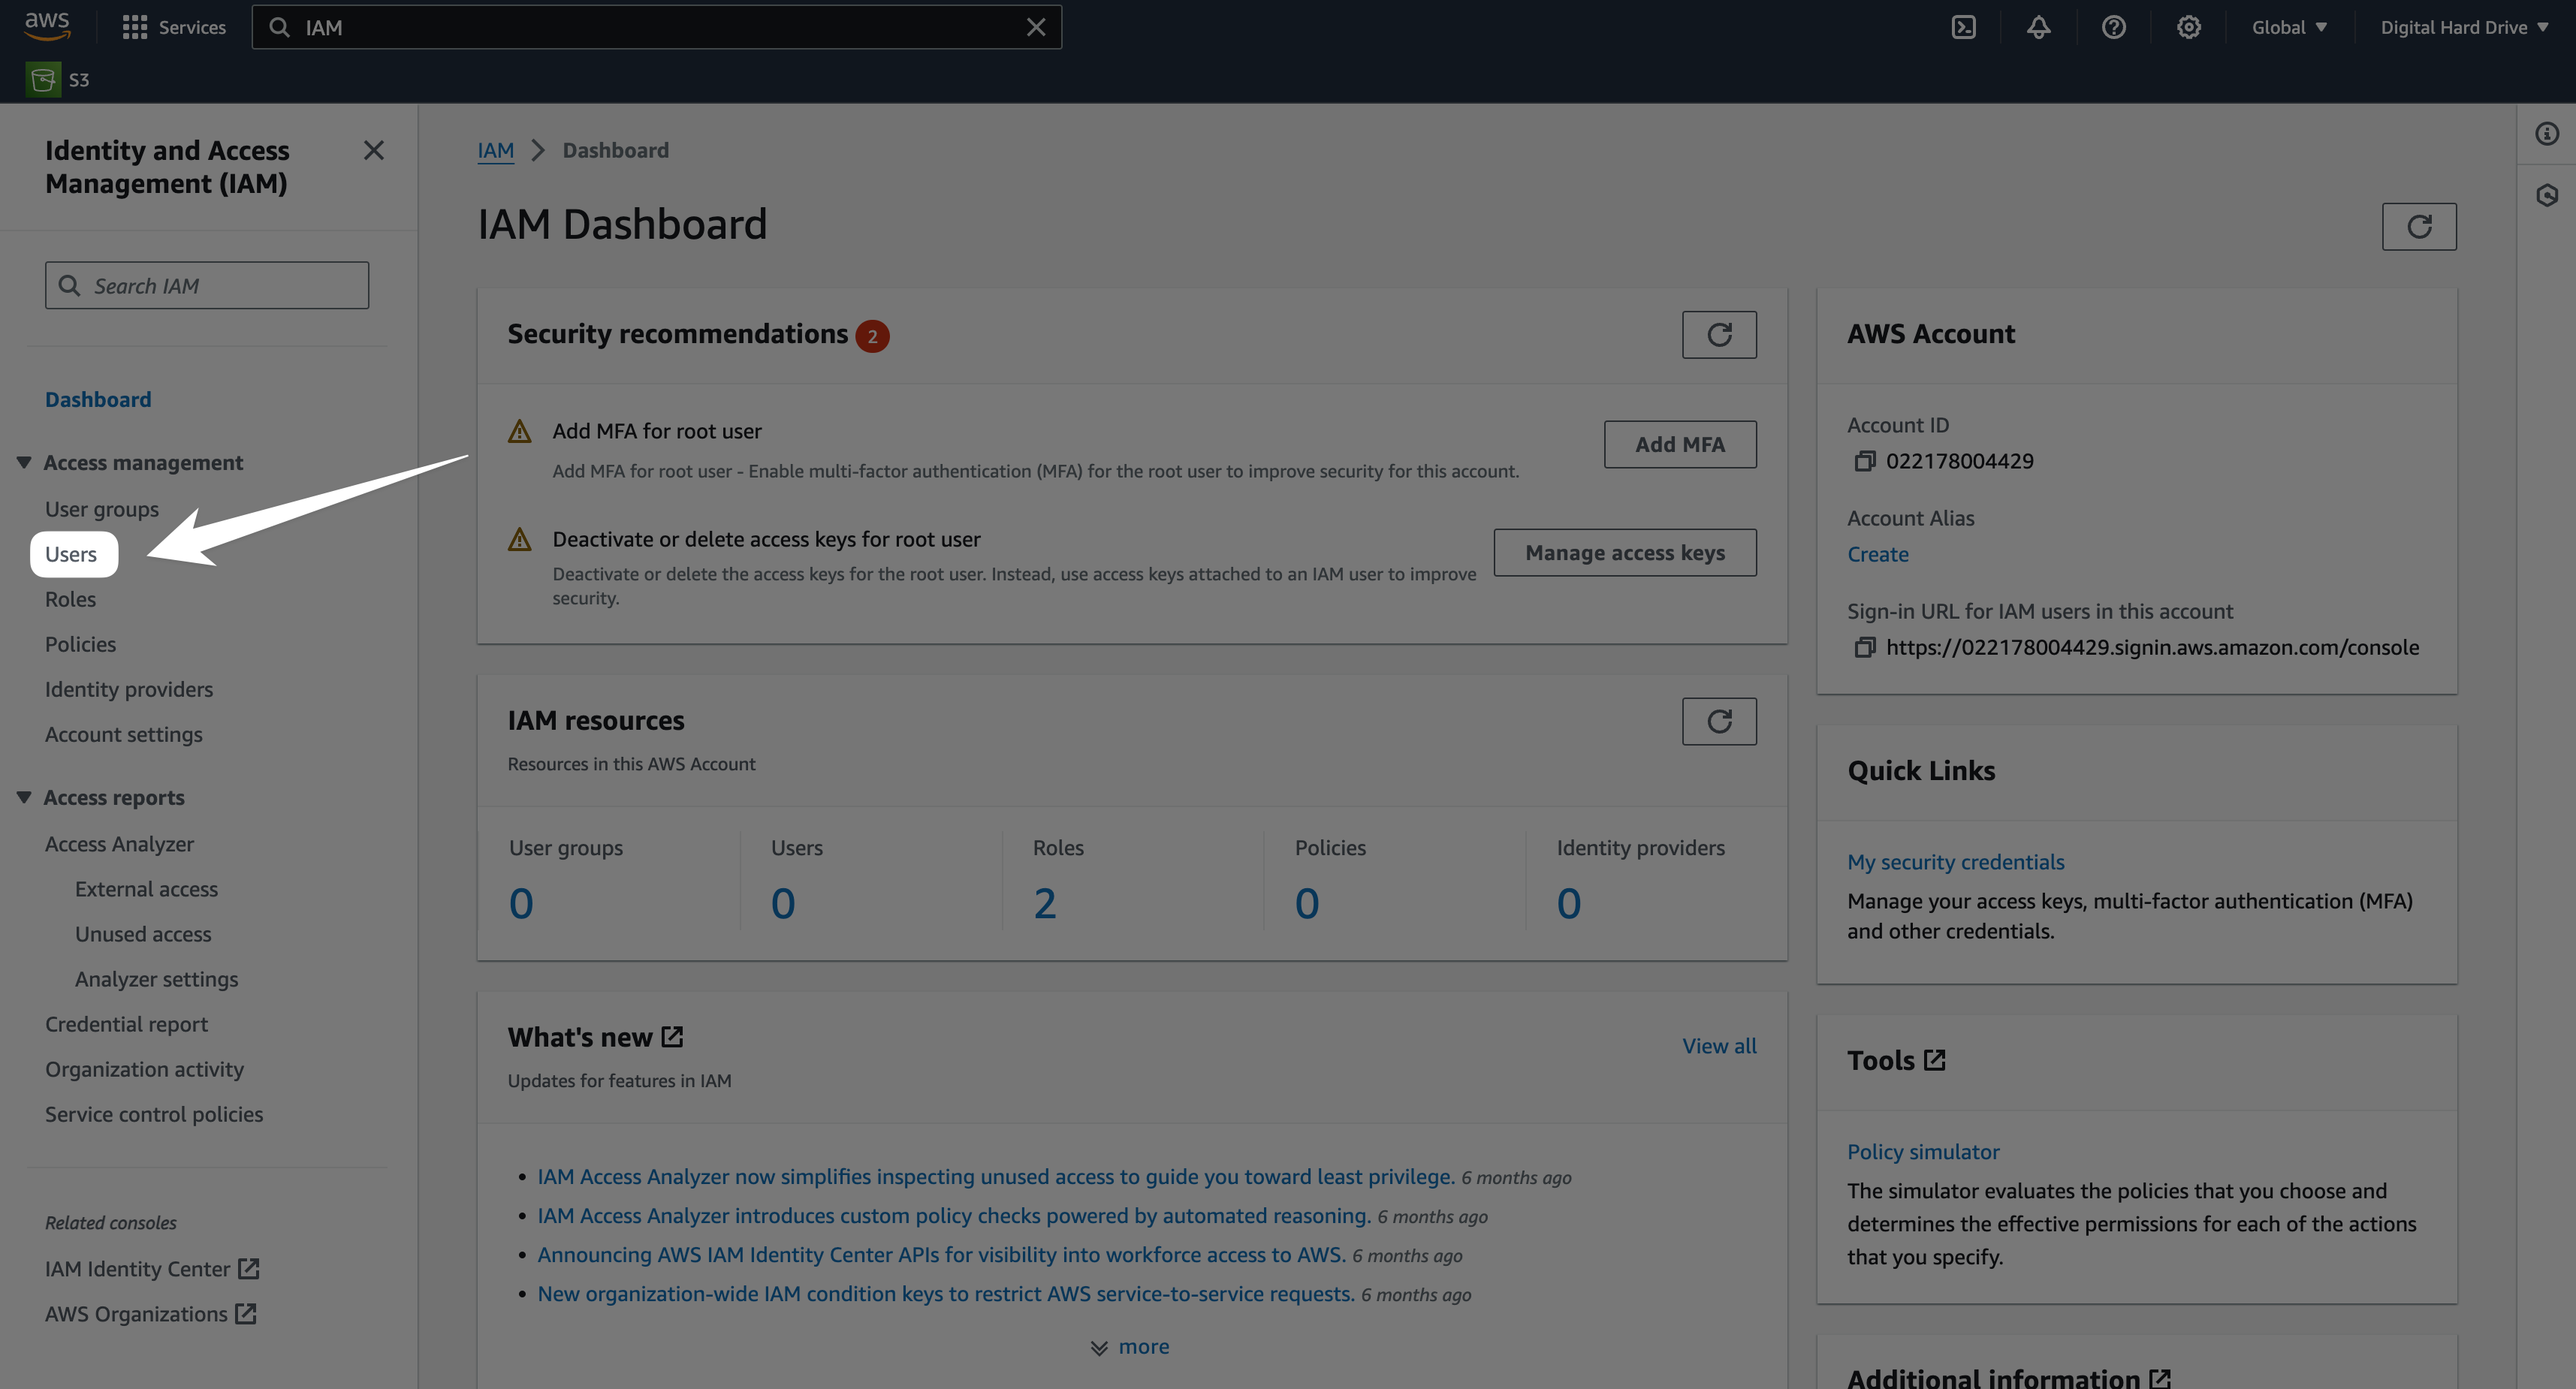
Now click "Users" under "Access management" in the left sidebar.
Then click "Create user" in the top-right.
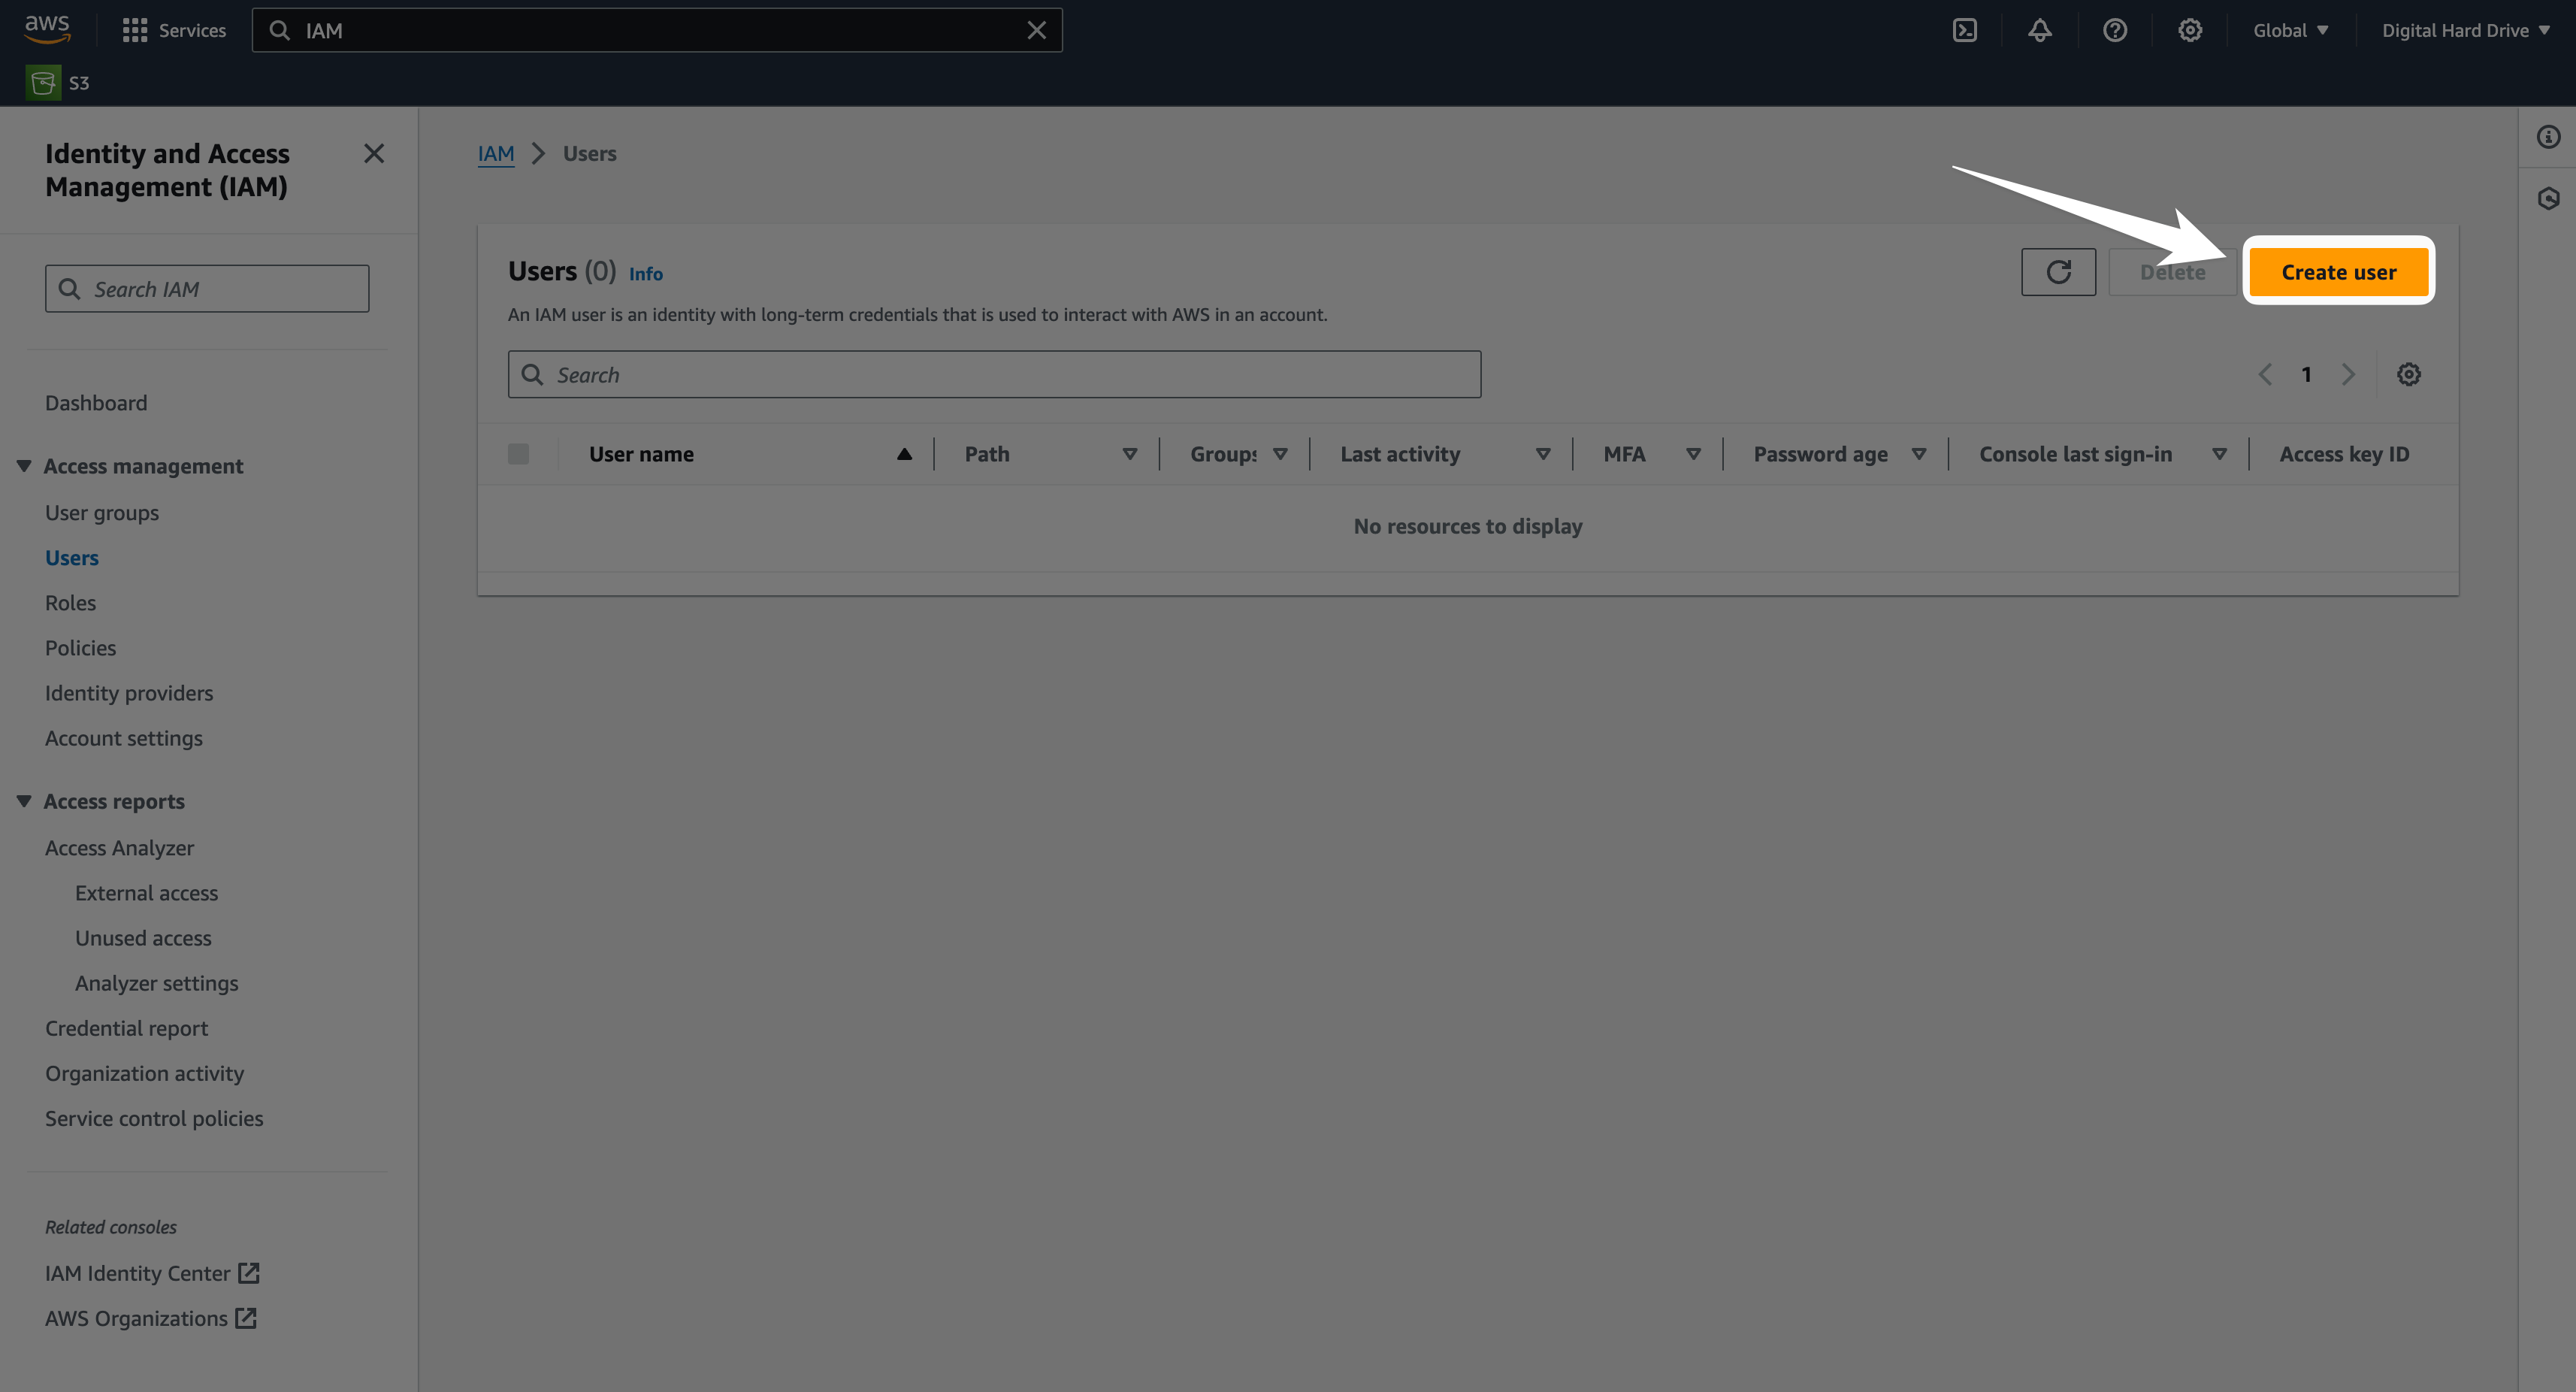
Add a user name and click "Next".
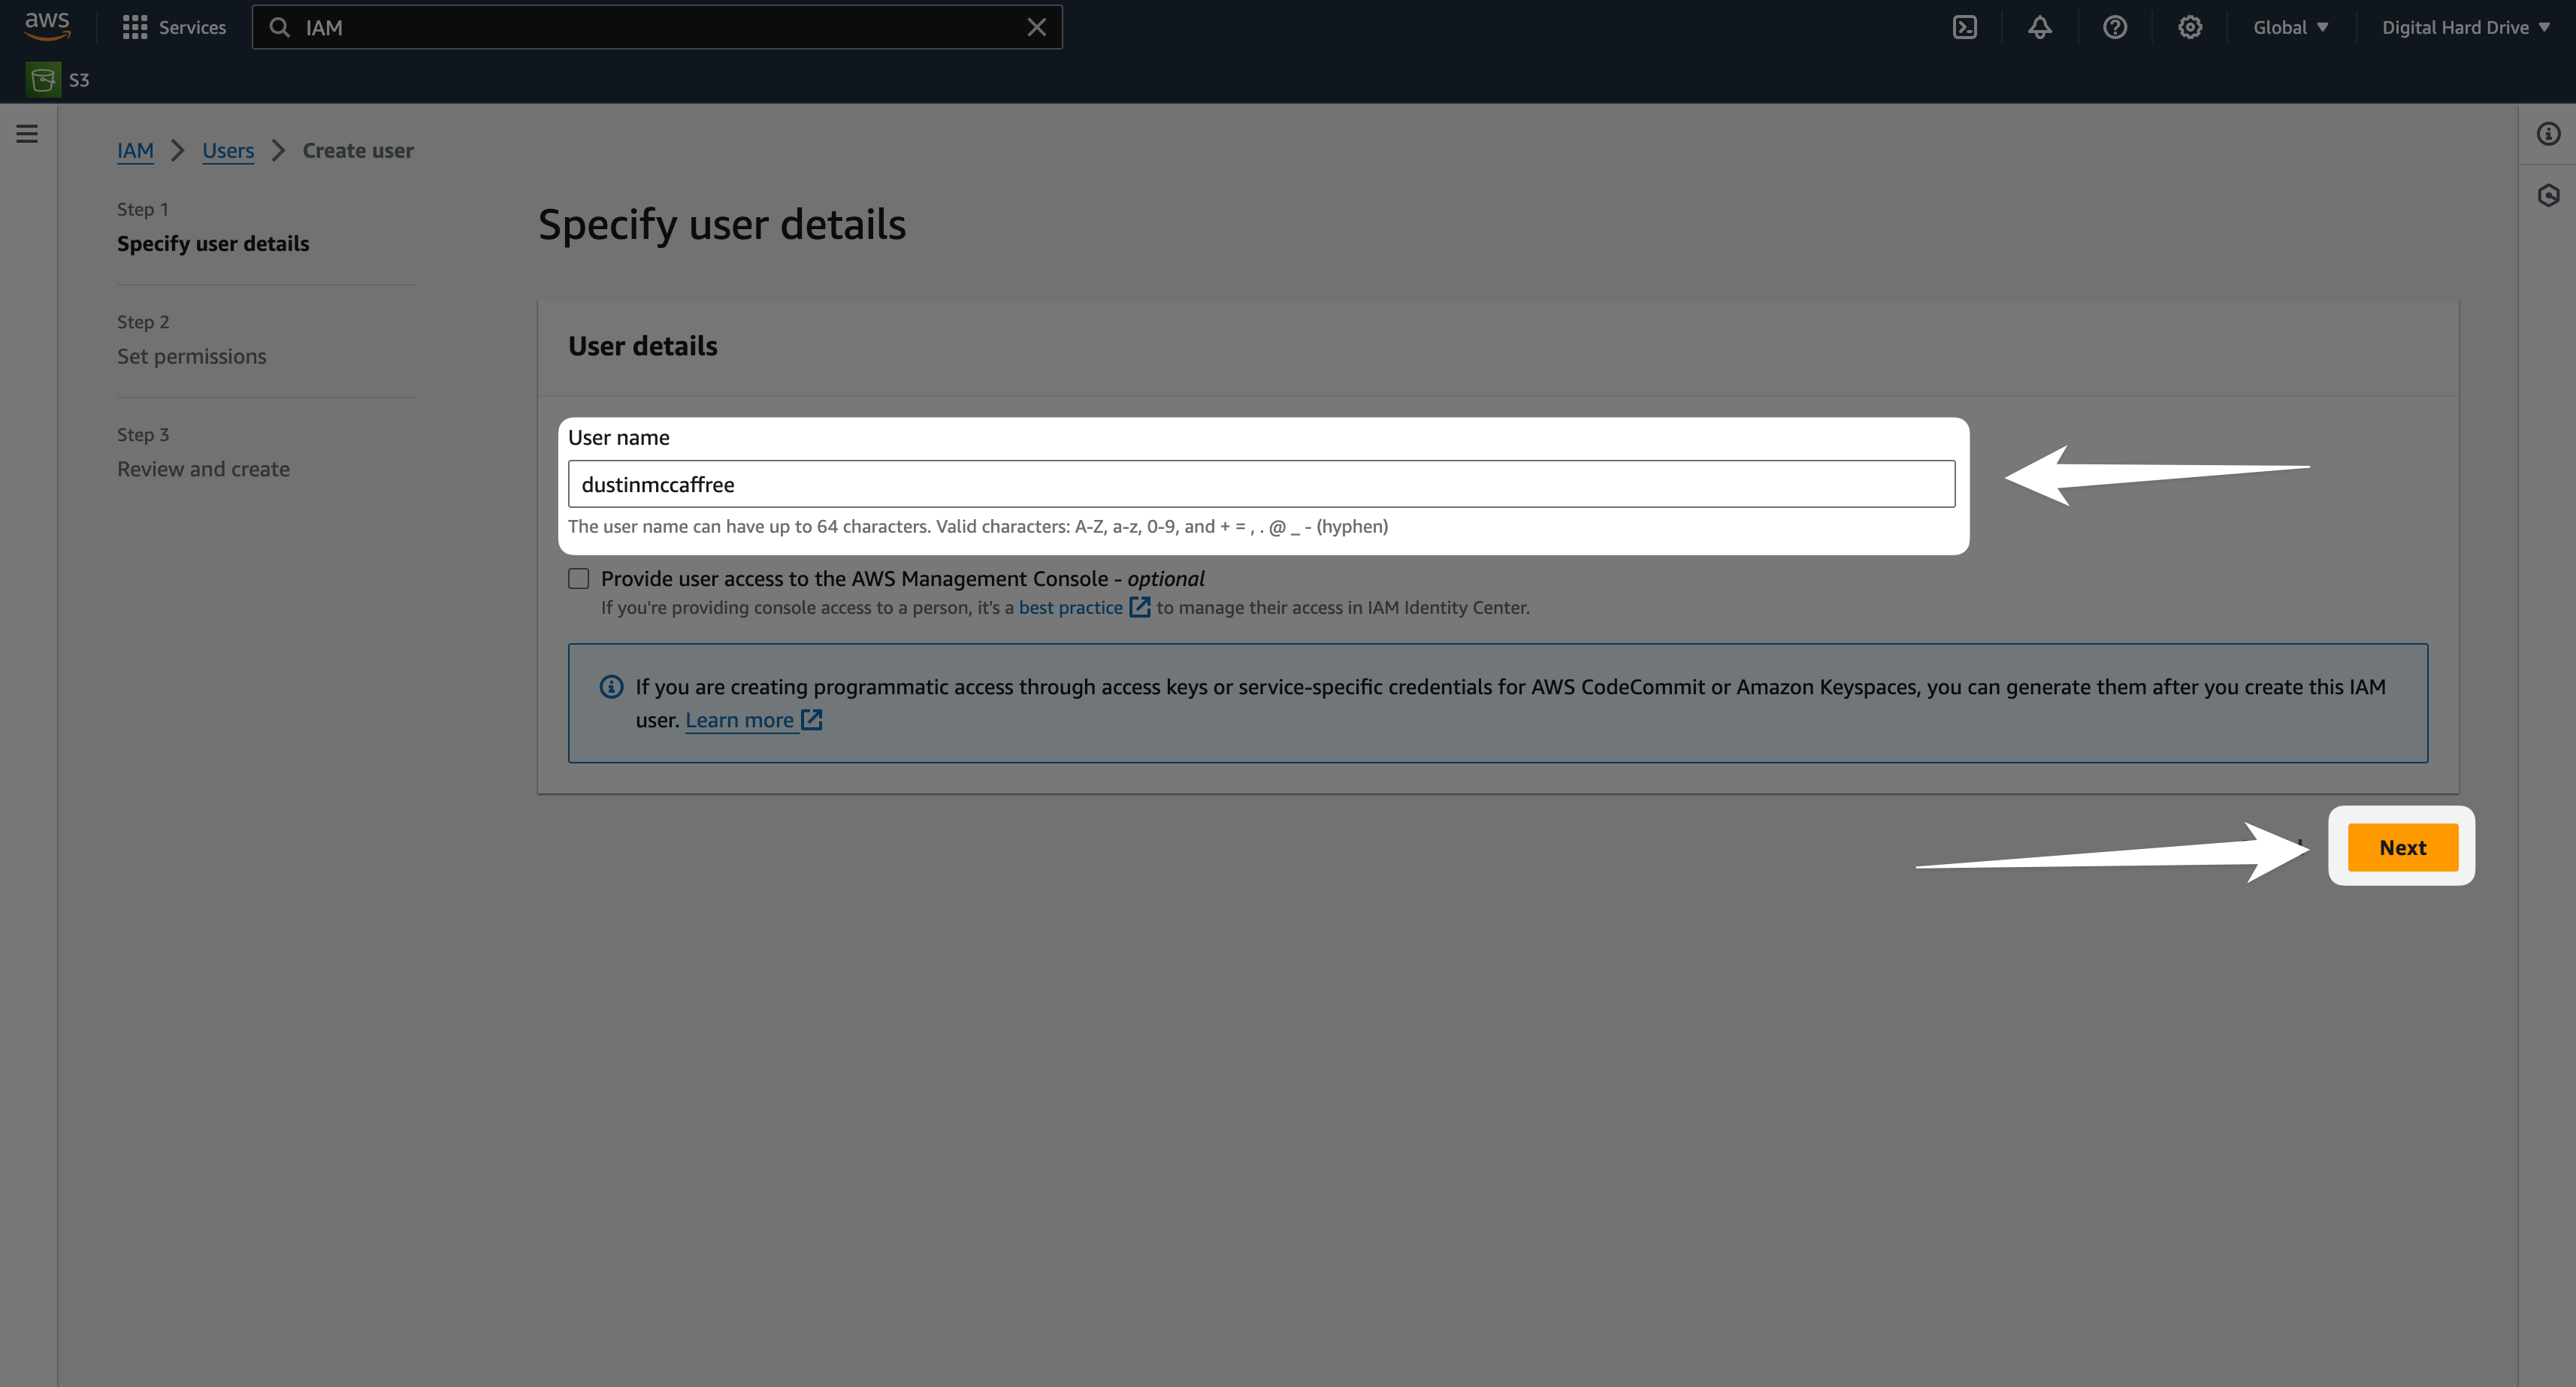
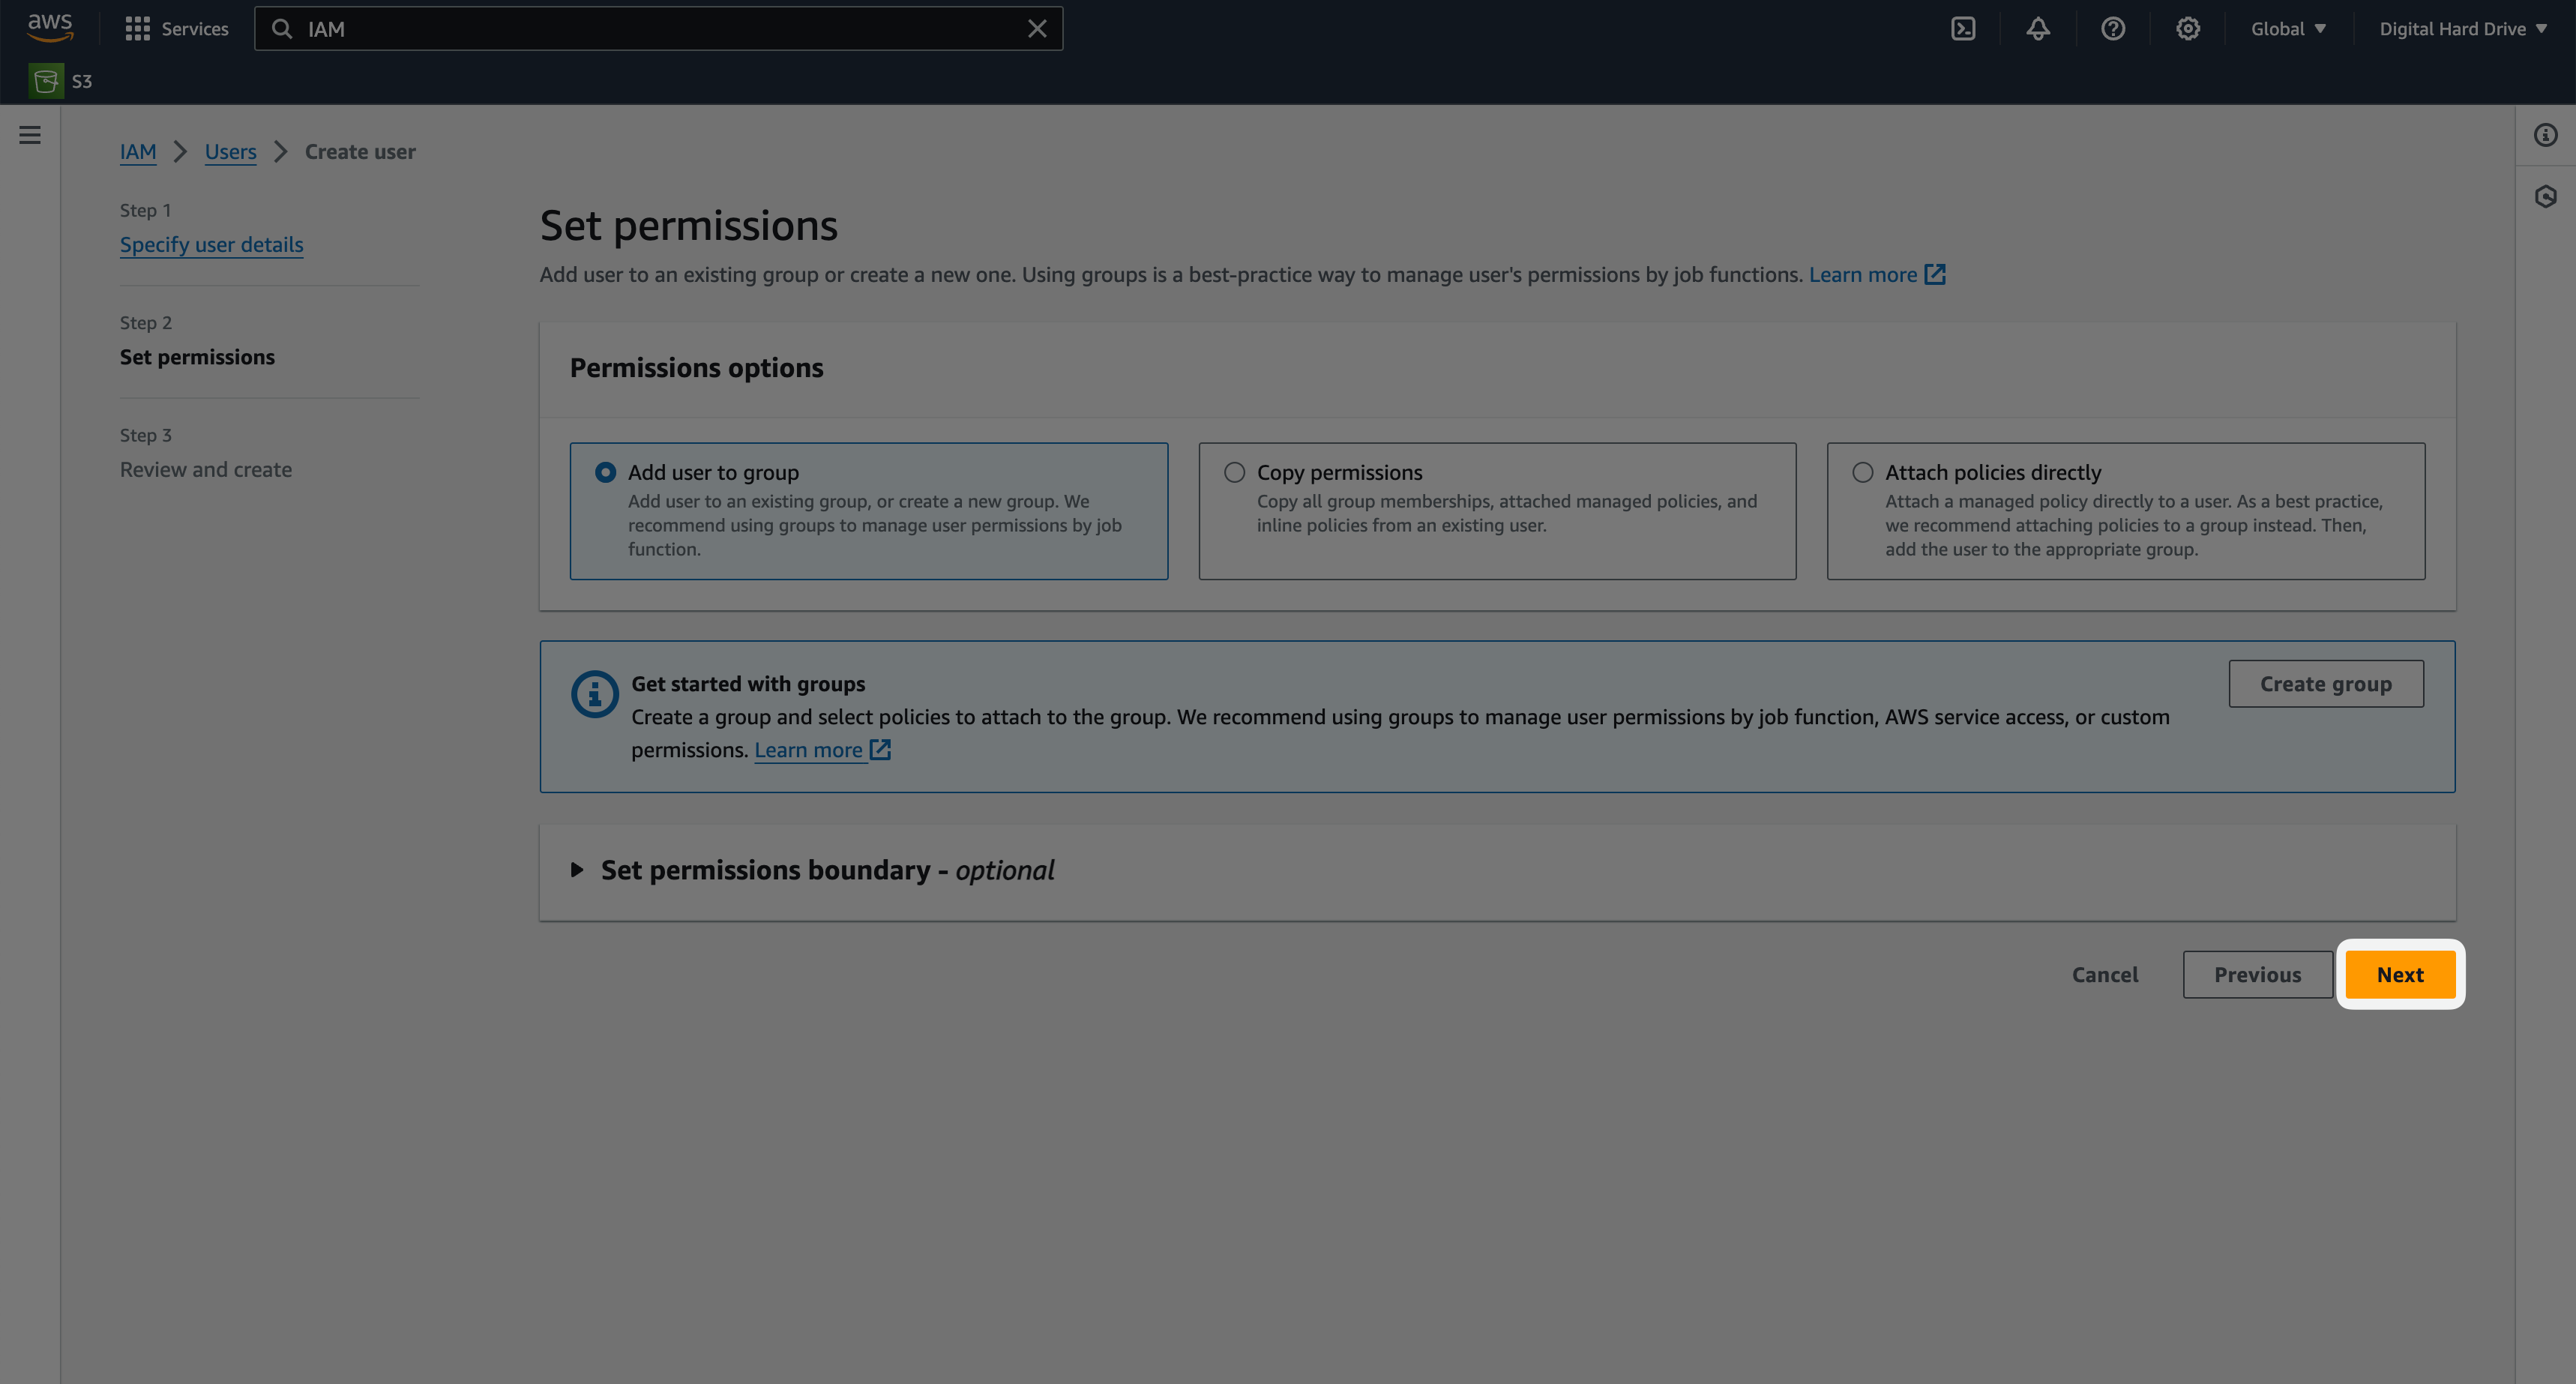
Click "Next" with the default setting for this page:
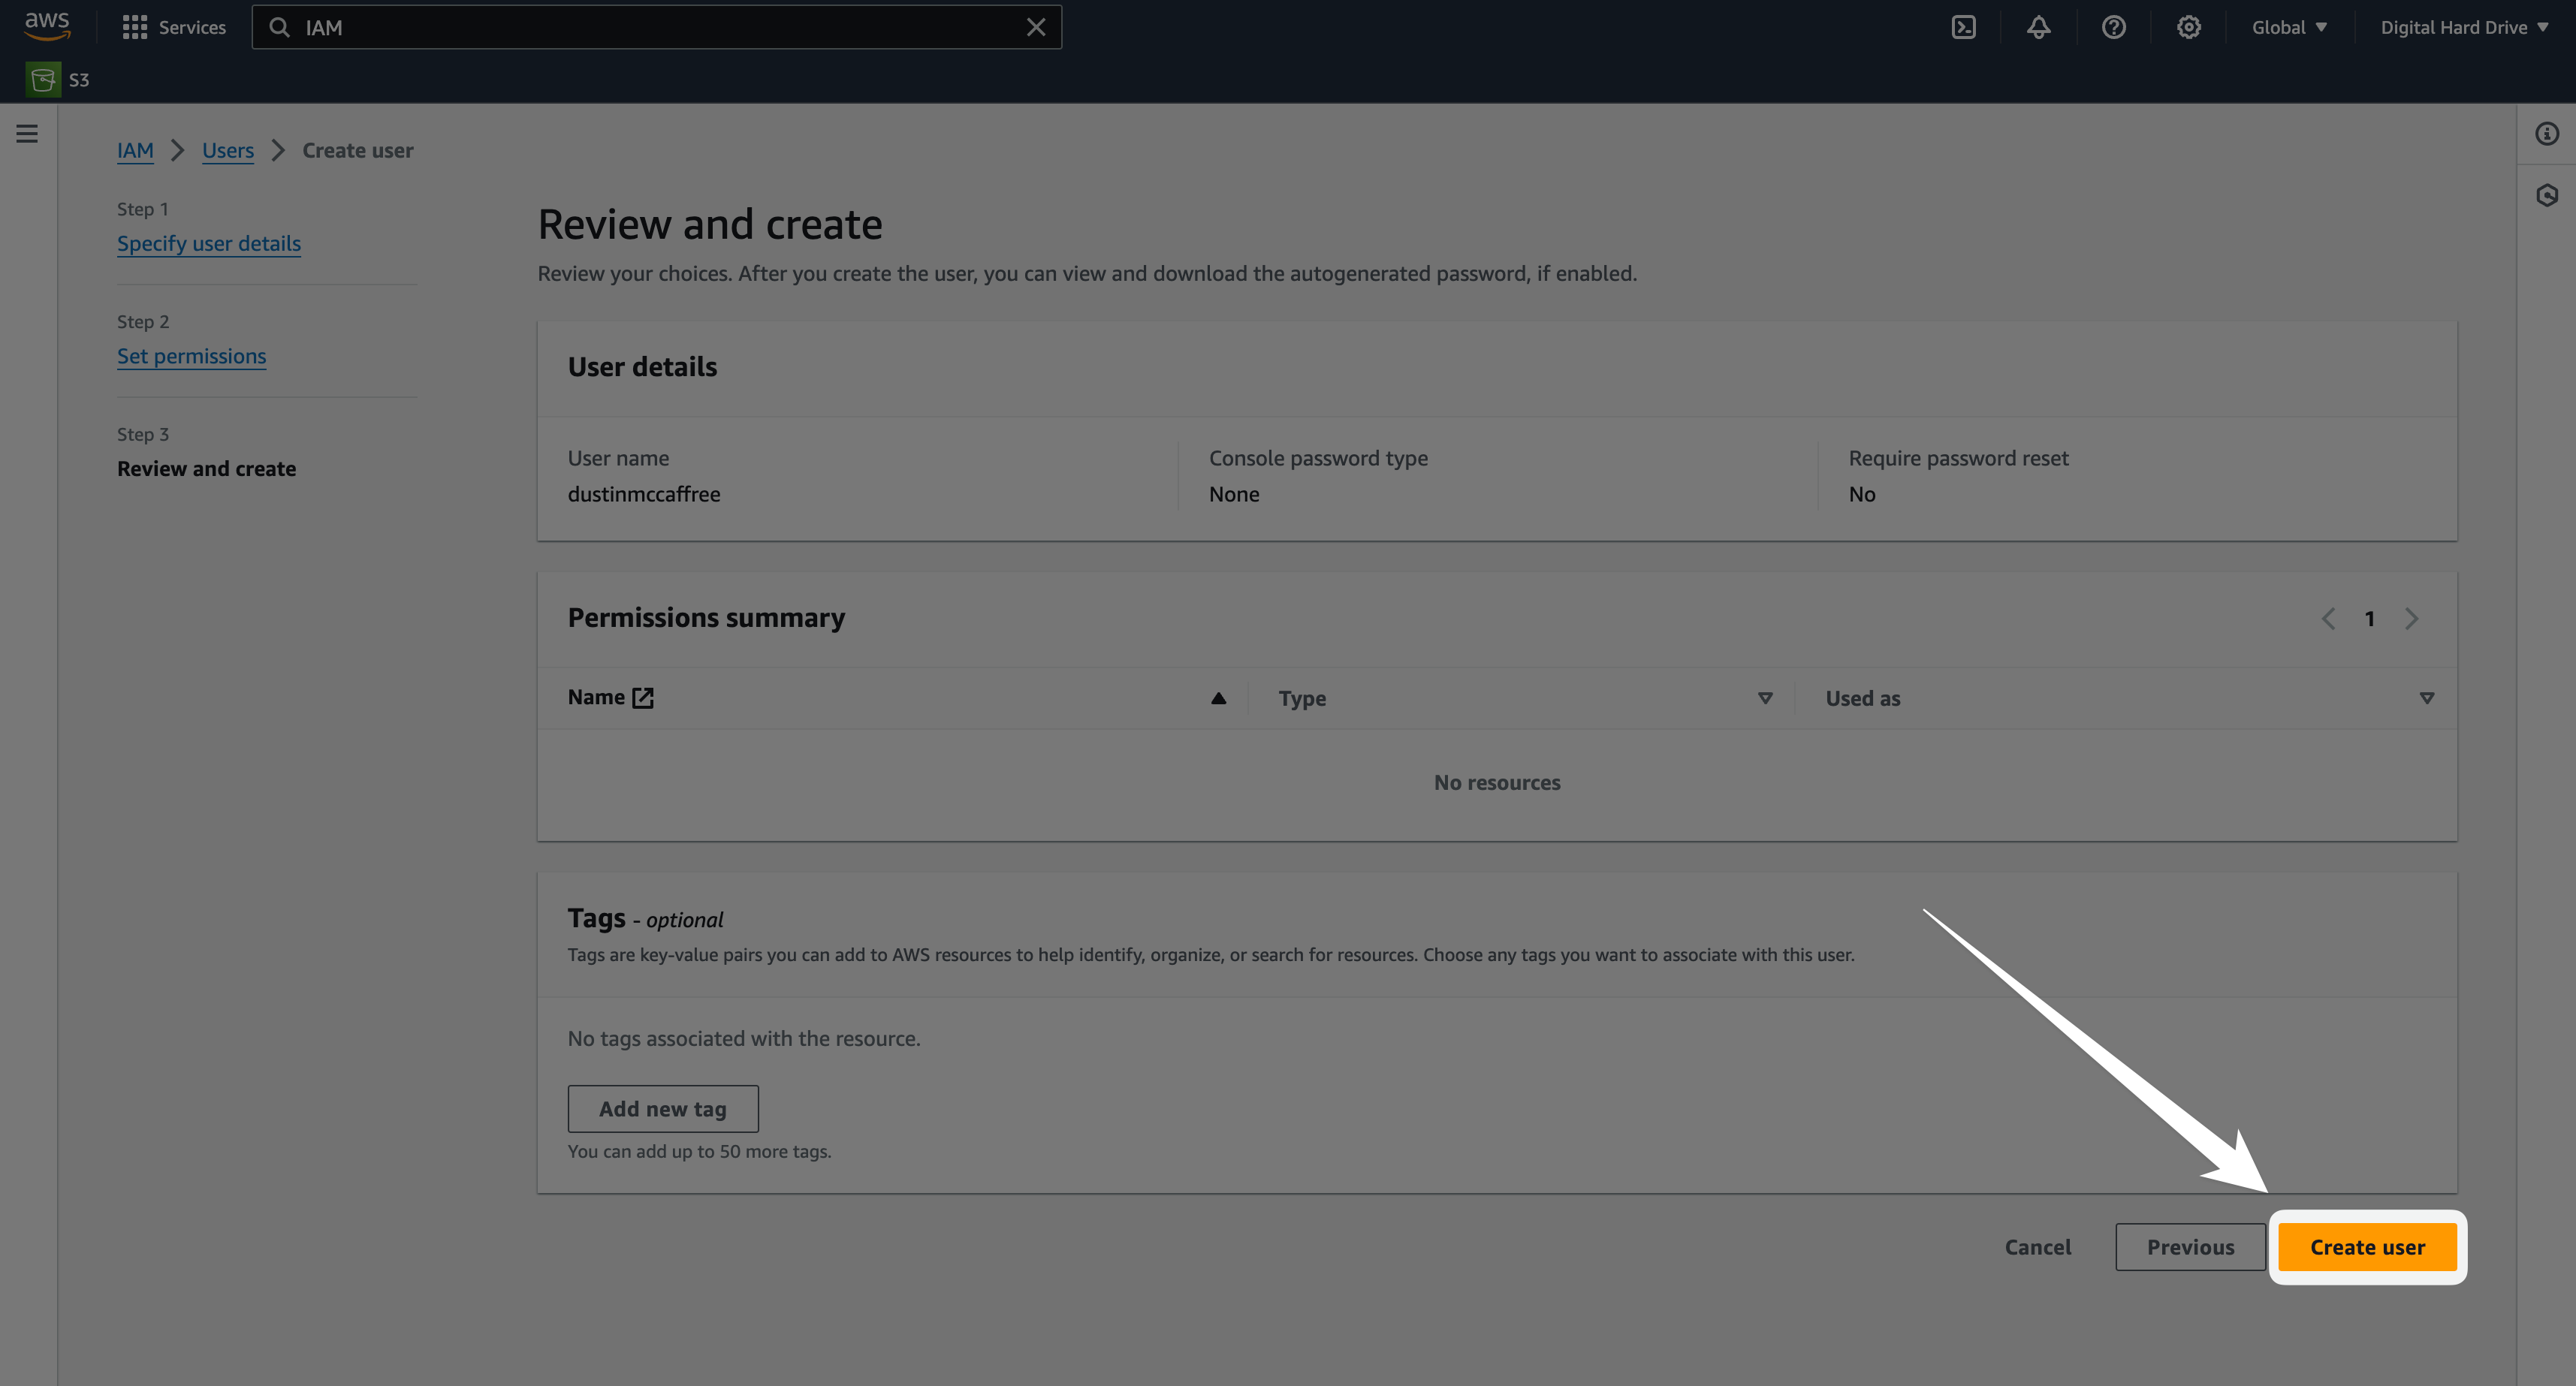
Click "Create user" from the next page as well.
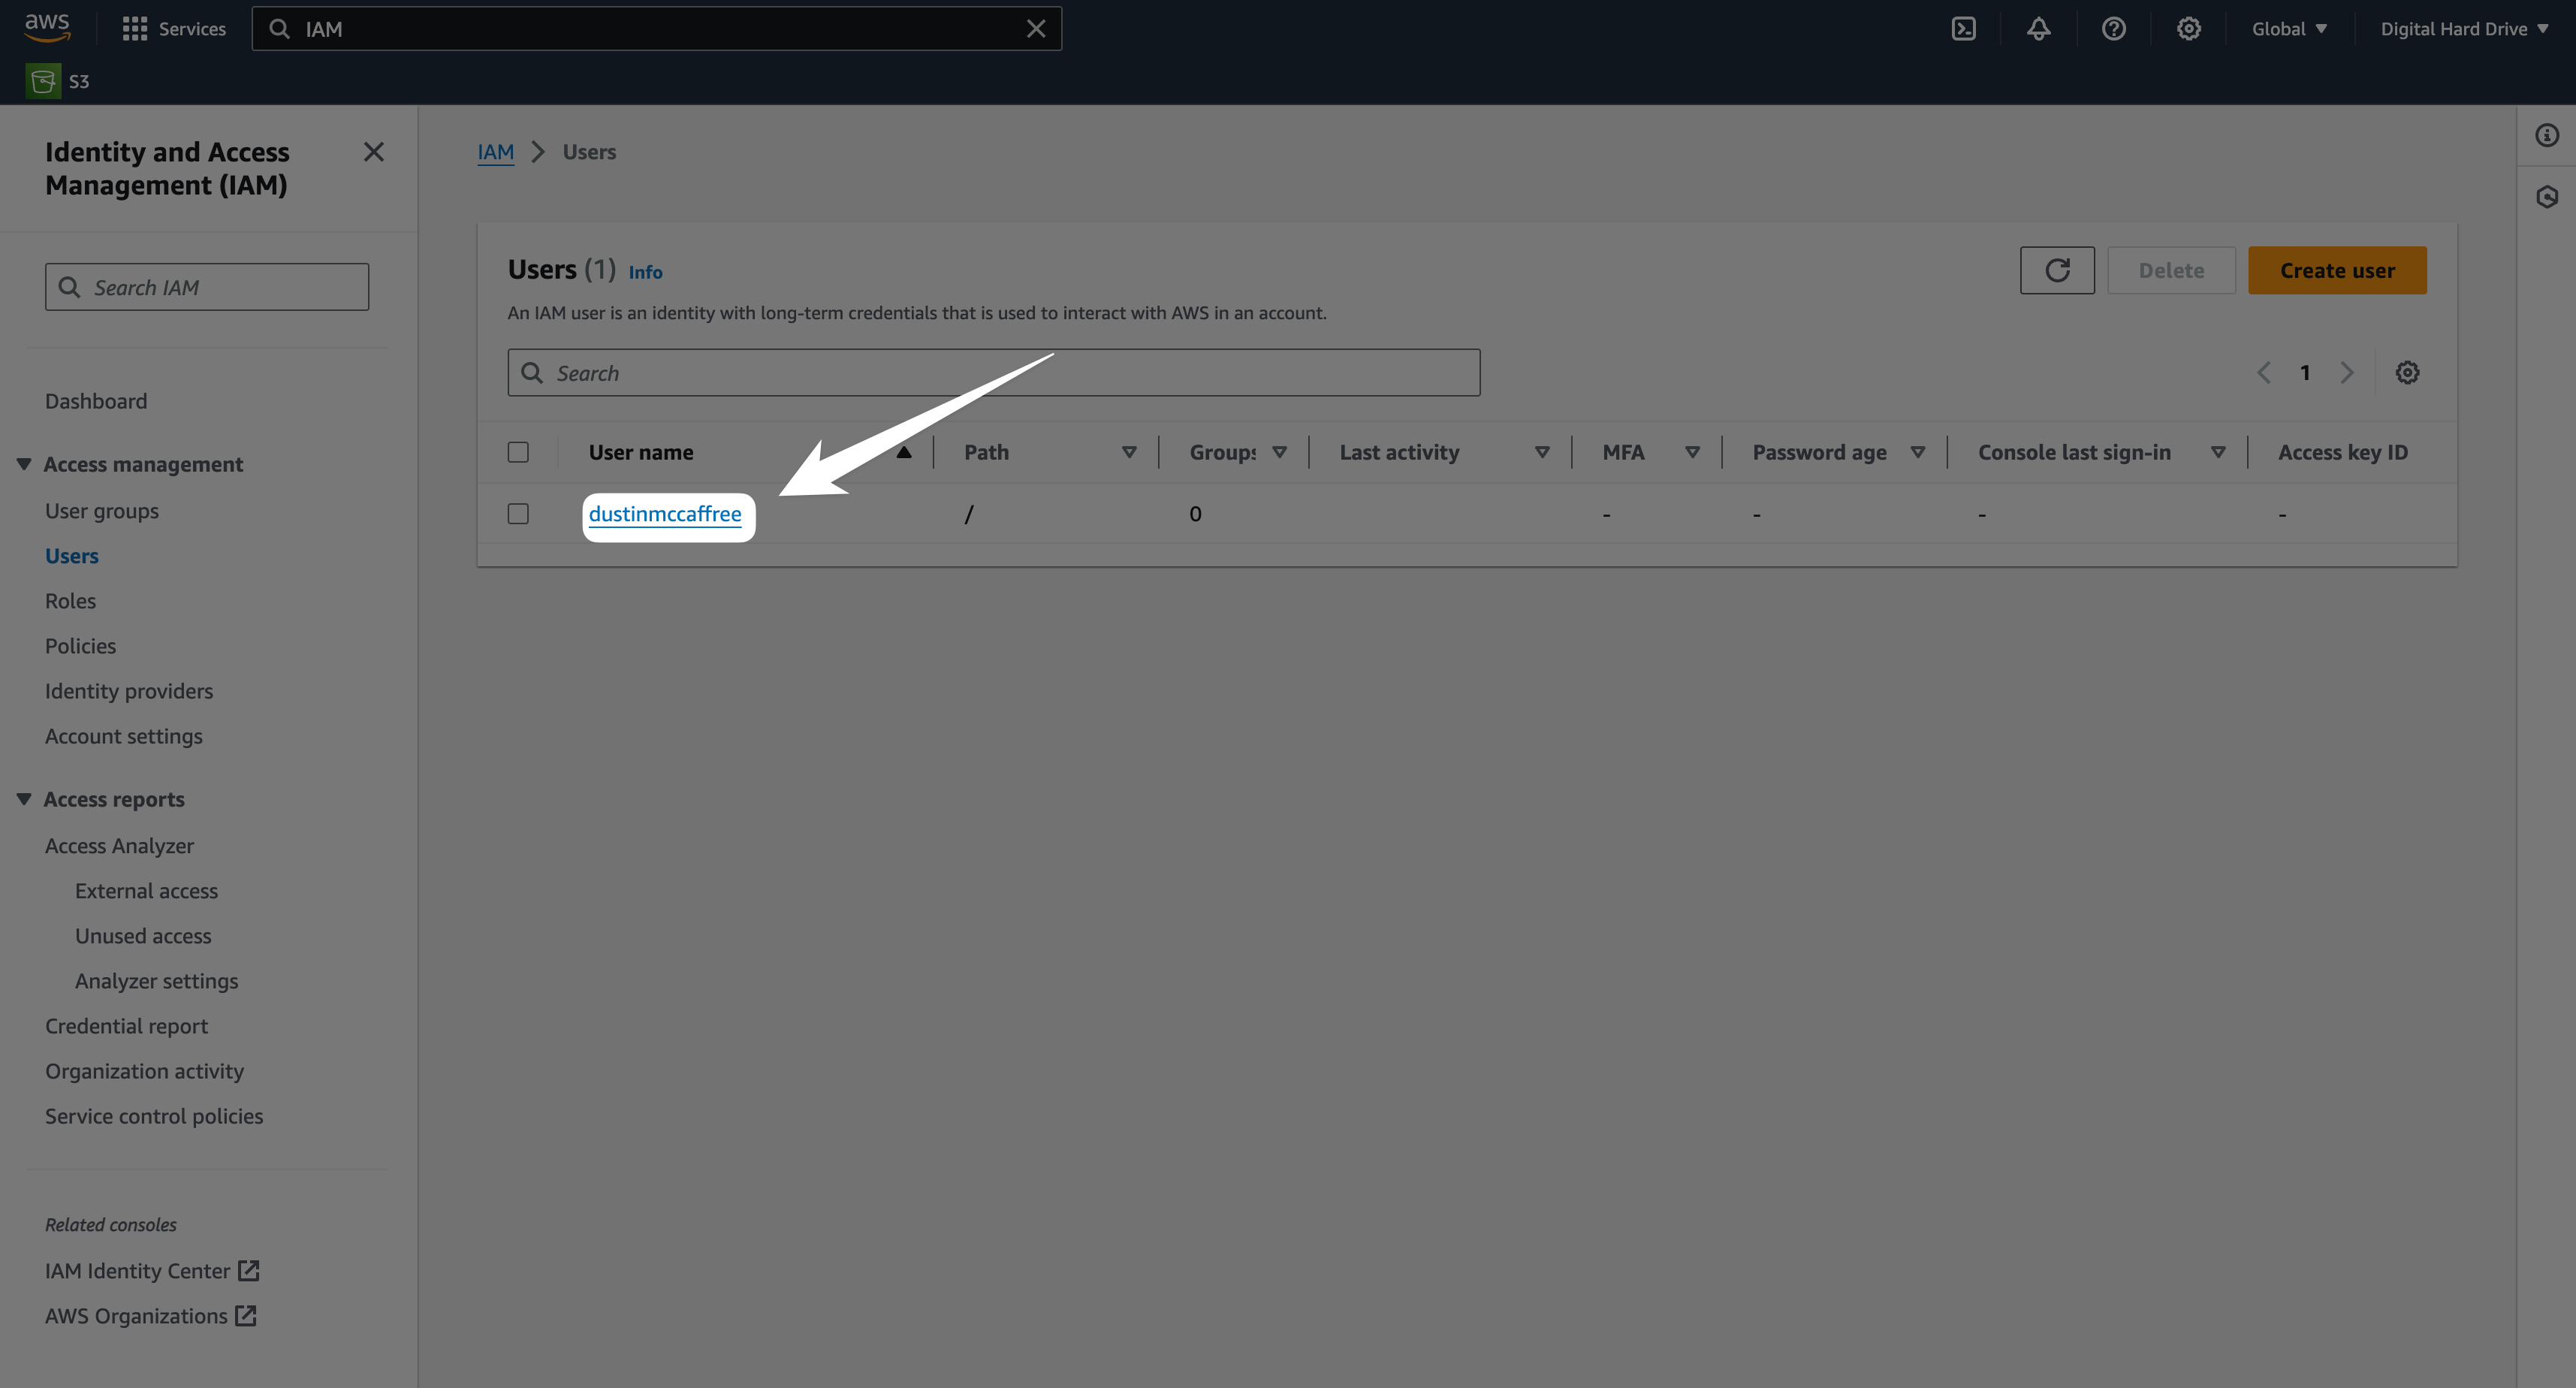
Click on the username for the User you just created:
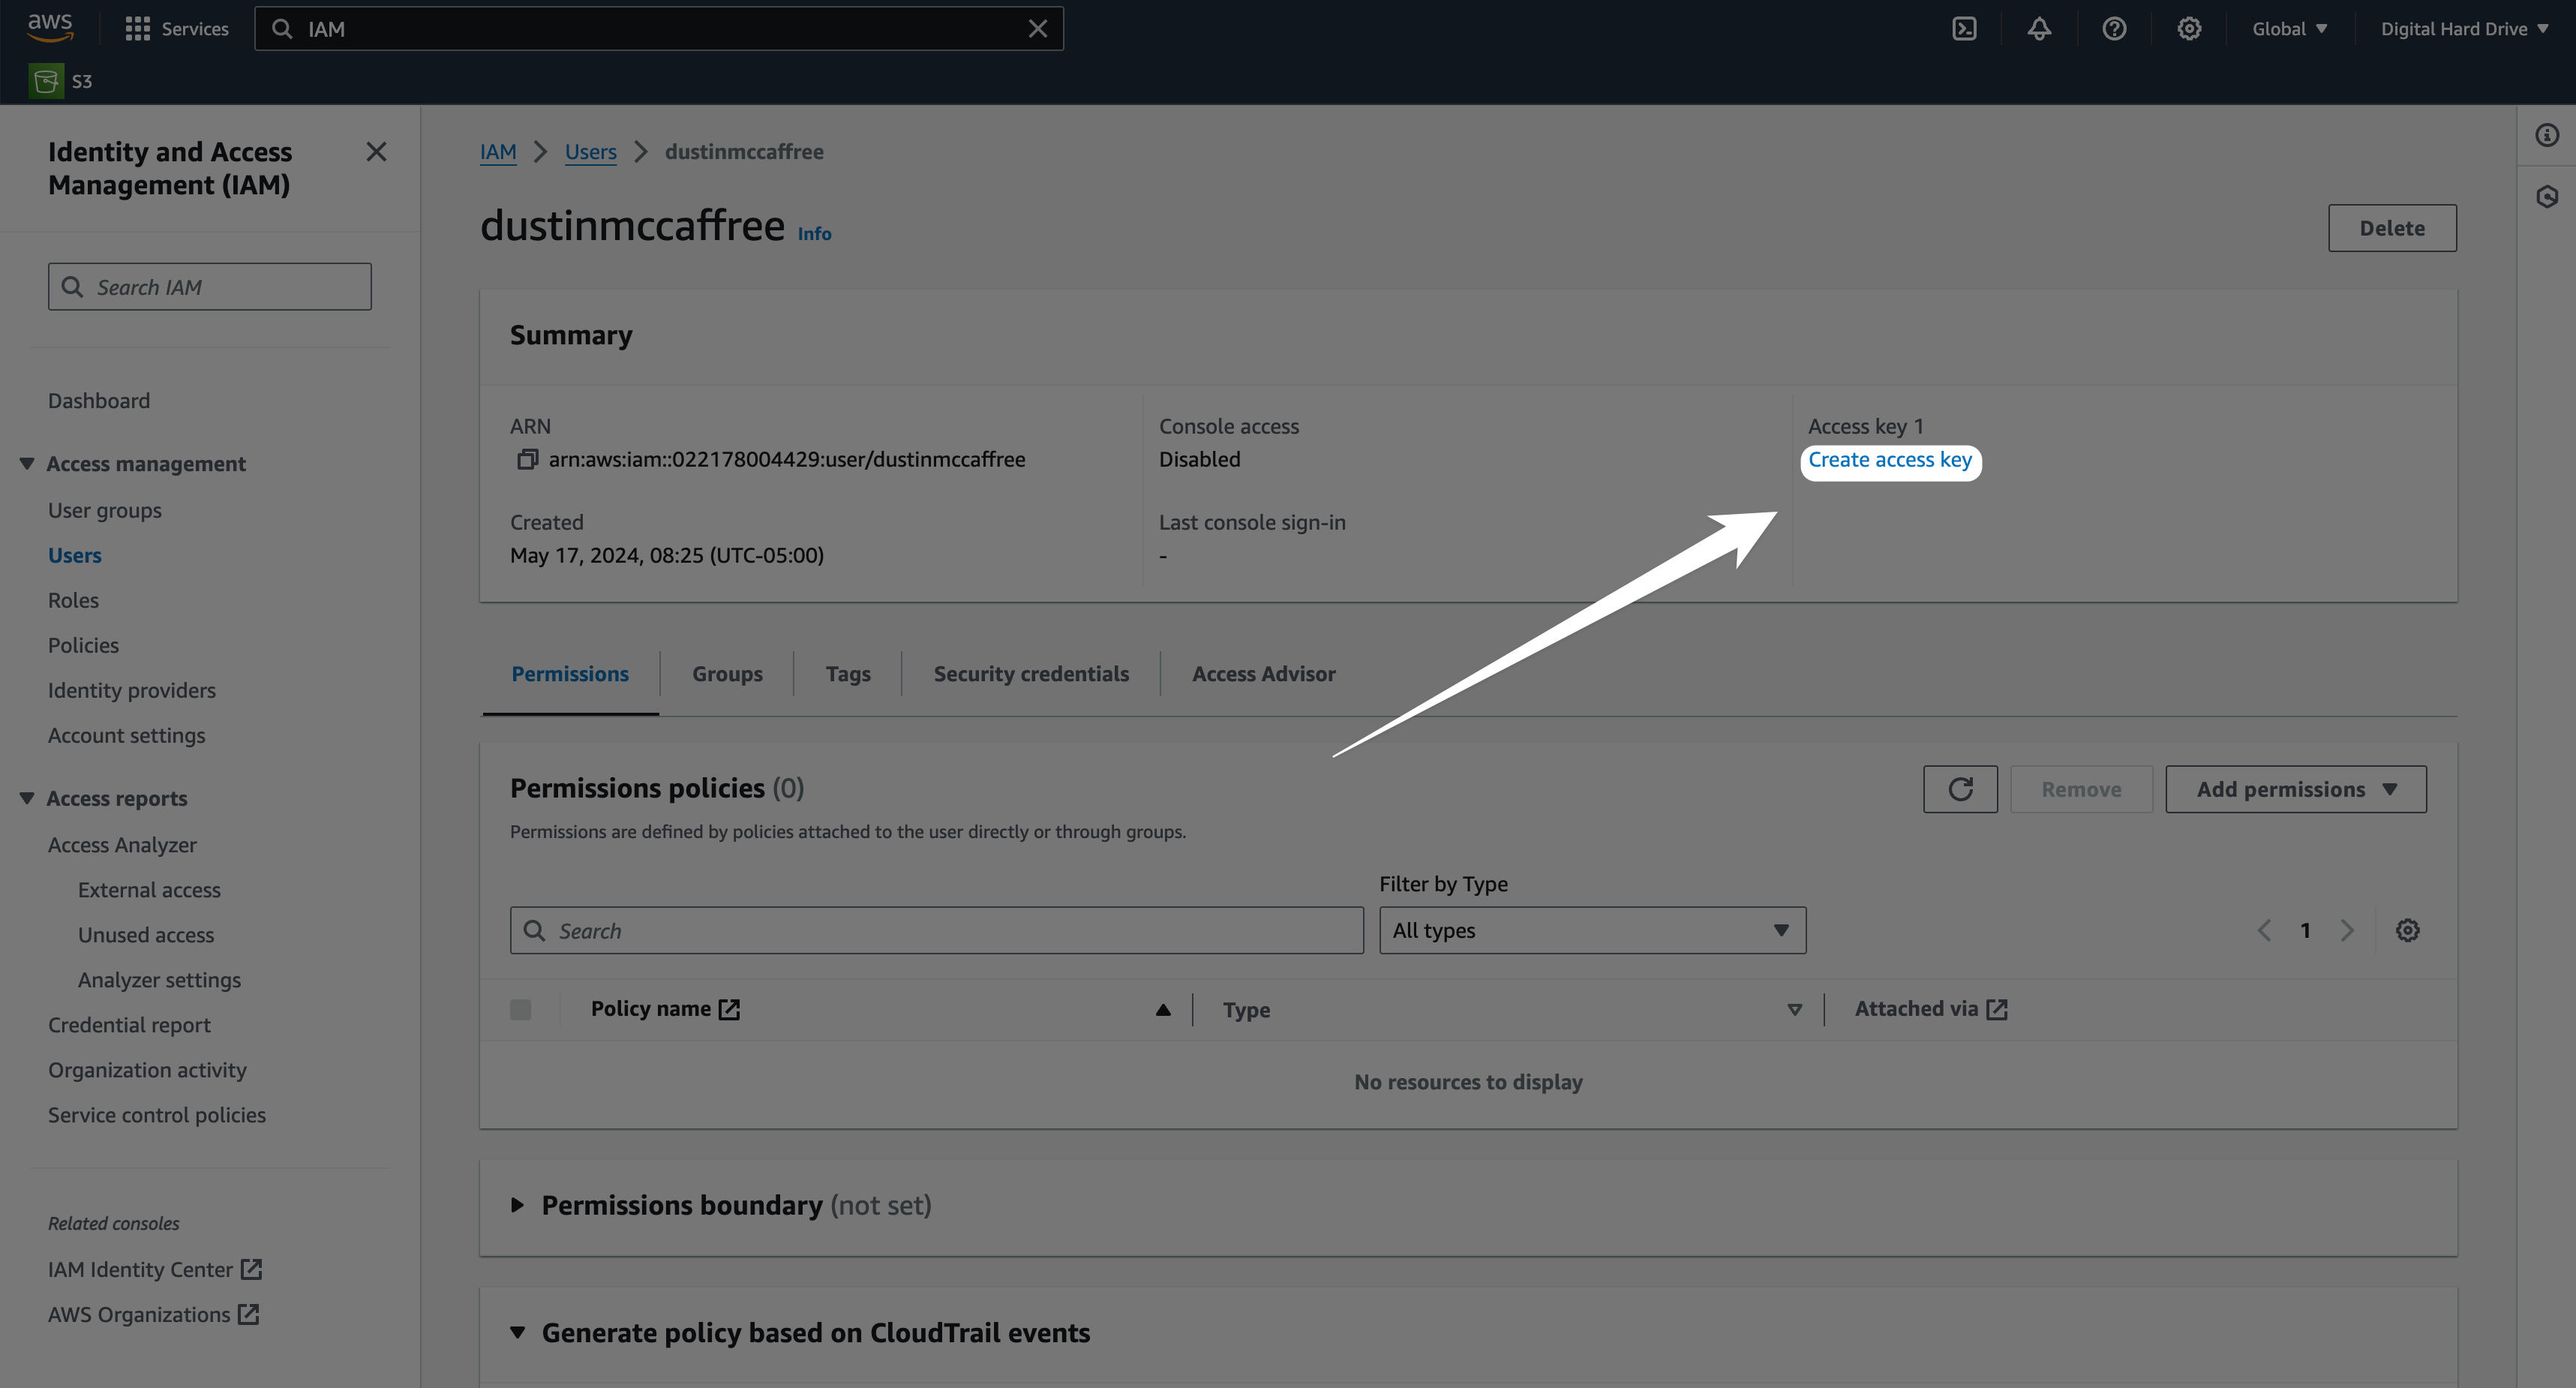
Now, click "Create access key".
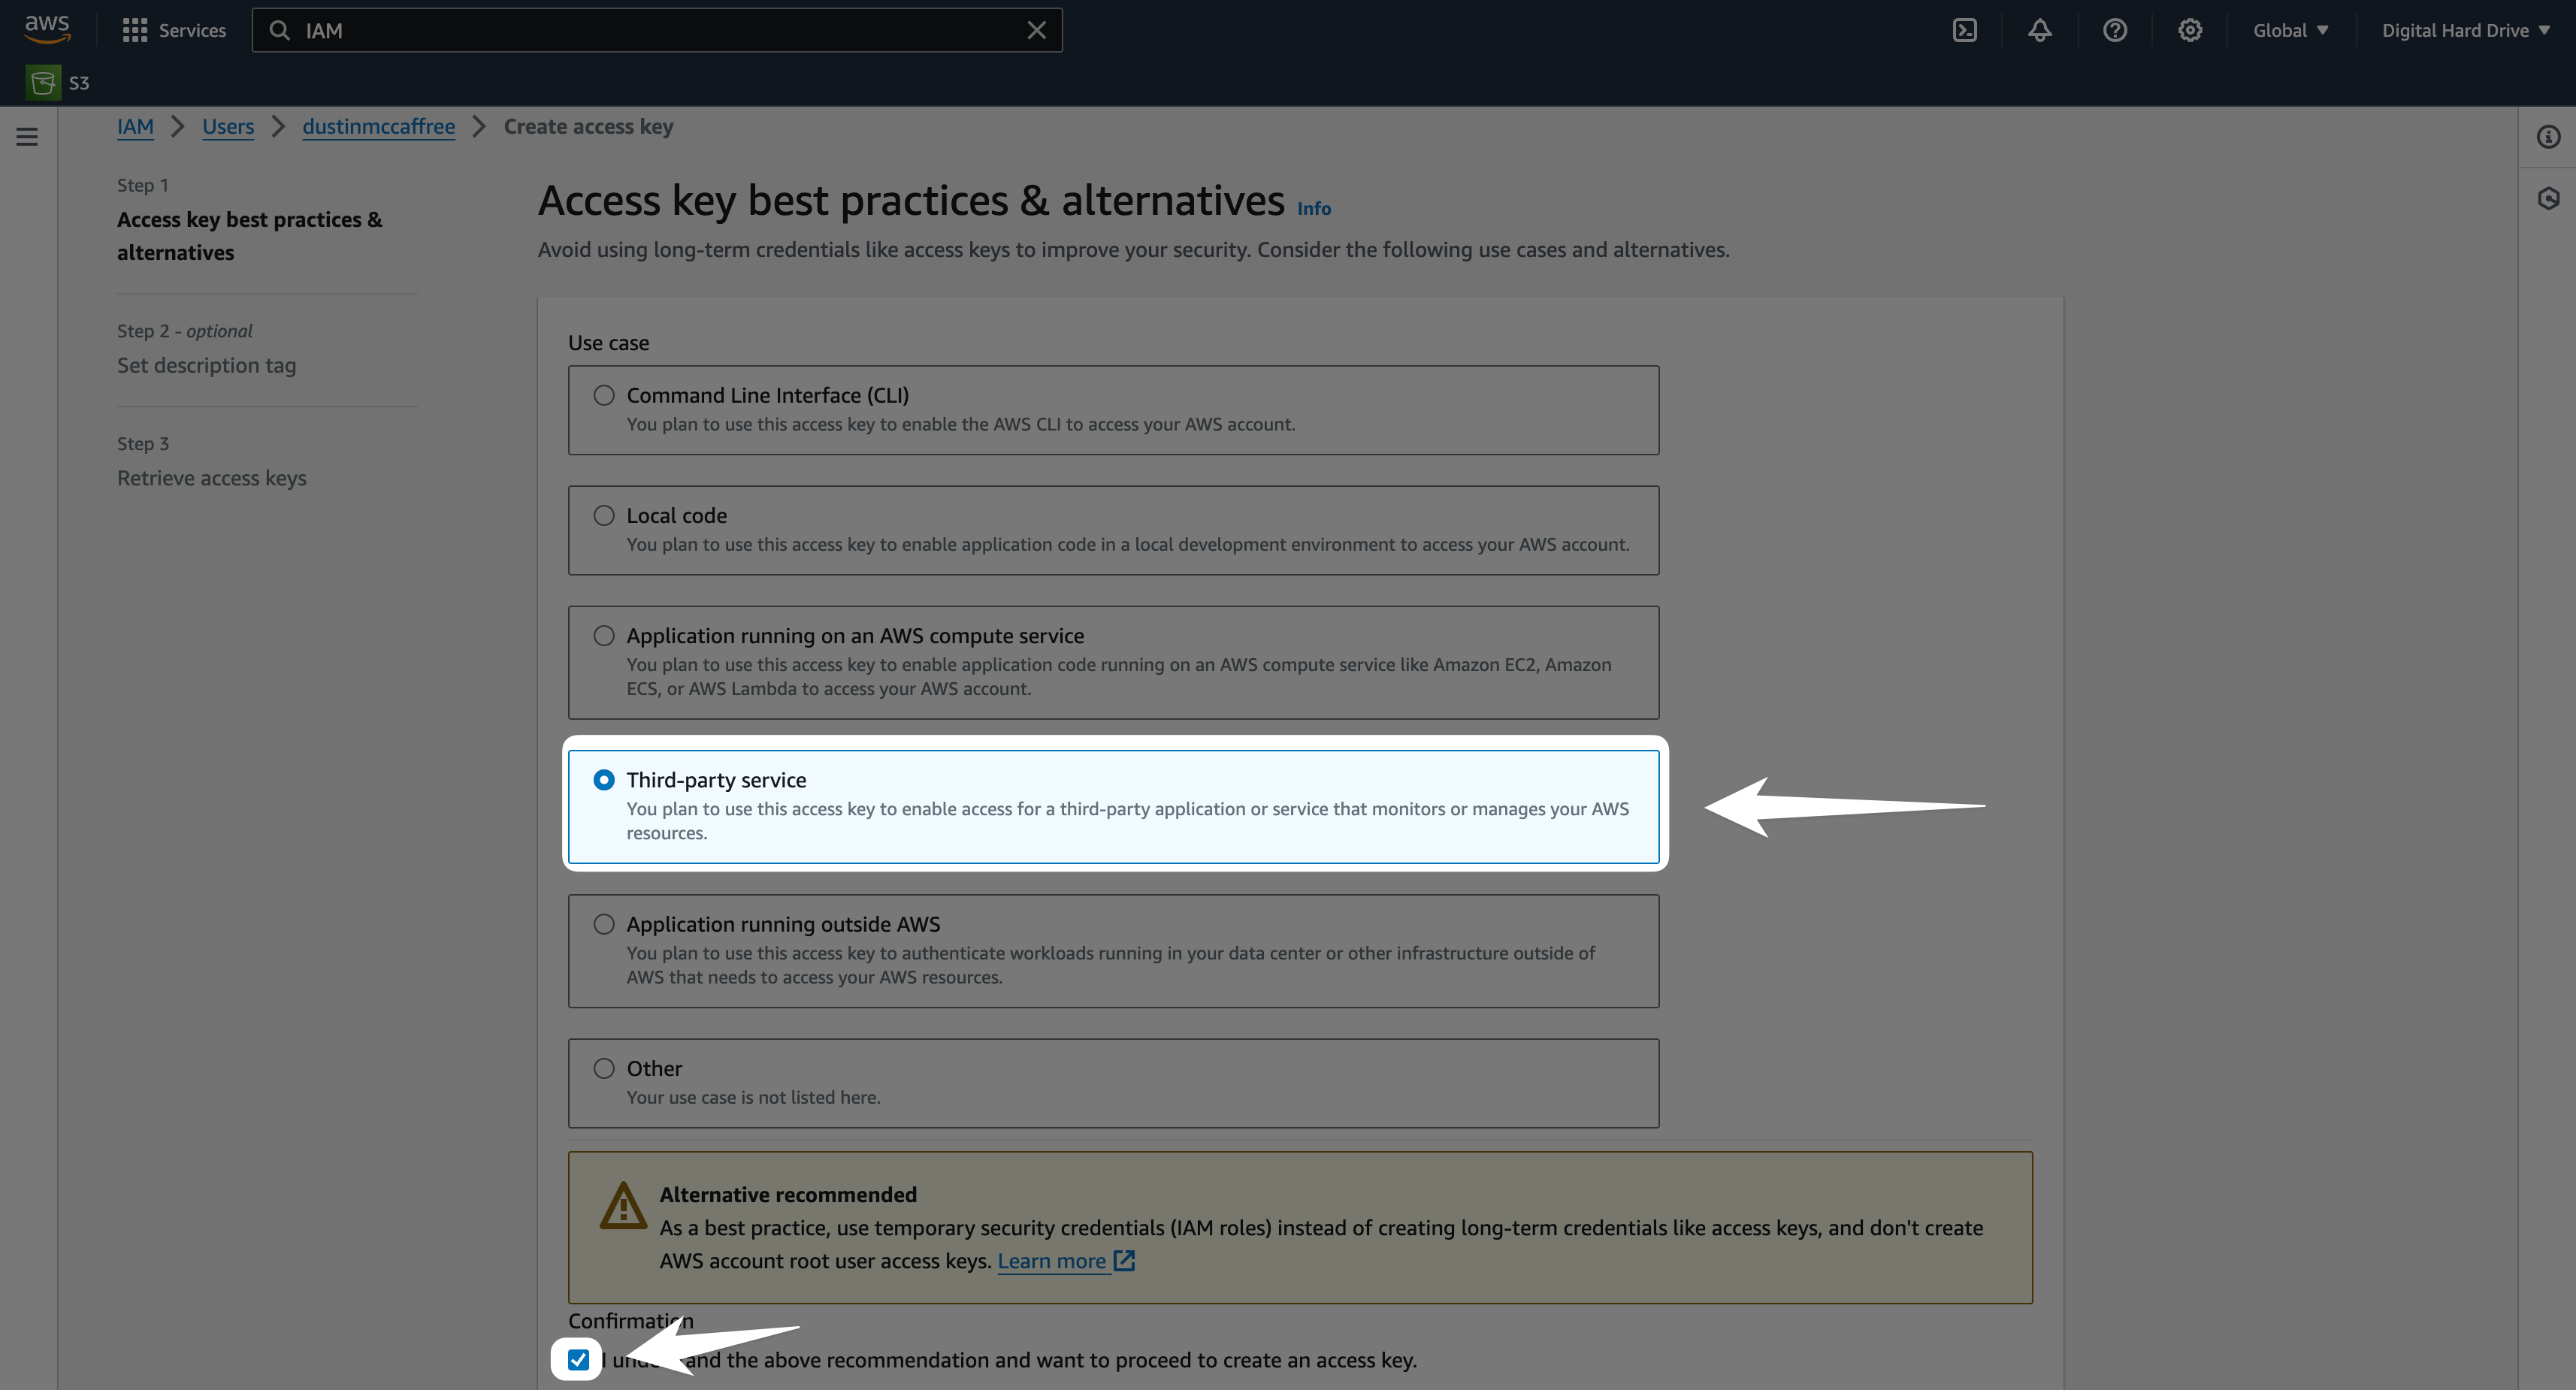
Select the option "Third-party service" and check the box at the bottom.
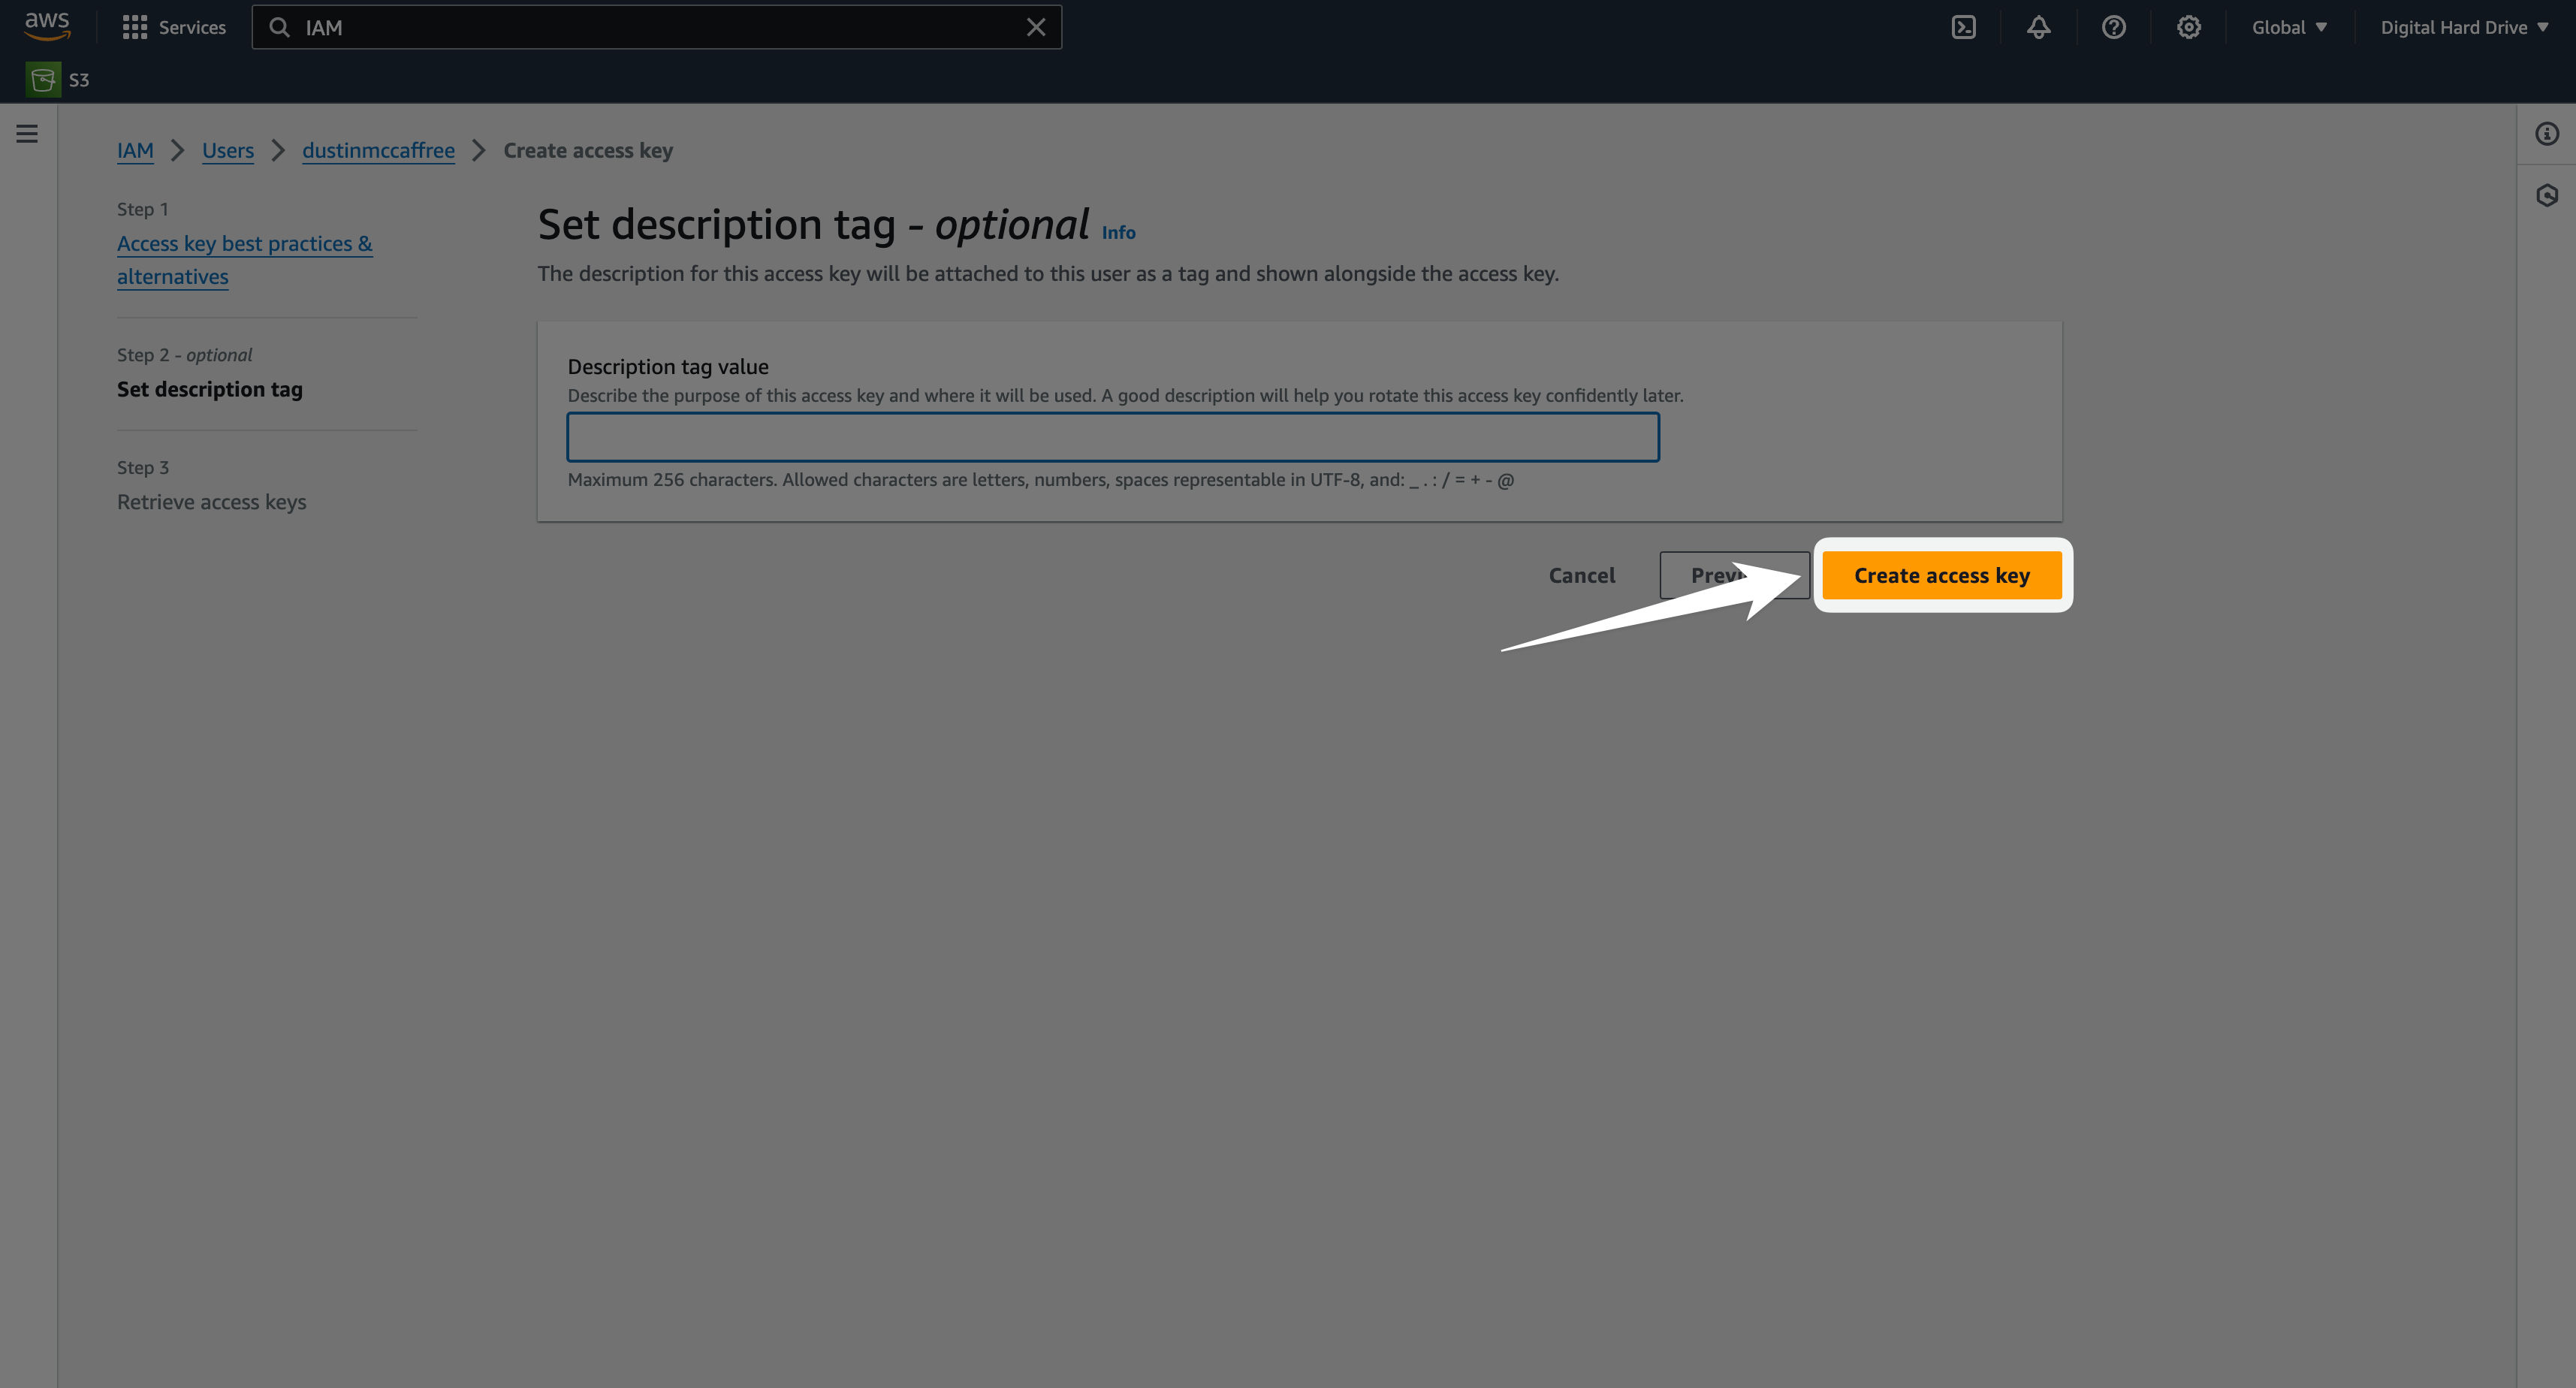
You can skip the description tag and just click "Create access key" here:
Now, these are the important values you want to save. Go ahead and copy/paste those somewhere you won't lose. We'll be adding those values to file.rocks.
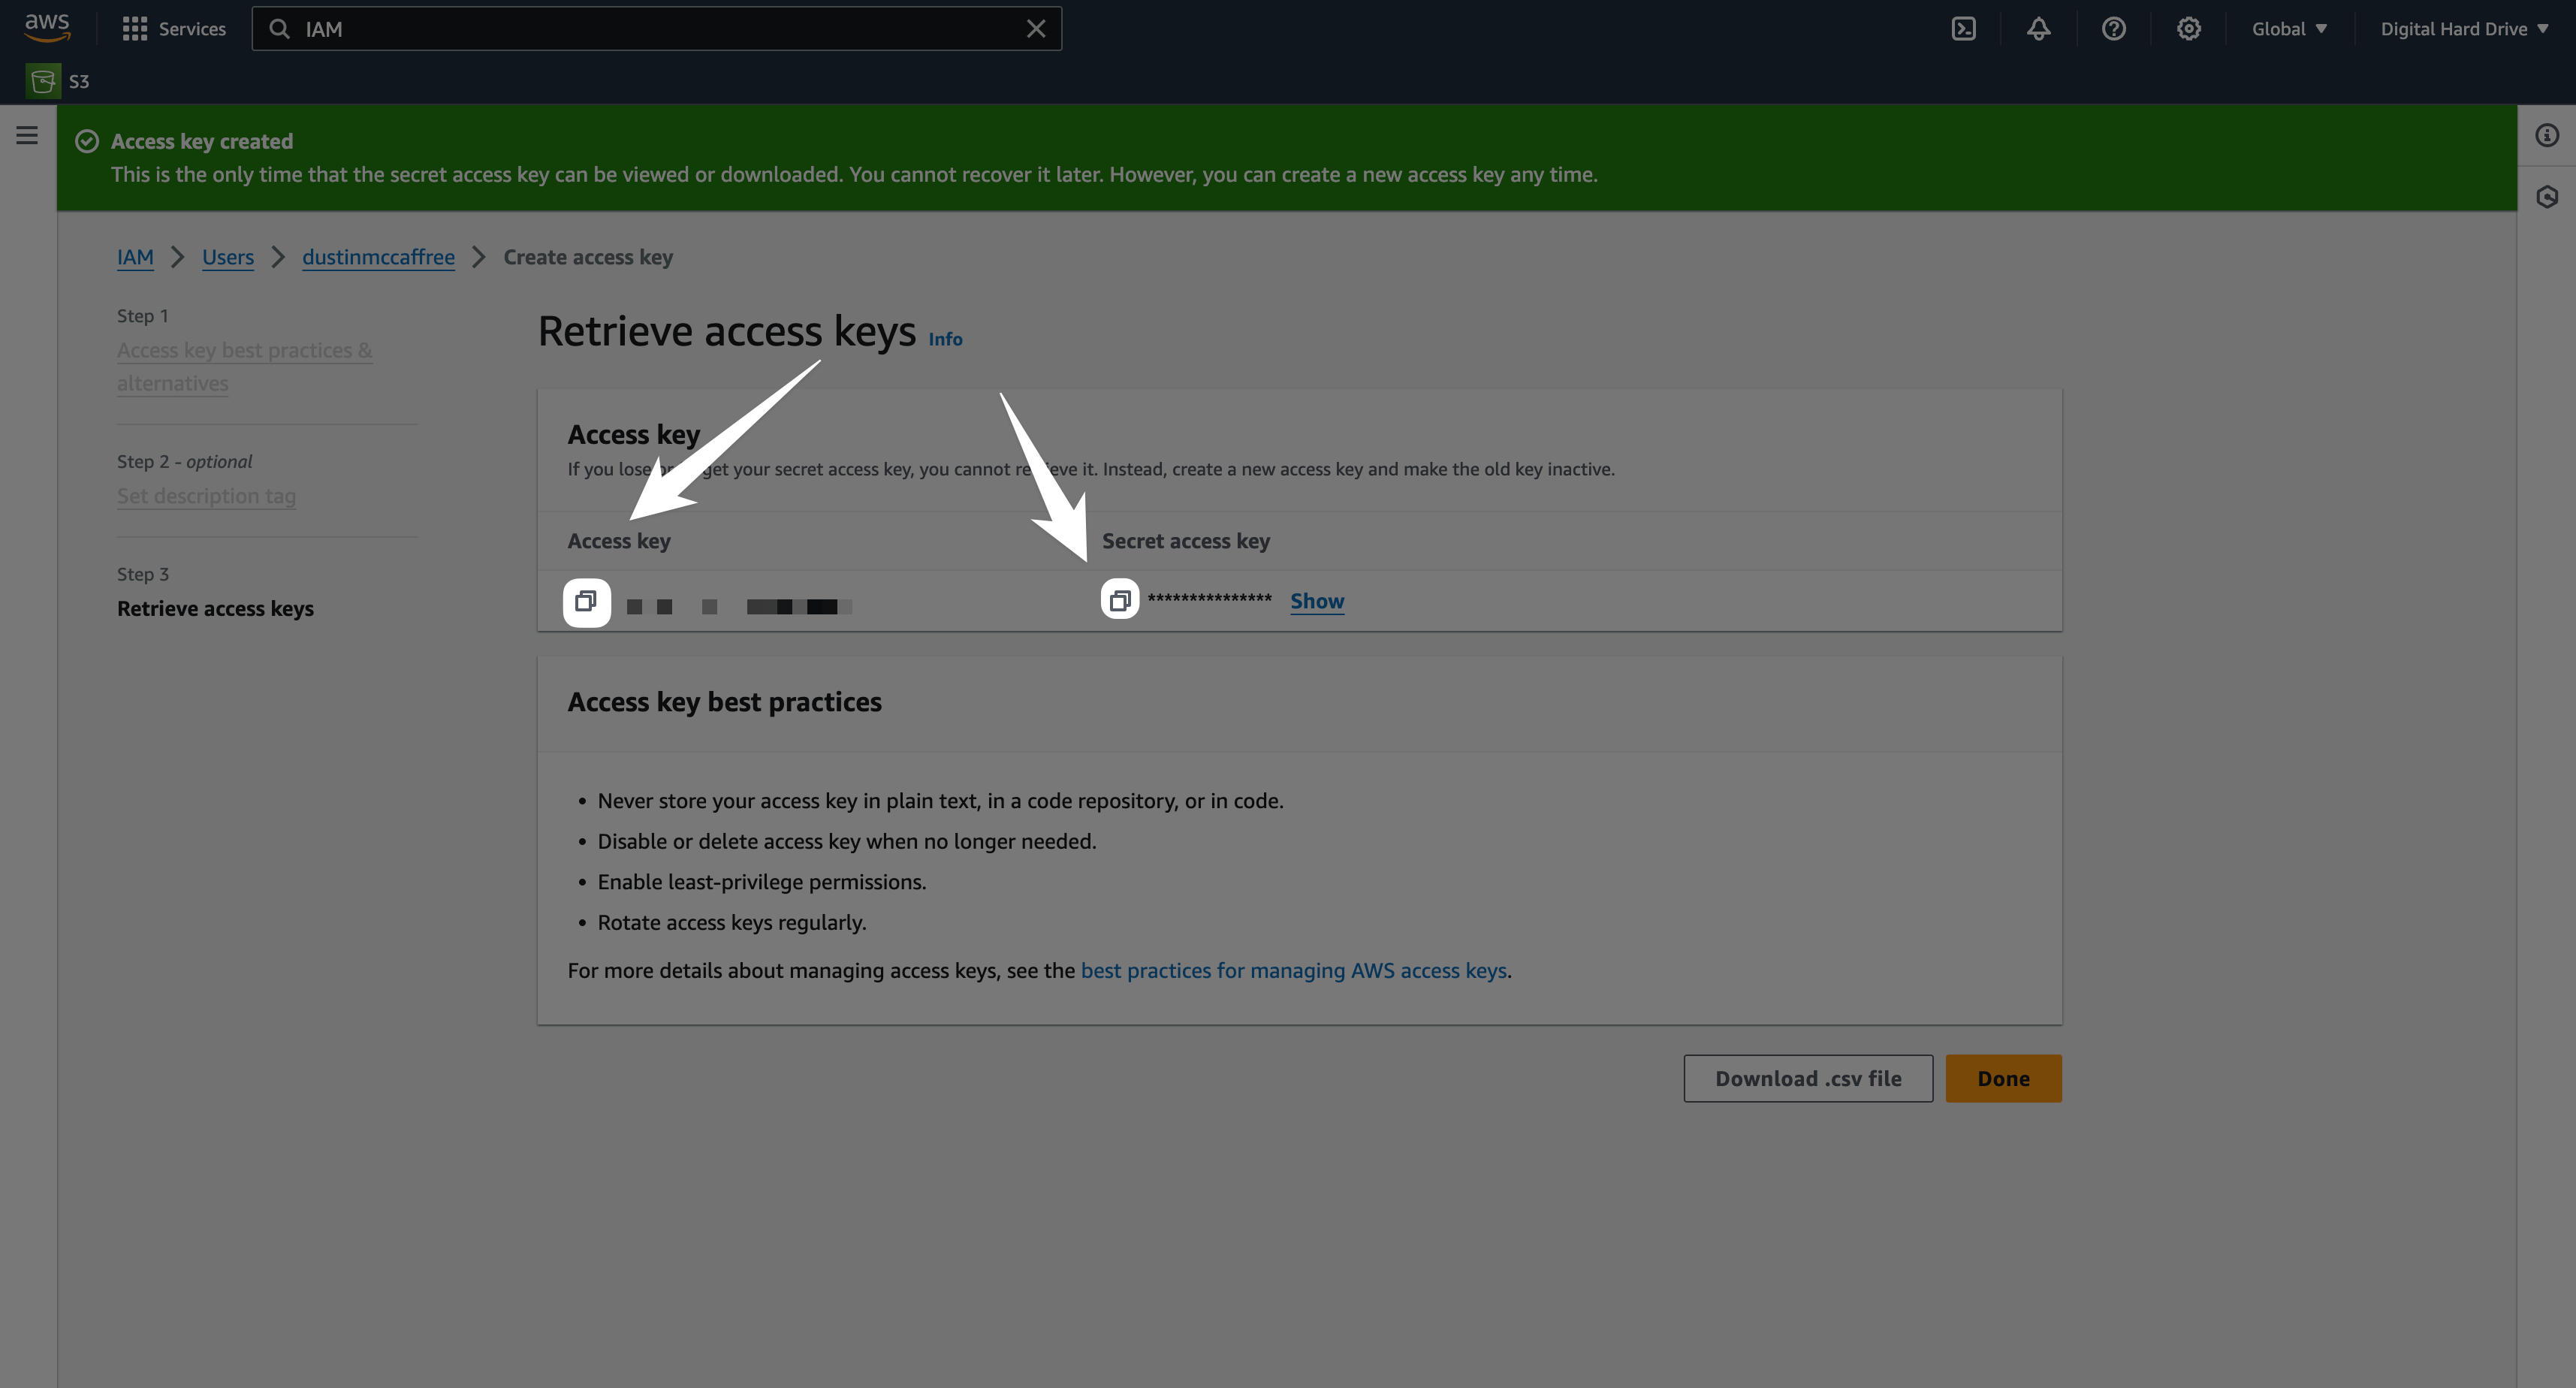
The last thing you'll want to do is take note of what region of AWS you're using. Looking at the URL of where you are right now, you should see something like us-east-1.console.aws.amazon.com.
This us-east-1 is known as a "region". For you, the region may be something else.
Just copy that bit from before .console.aws.amazon.com in the url. We'll be using that in a moment in file.rocks as well.
4. Add your bucket to file.rocks
Okay, we're in the home stretch! 🎉 The rest of this is easy now that our bucket and permissions are set up correctly.
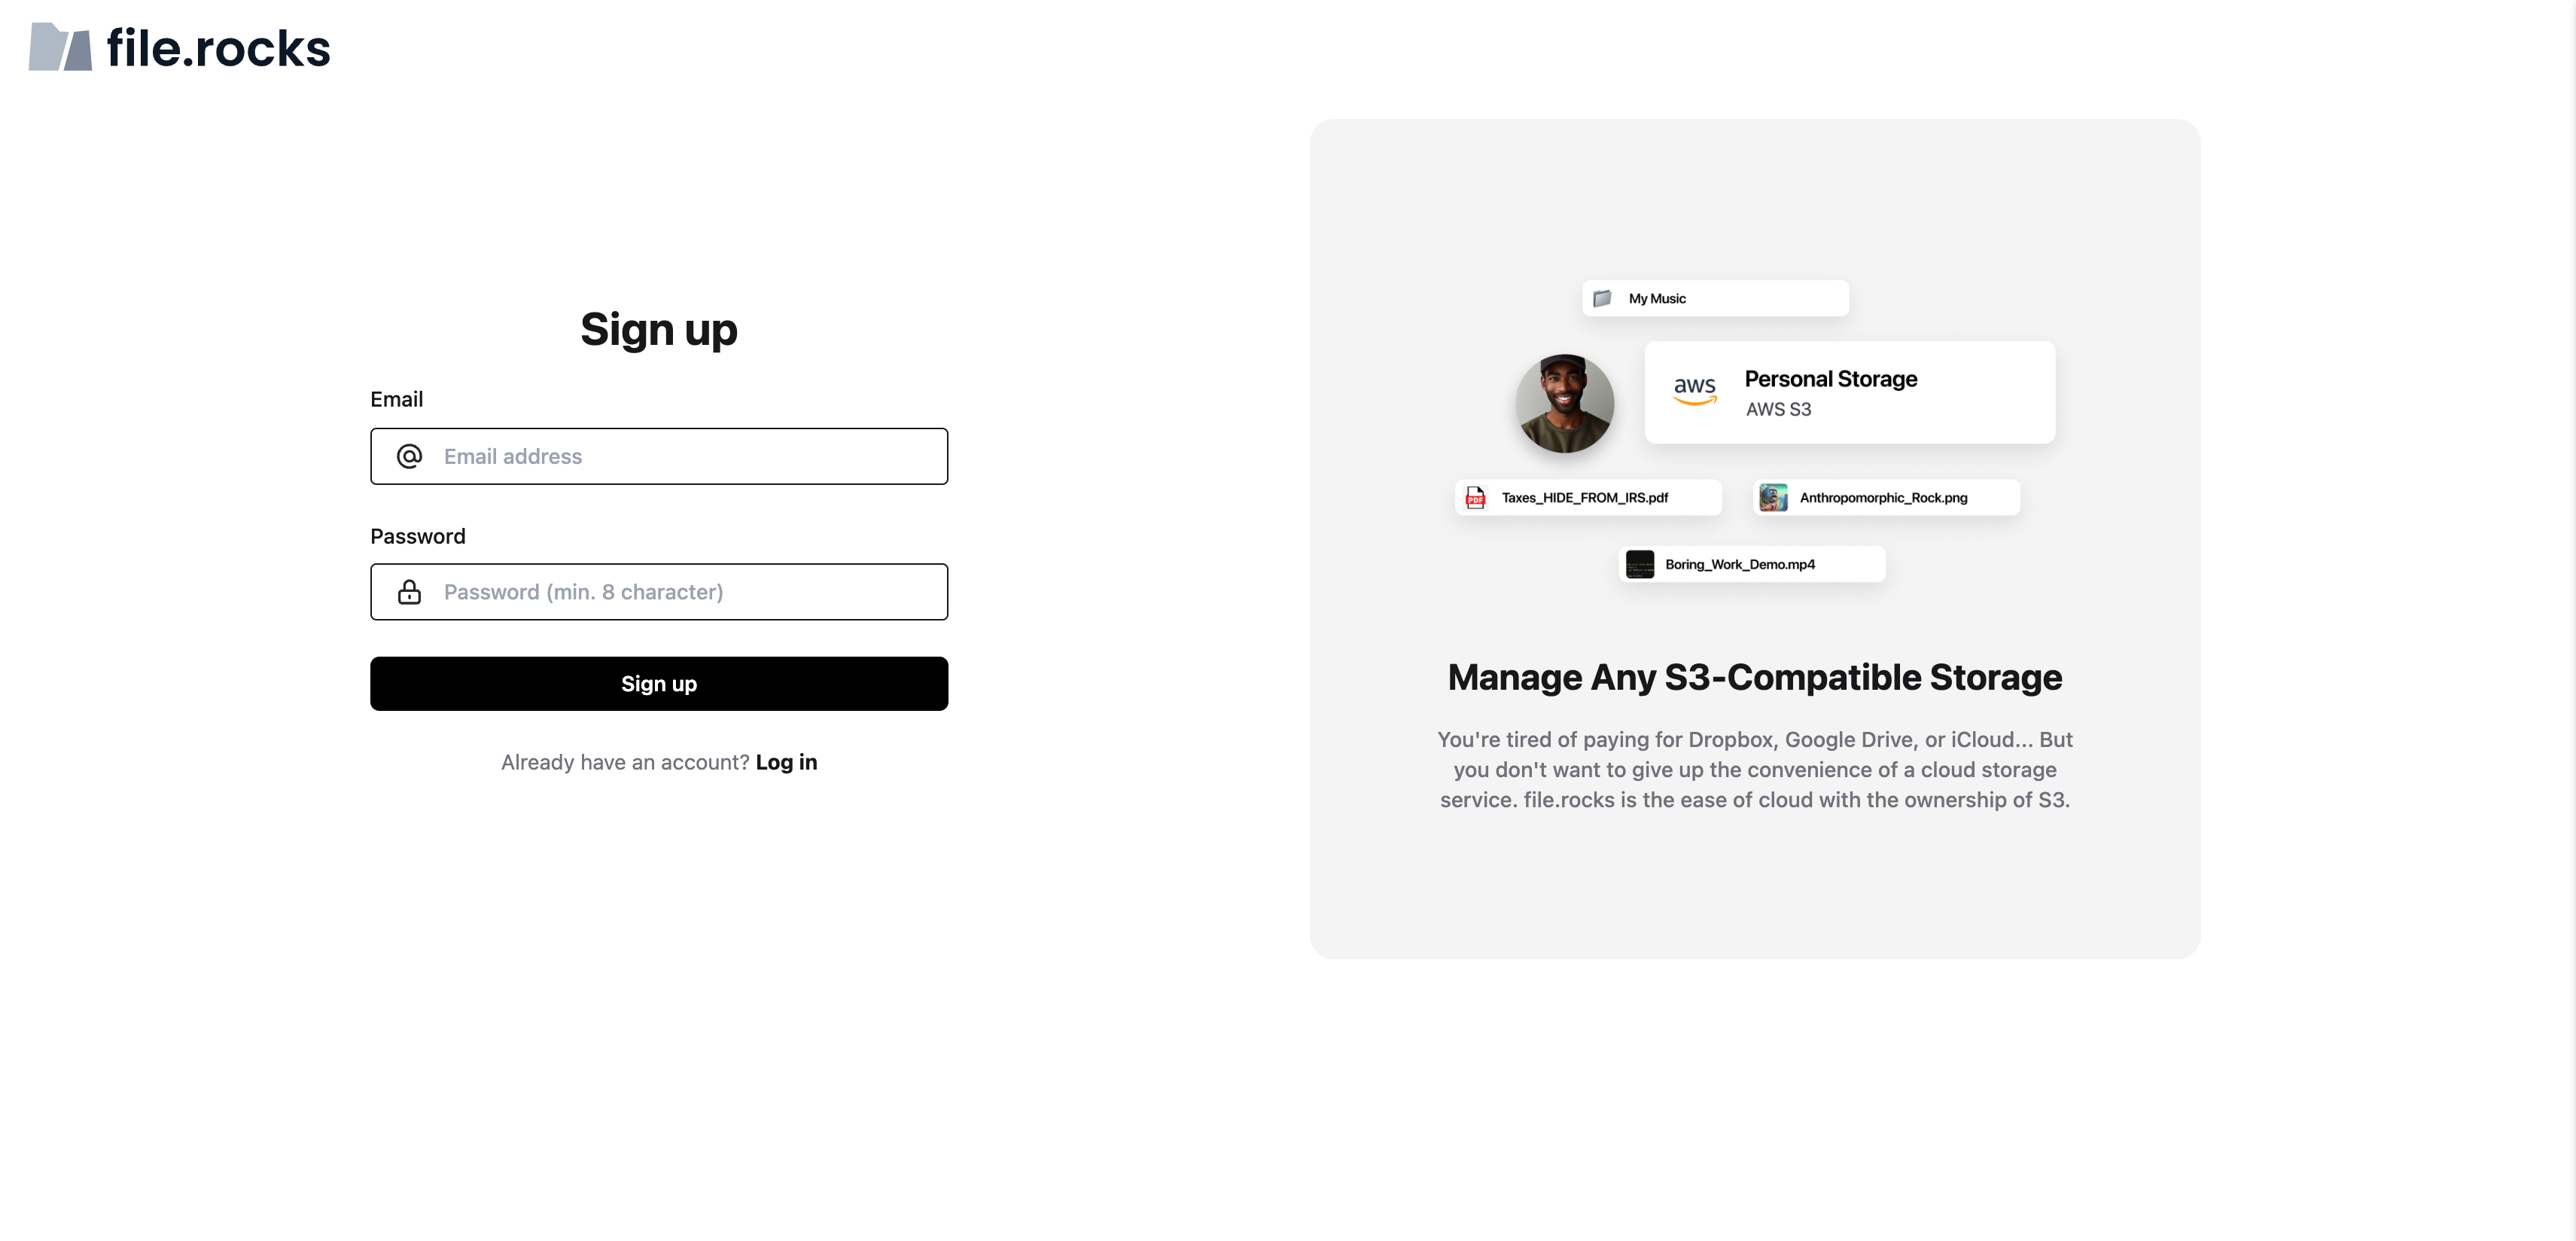
Go to file.rocks/signup and create an account (if you haven't already):
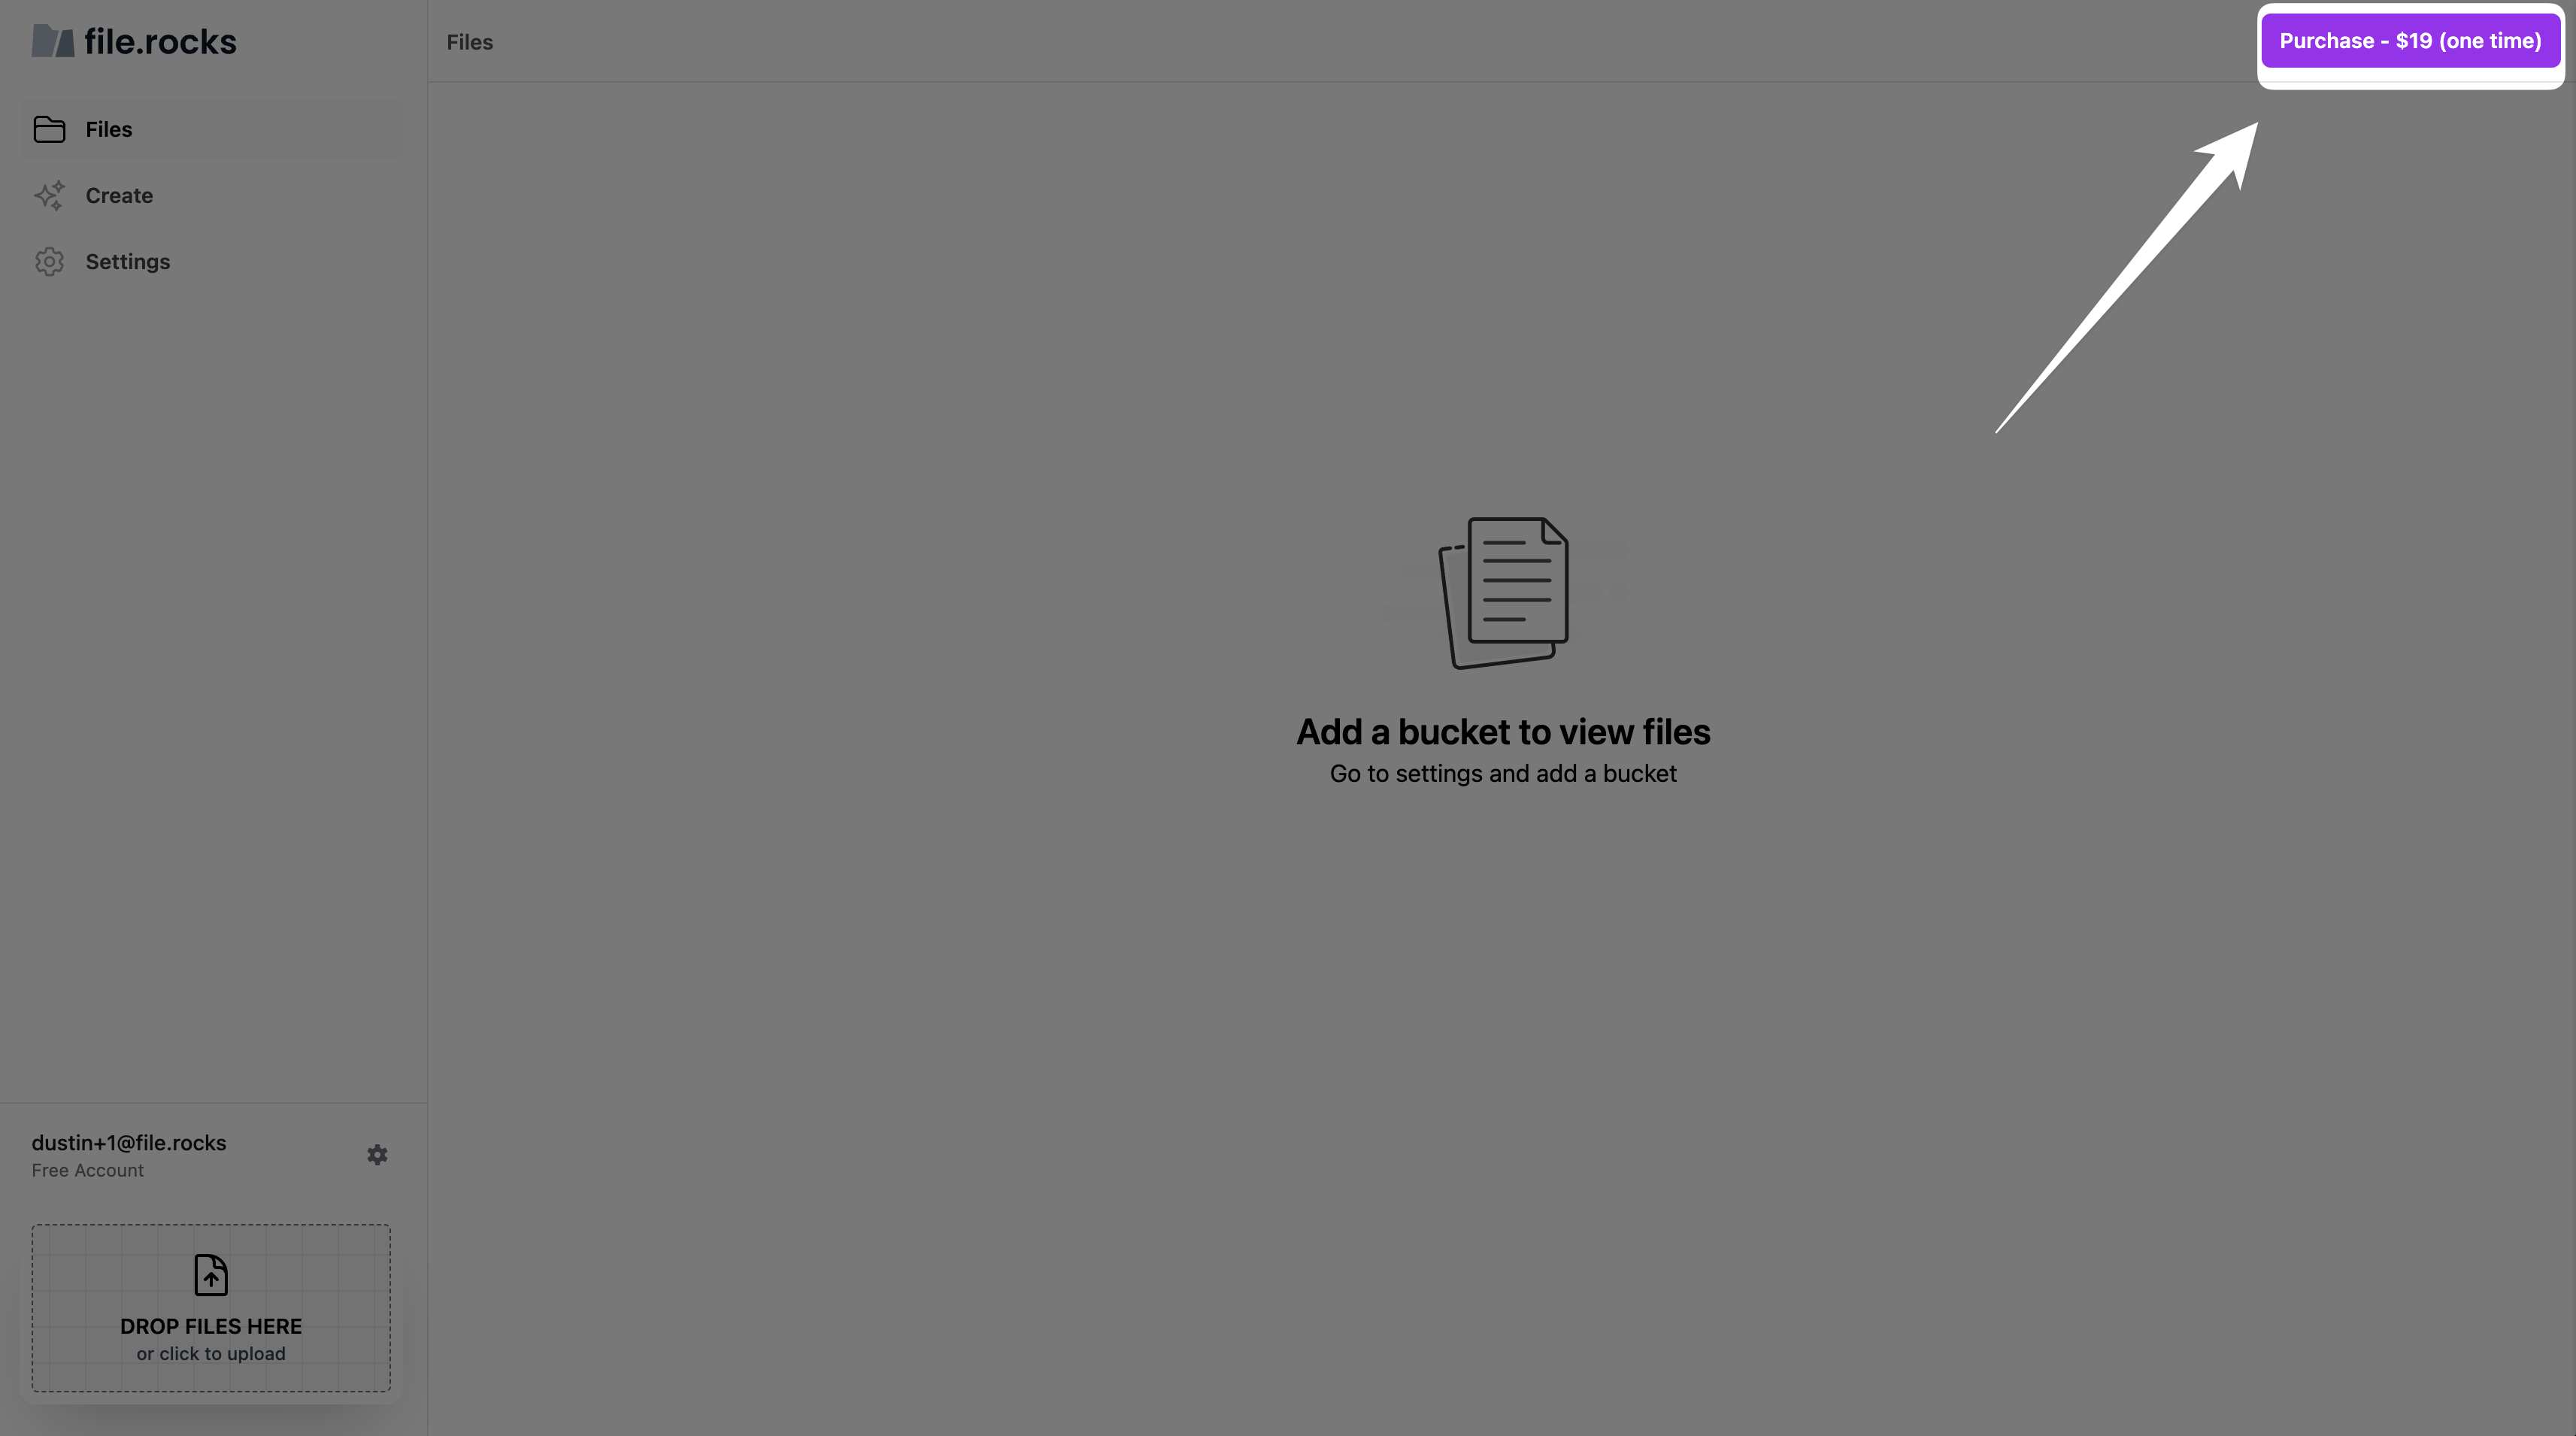
Before you can add a bucket, you need to upgrade to Pro for $19 (one time):
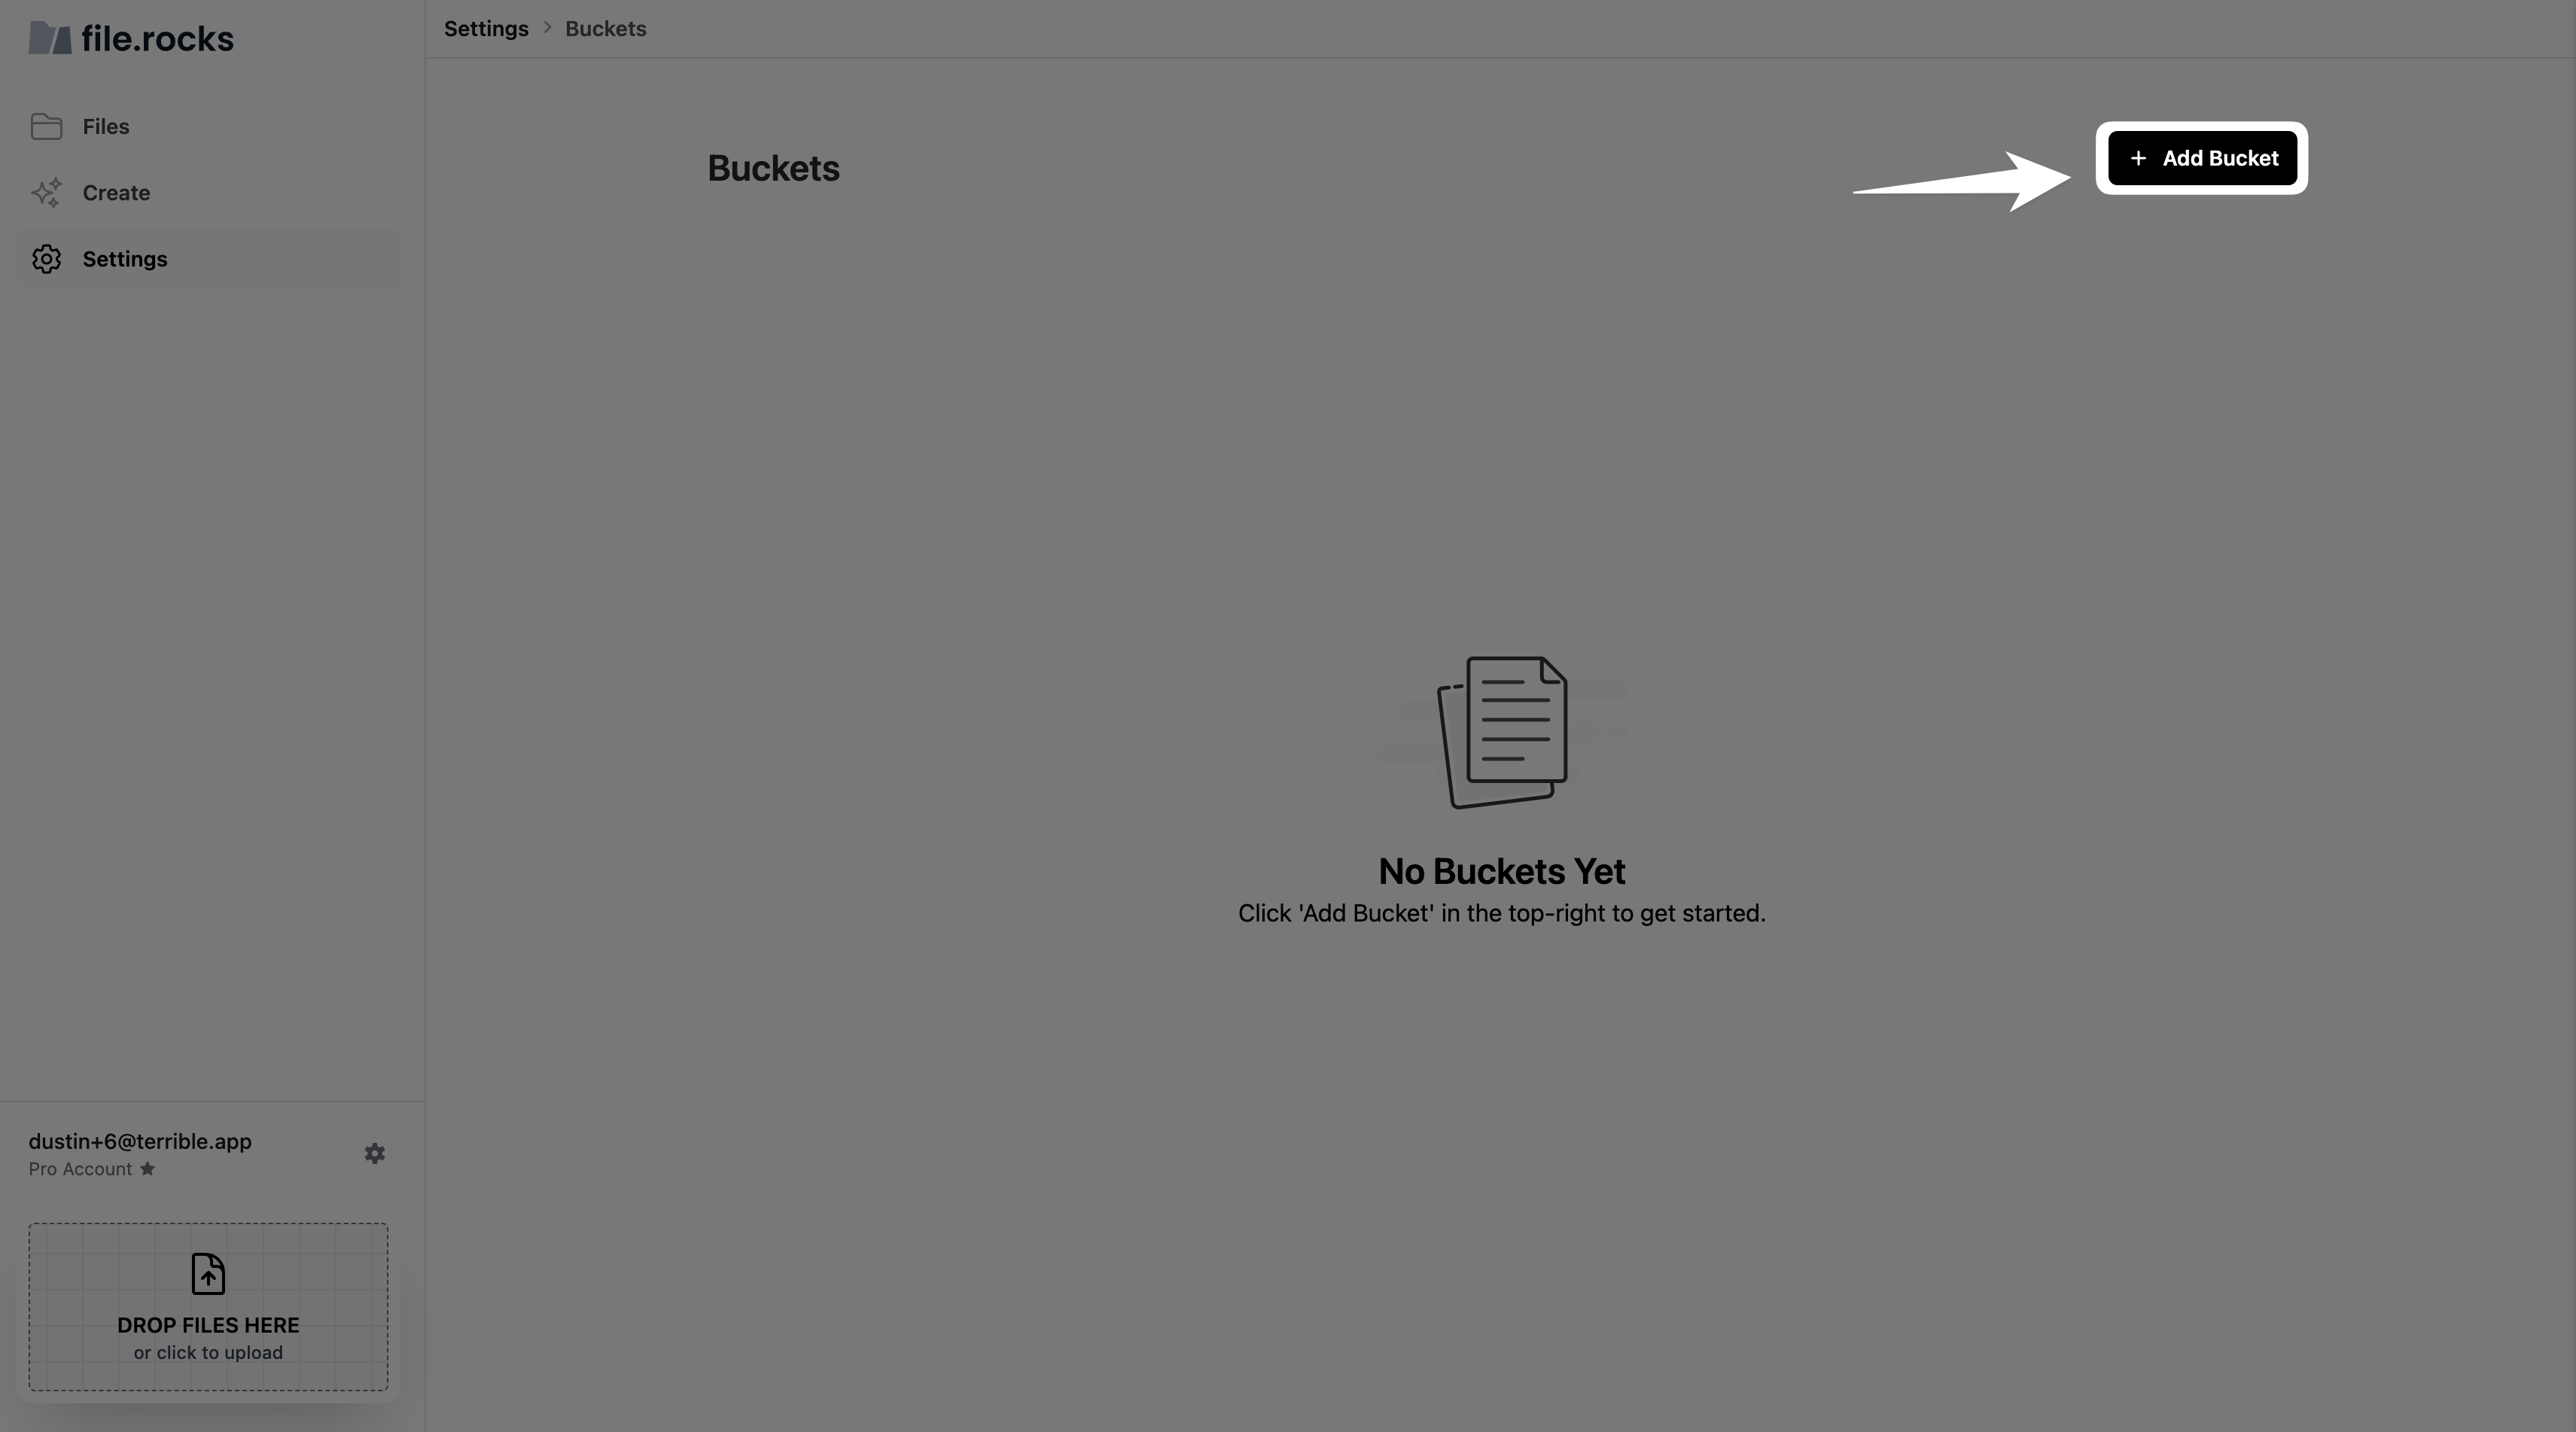
After you purchase, the button in the top-right turns into "Add a Bucket". Go ahead and click that.
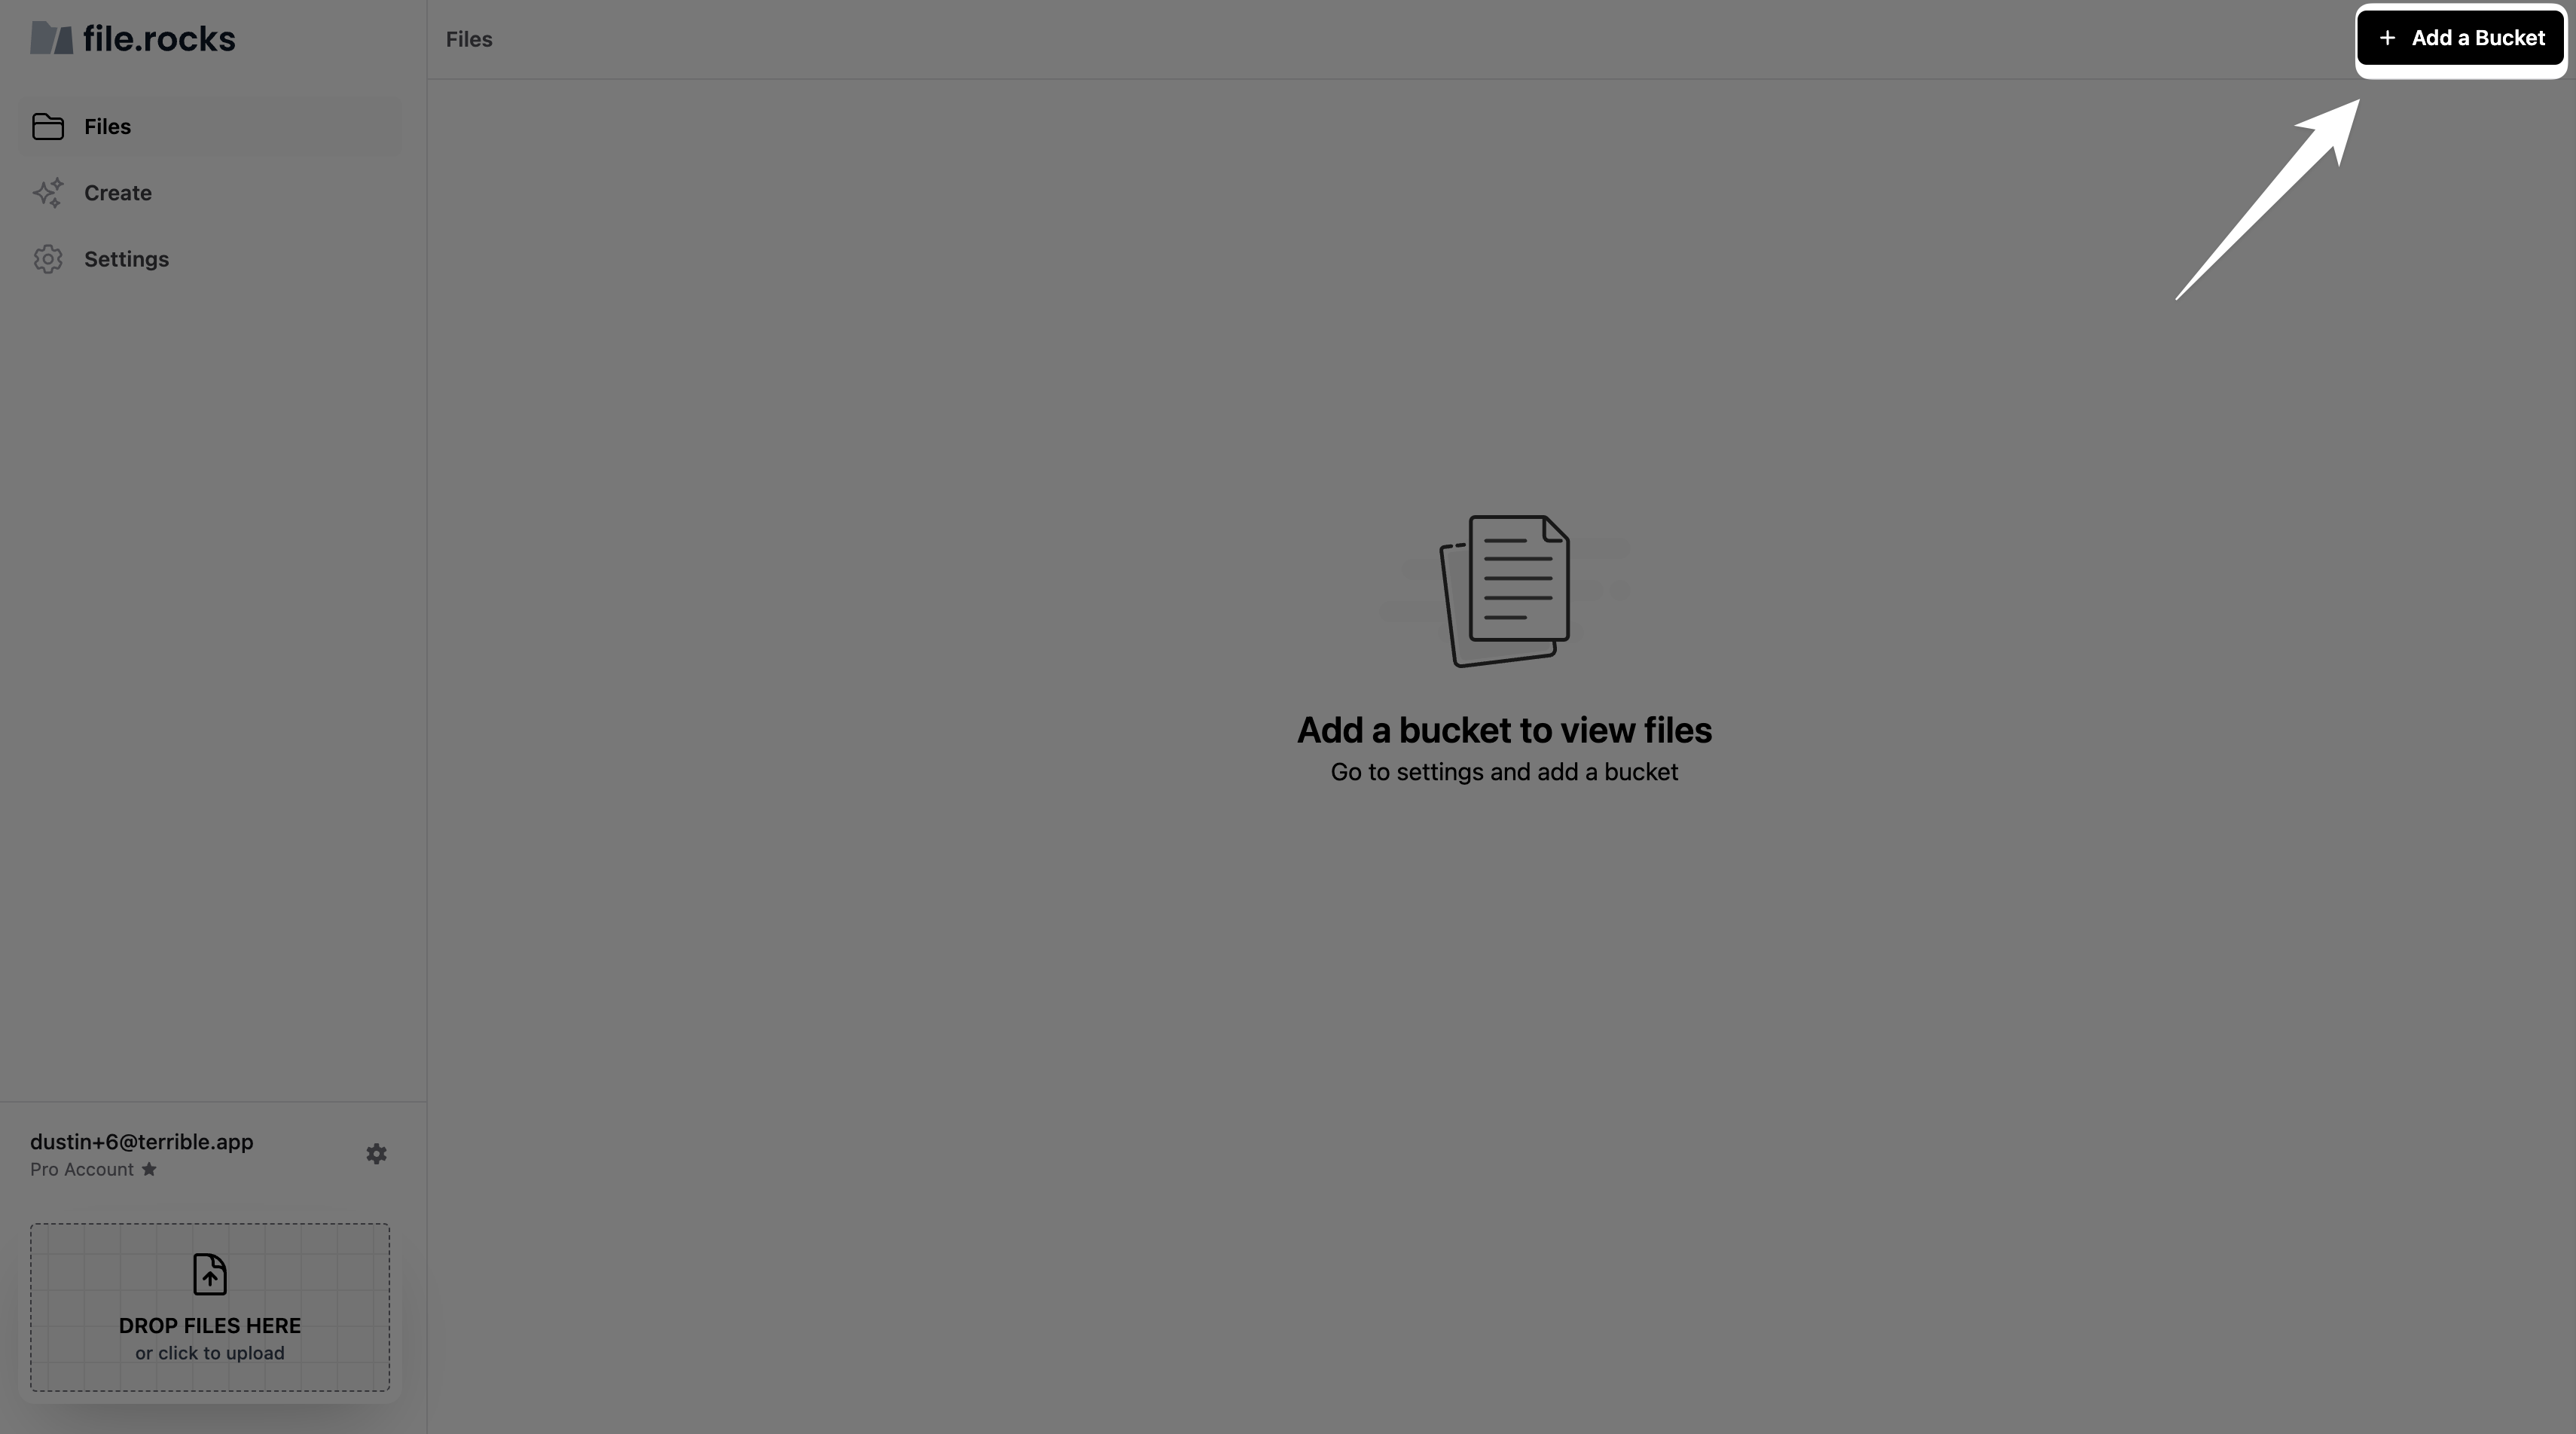
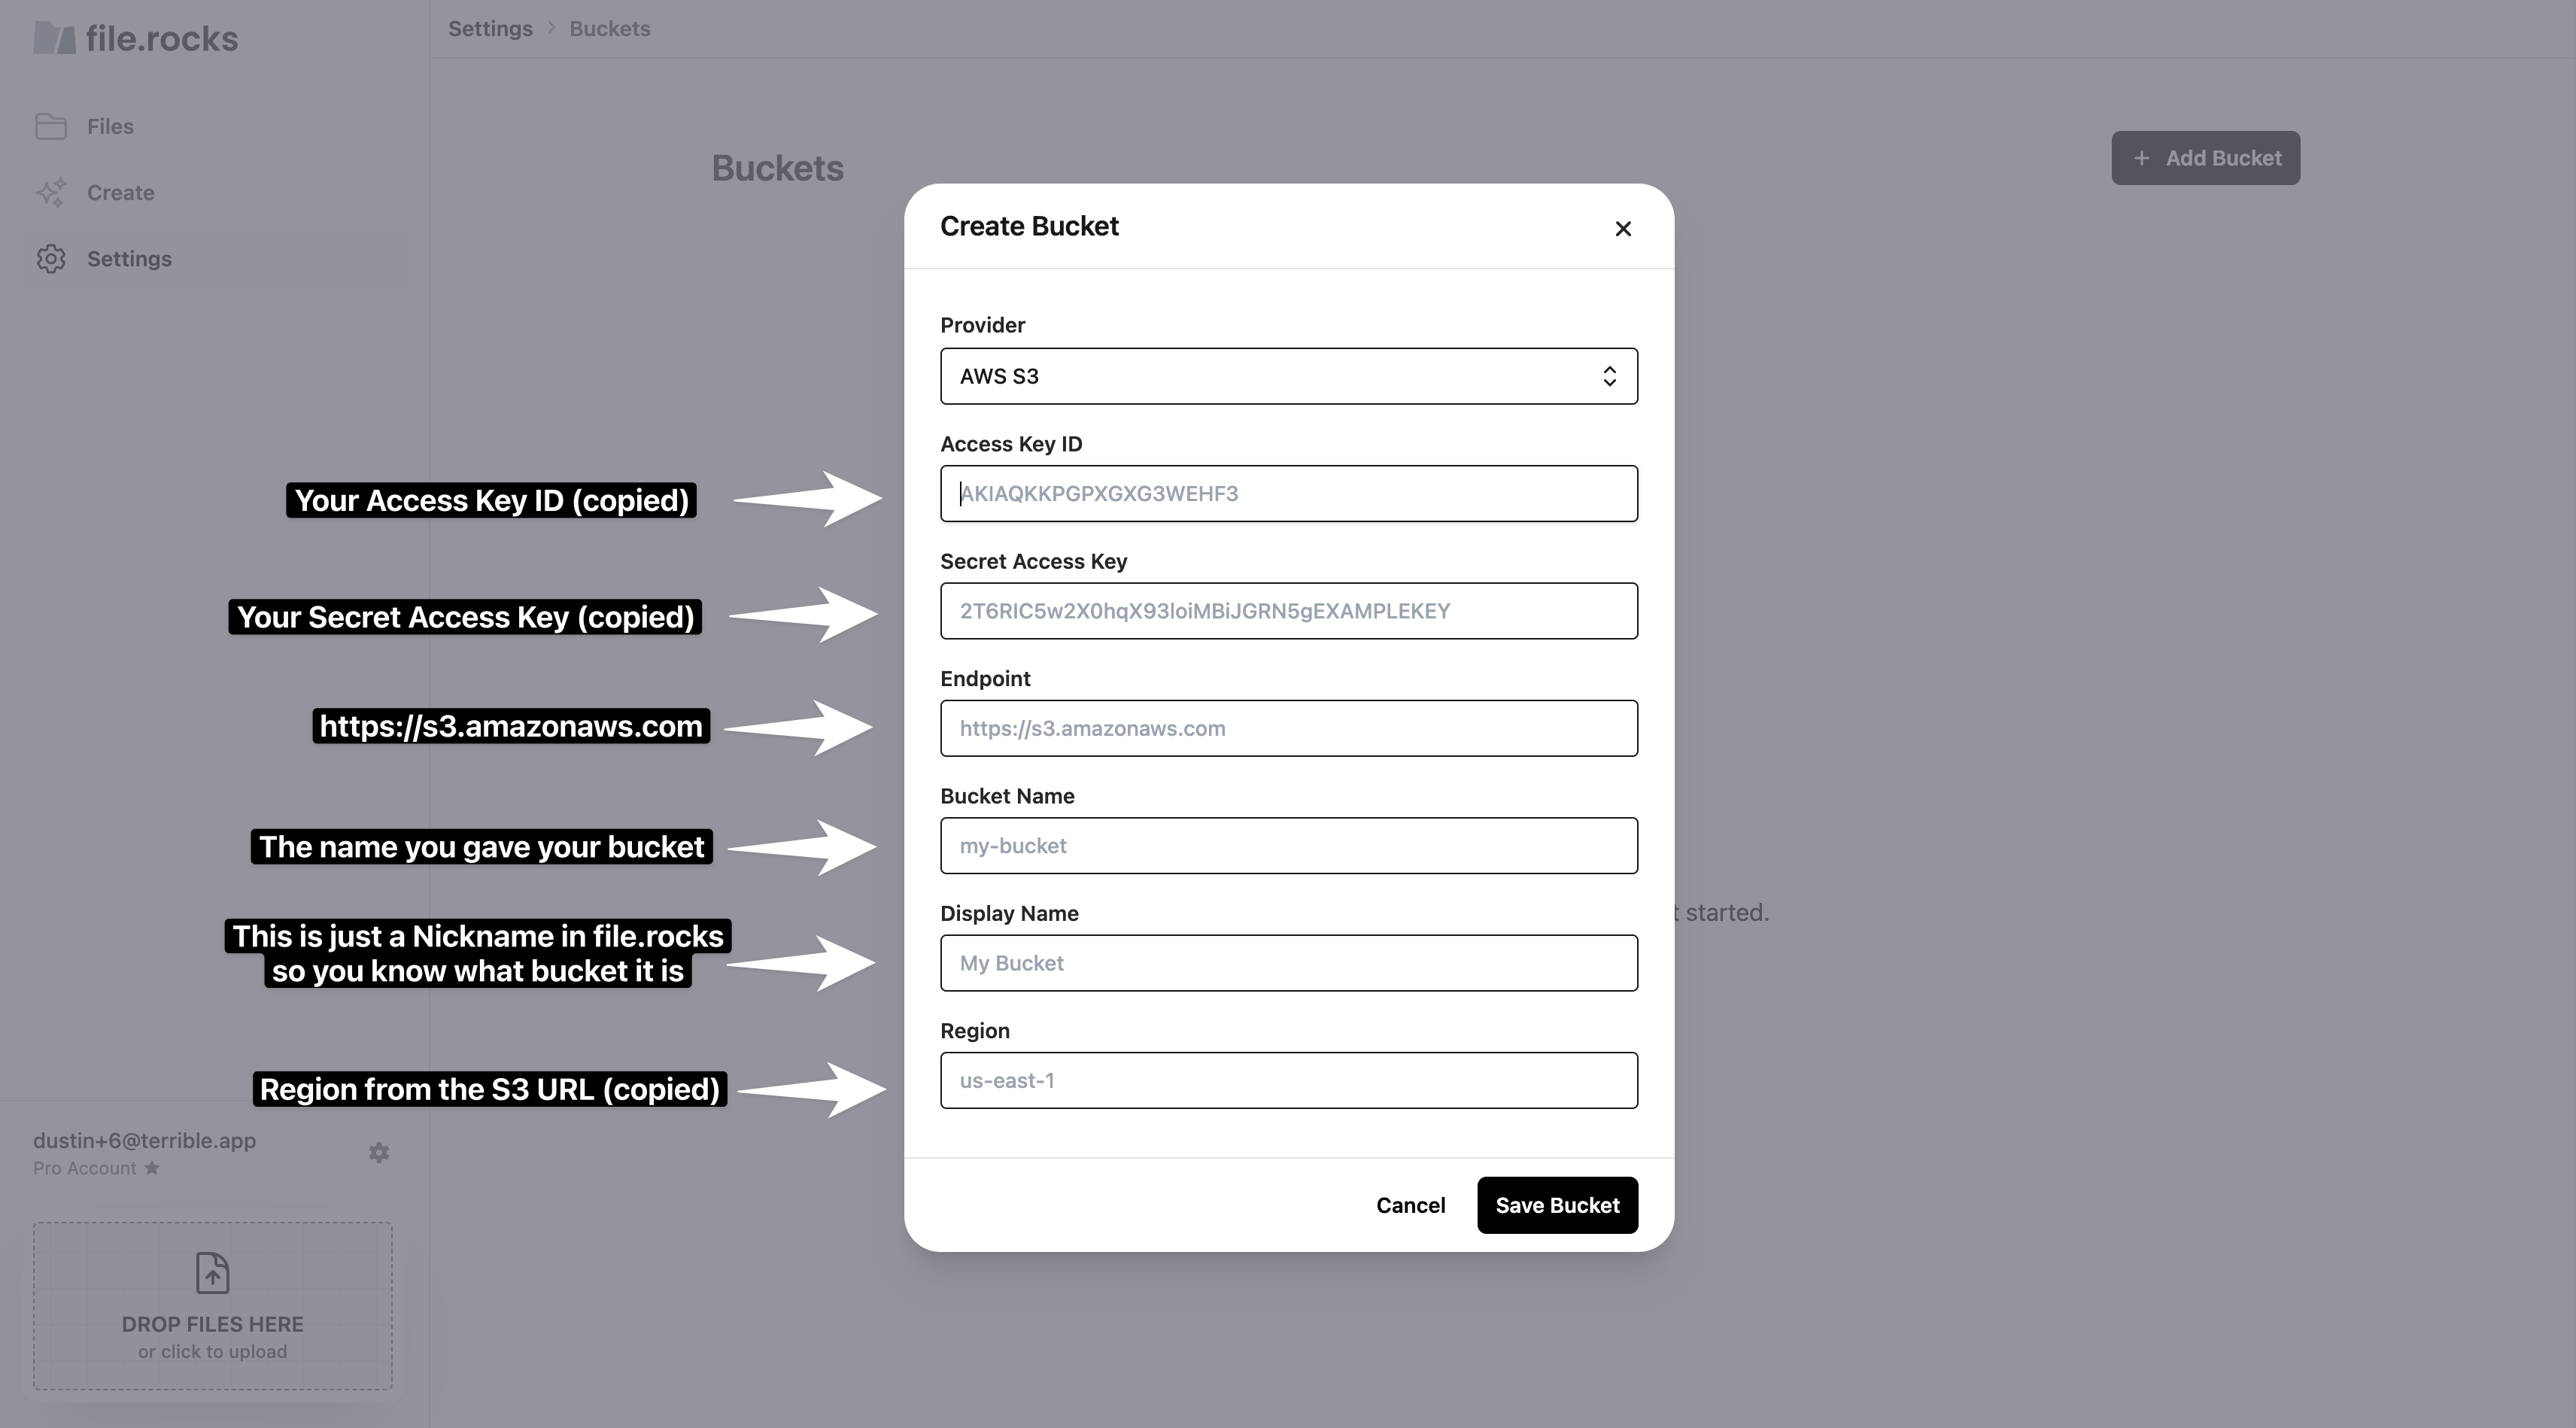
Click "Add Bucket" now and you'll see a popup to fill in Bucket details, which we luckily saved from the previous steps!
Now copy/paste and add all the details we prepared earlier and click "Save Bucket":
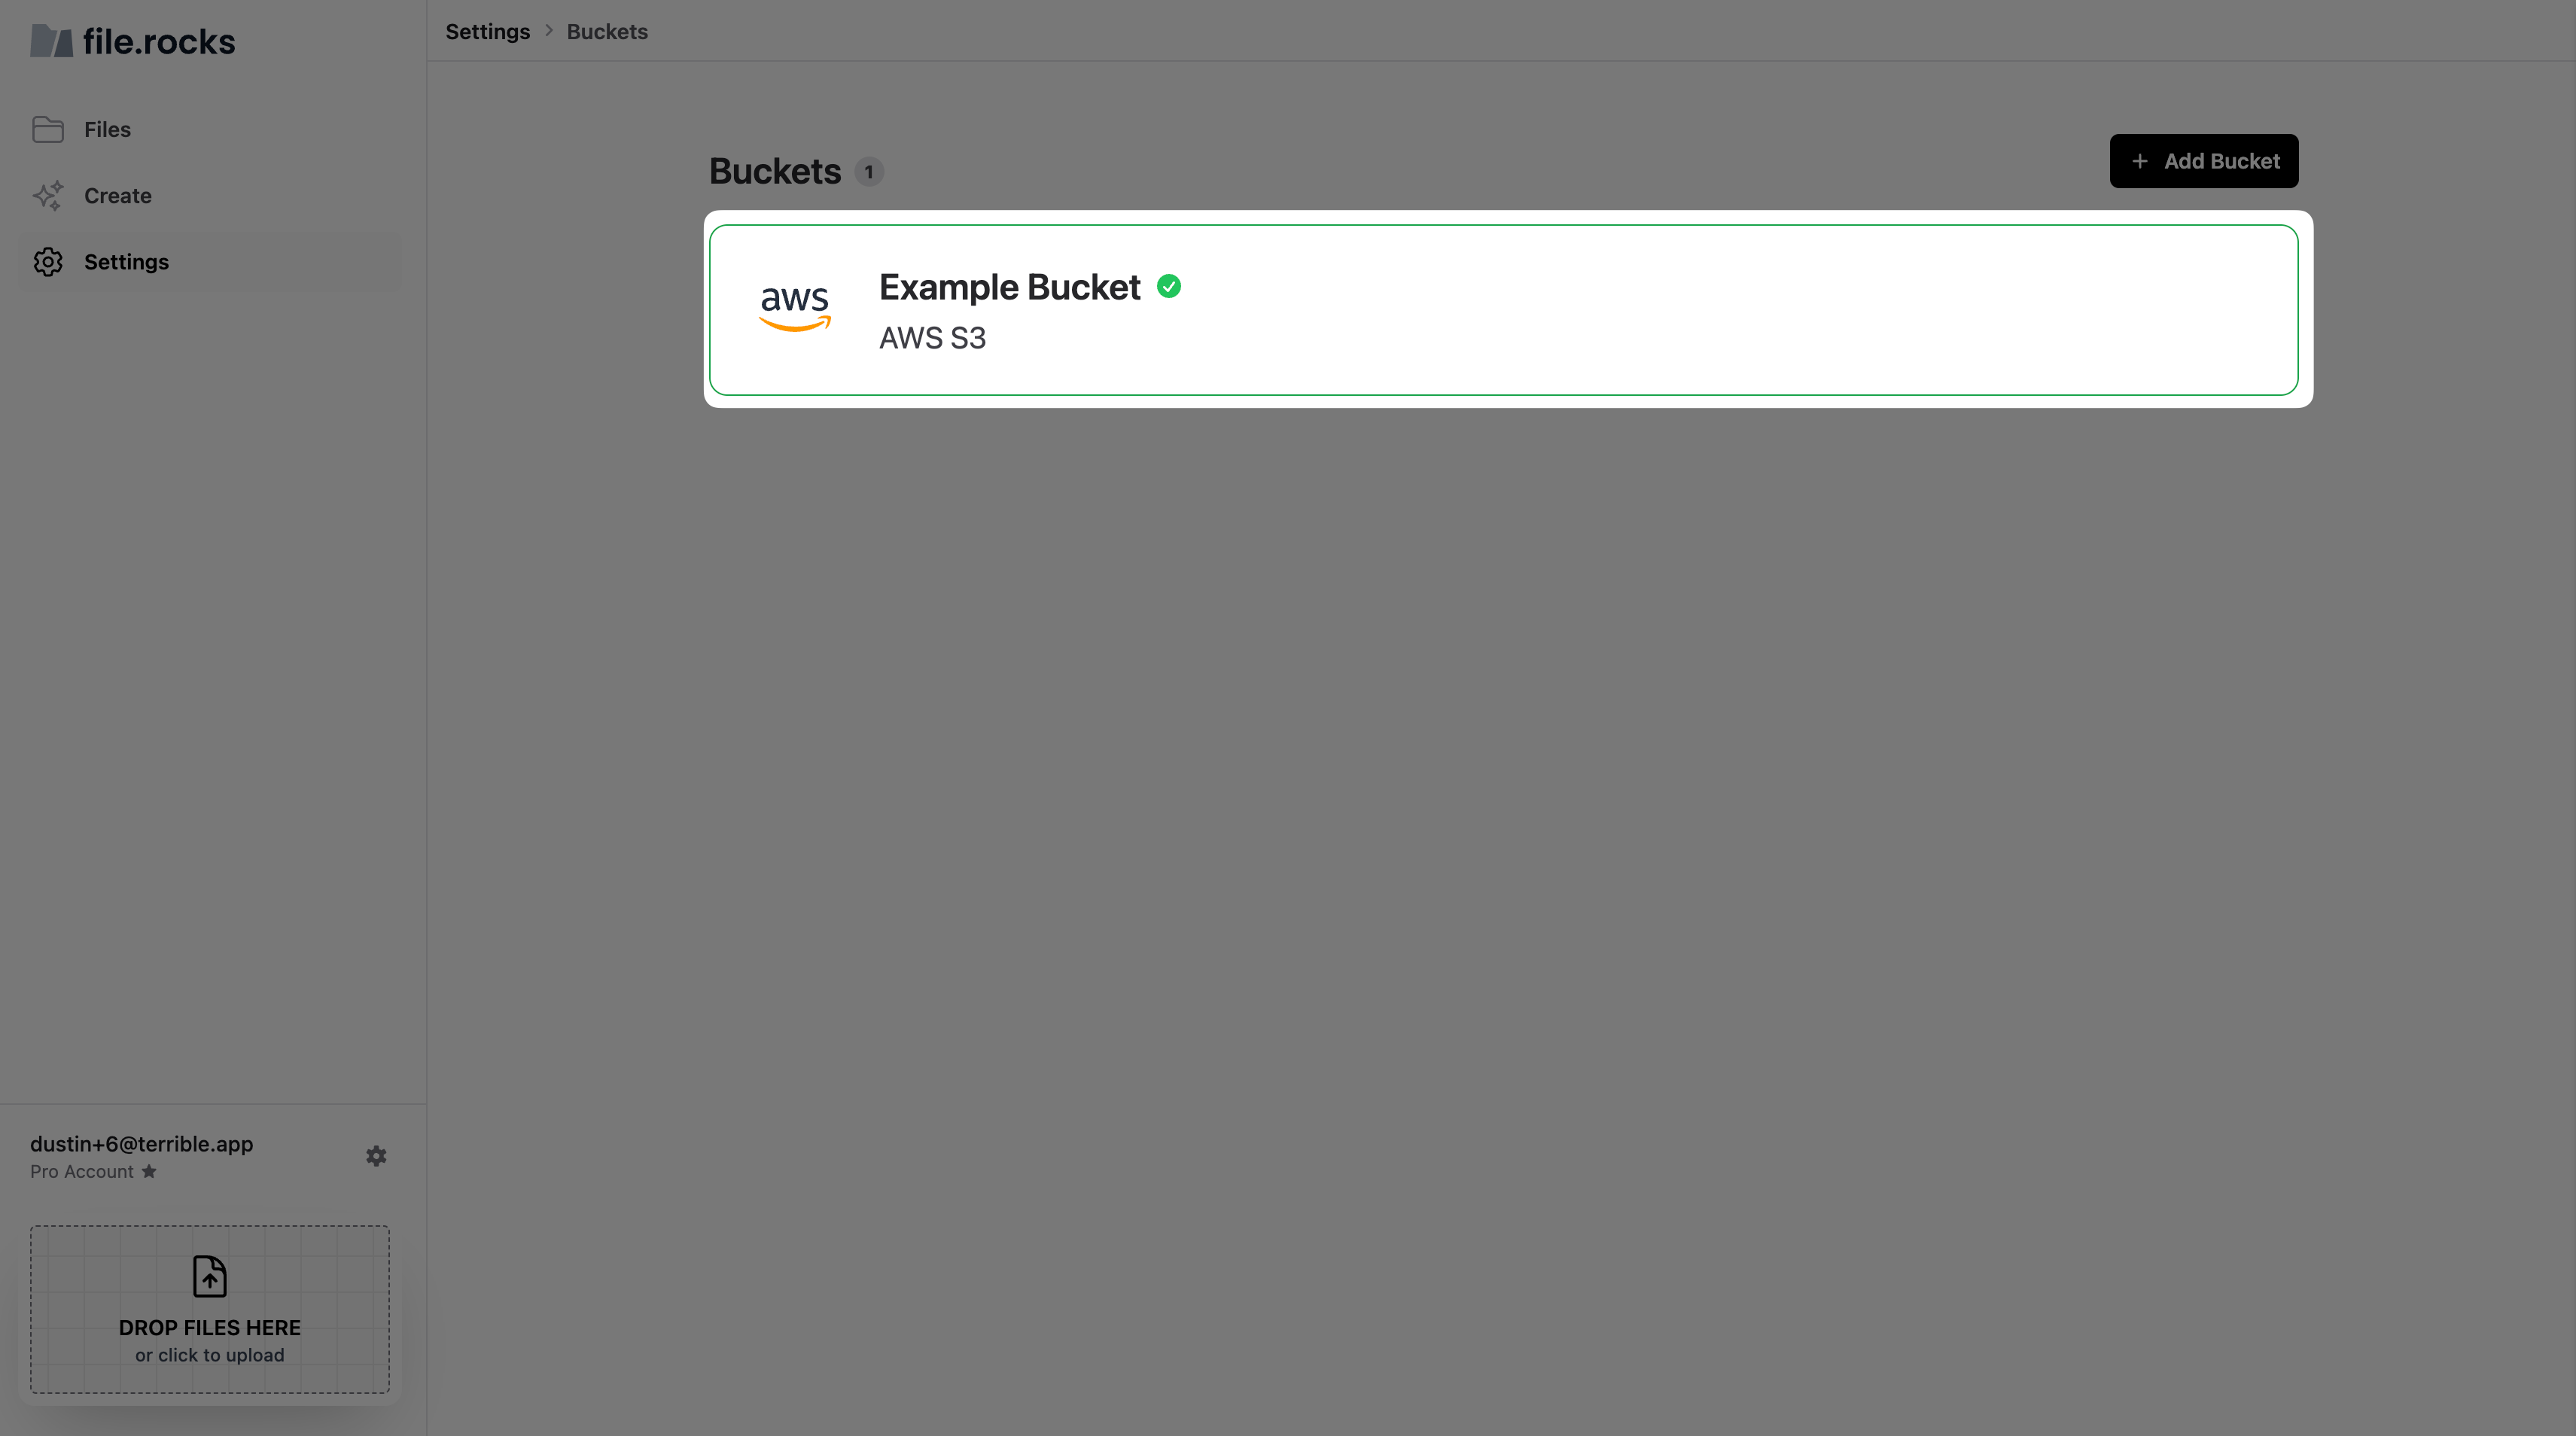
You should now see the newly added bucket in the Buckets list. Click "Files" in the sidebar to view the bucket!
The easiest way to add your first file to your bucket now is just to drag-and-drop a file here or click it to add files. You can add many files at the same time.
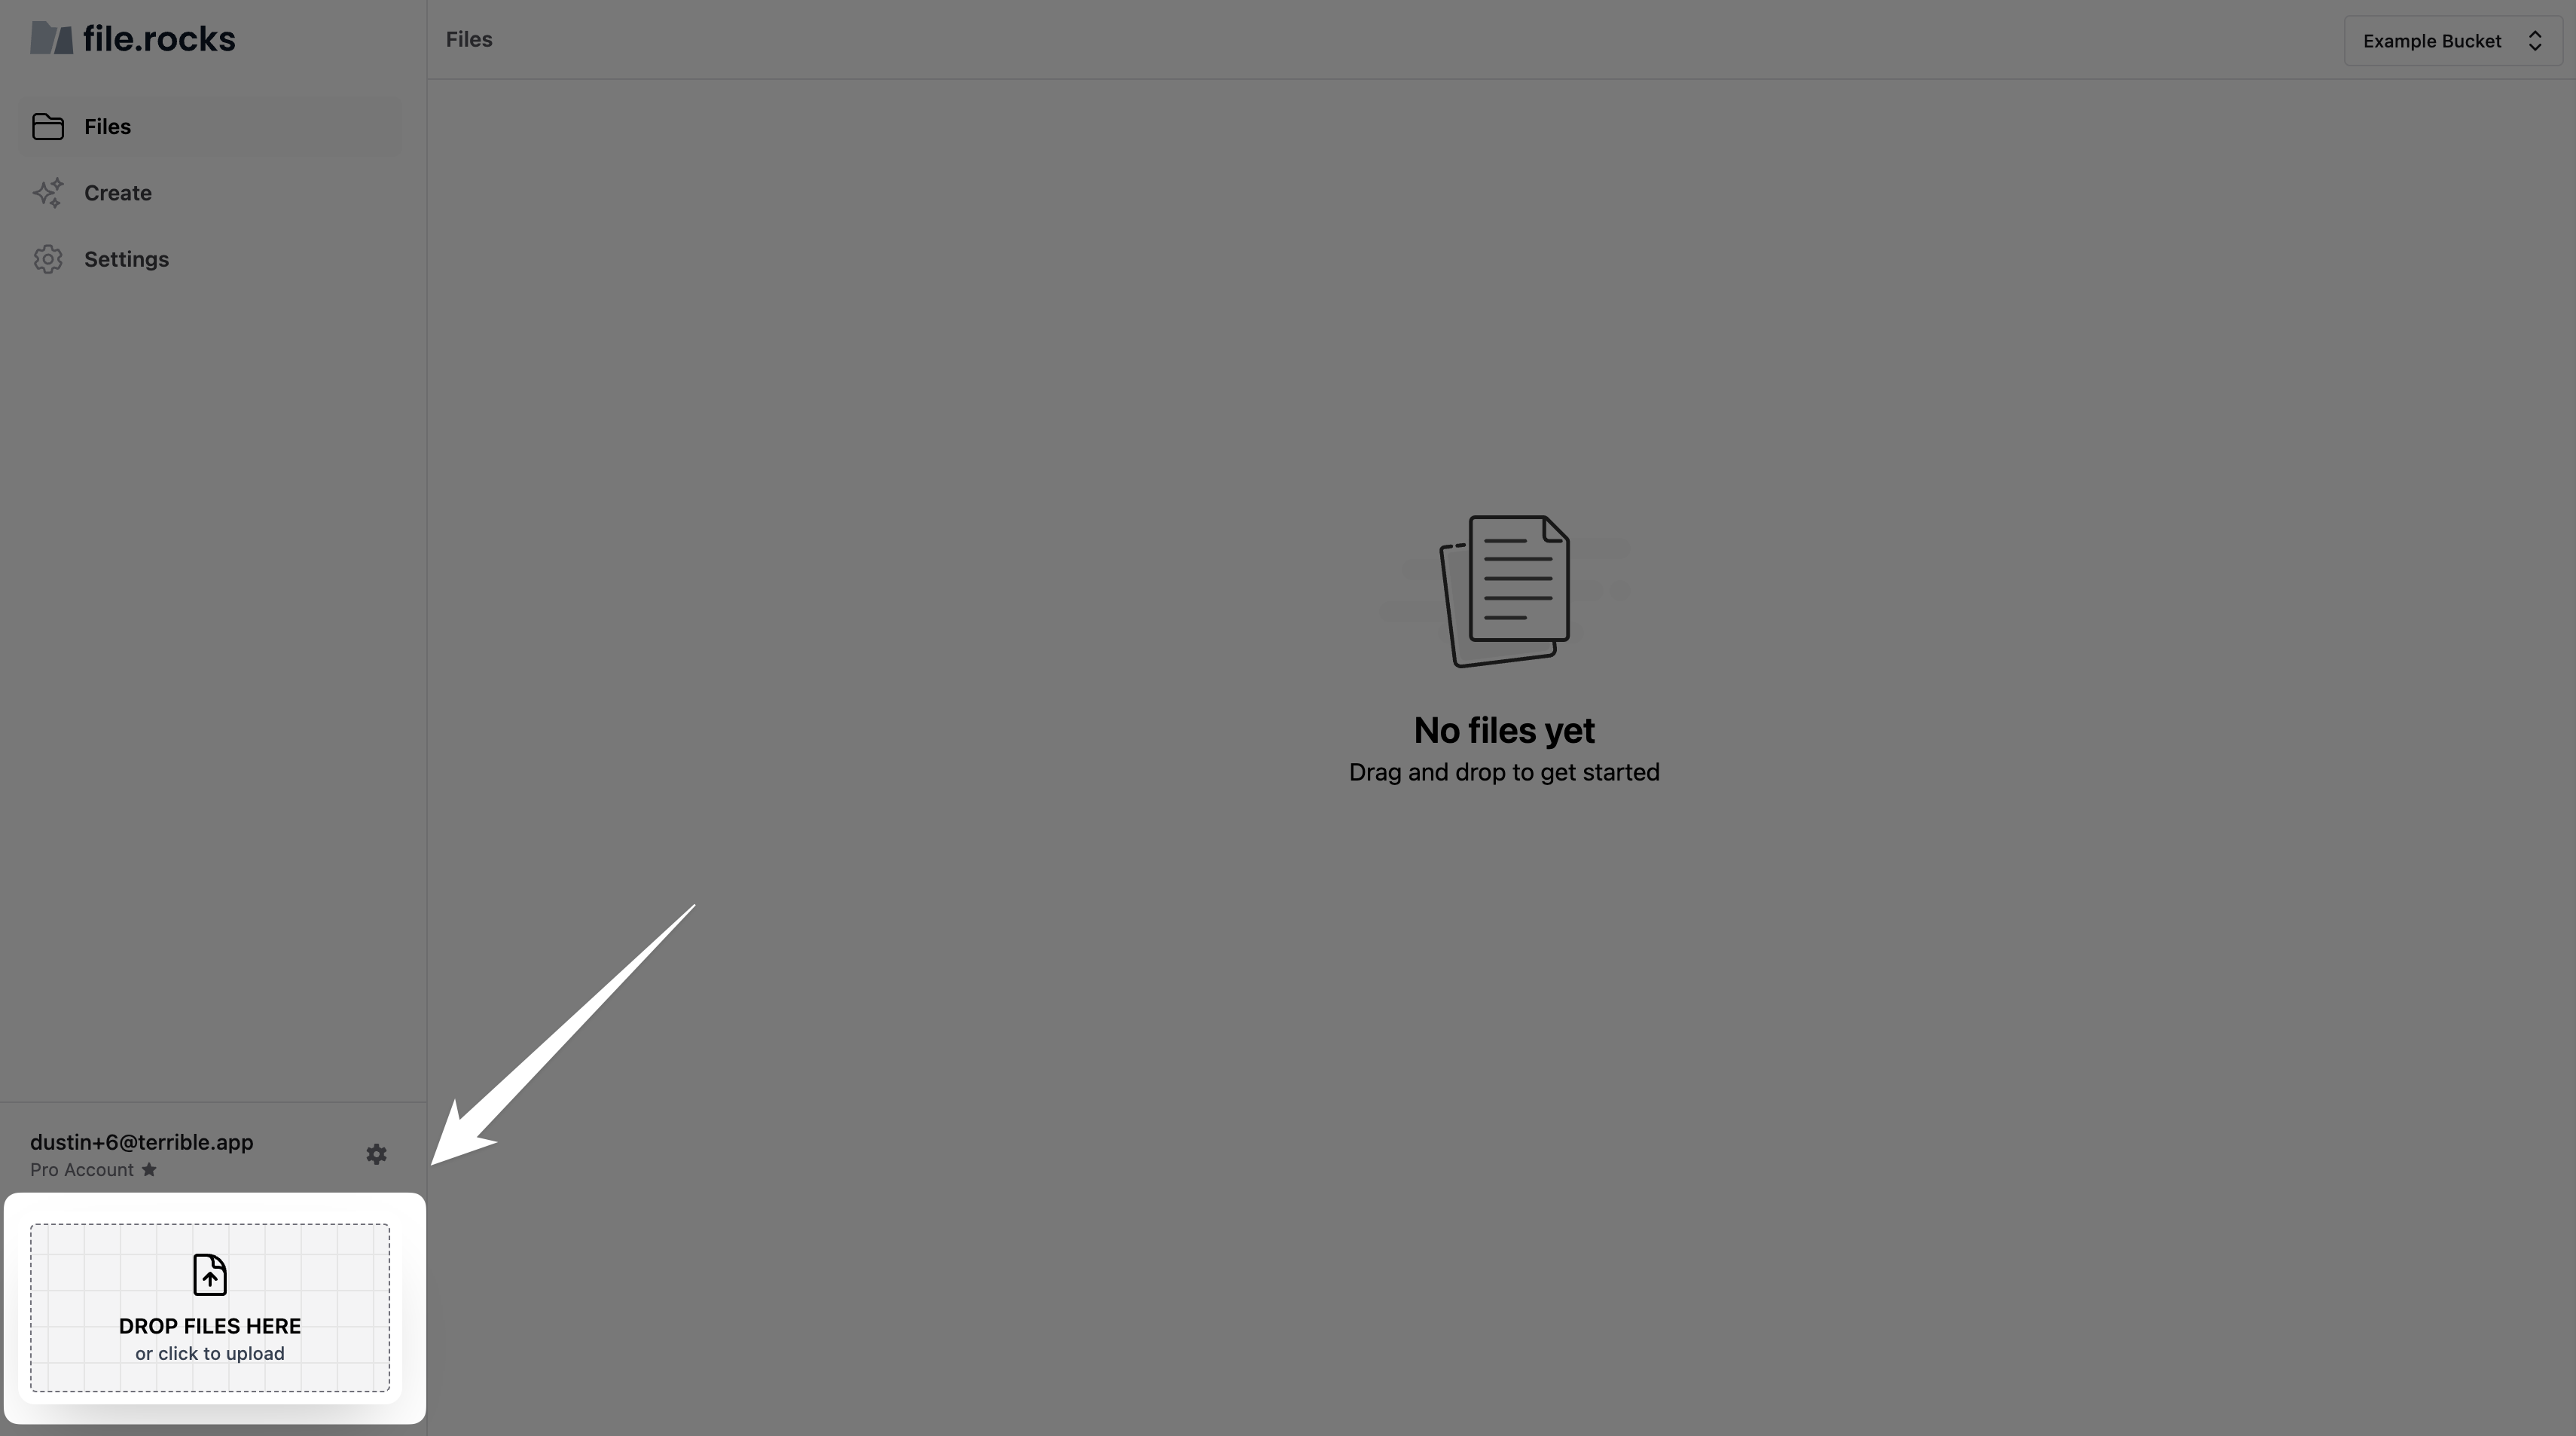
Then just click "Start uploading".
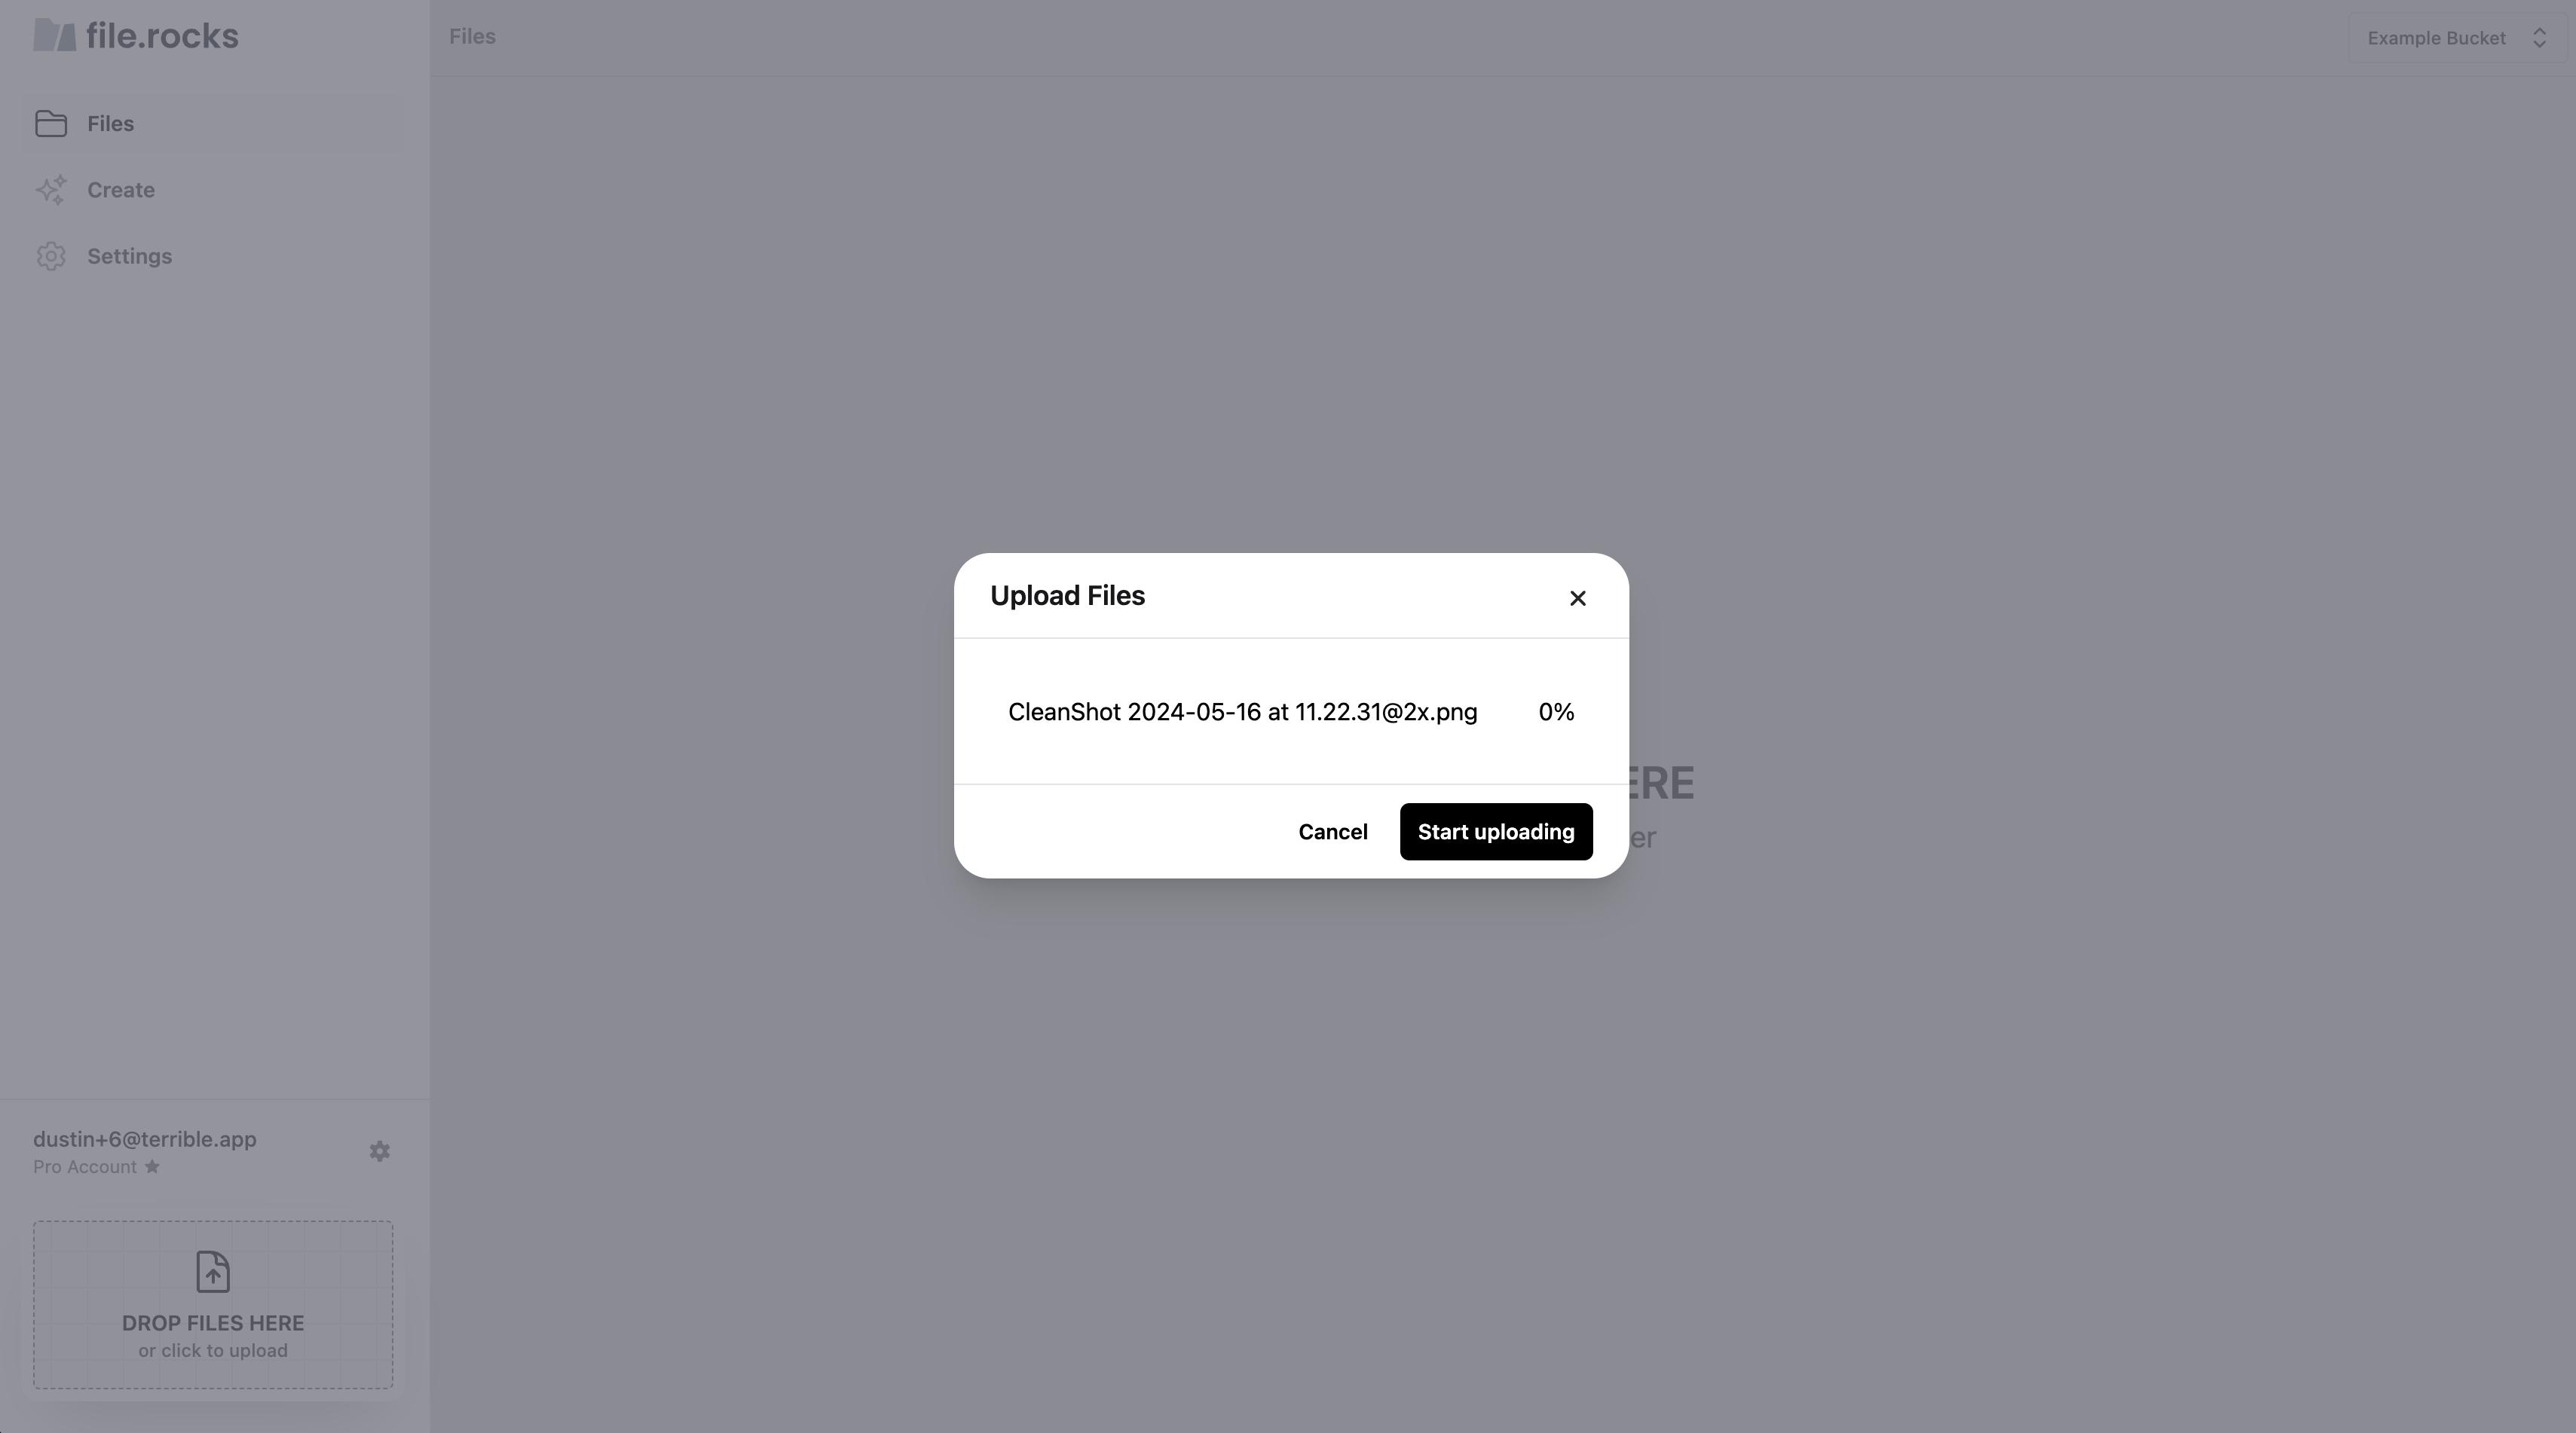
You did it! 🎉
You've done it! You've uploaded your first file to your bucket from file.rocks!
Feel free to reach out to [email protected] with any questions you have after following this guide or if you need help troubleshooting your bucket and connection!