

How to add a custom public domain to a Cloudflare R2 bucket

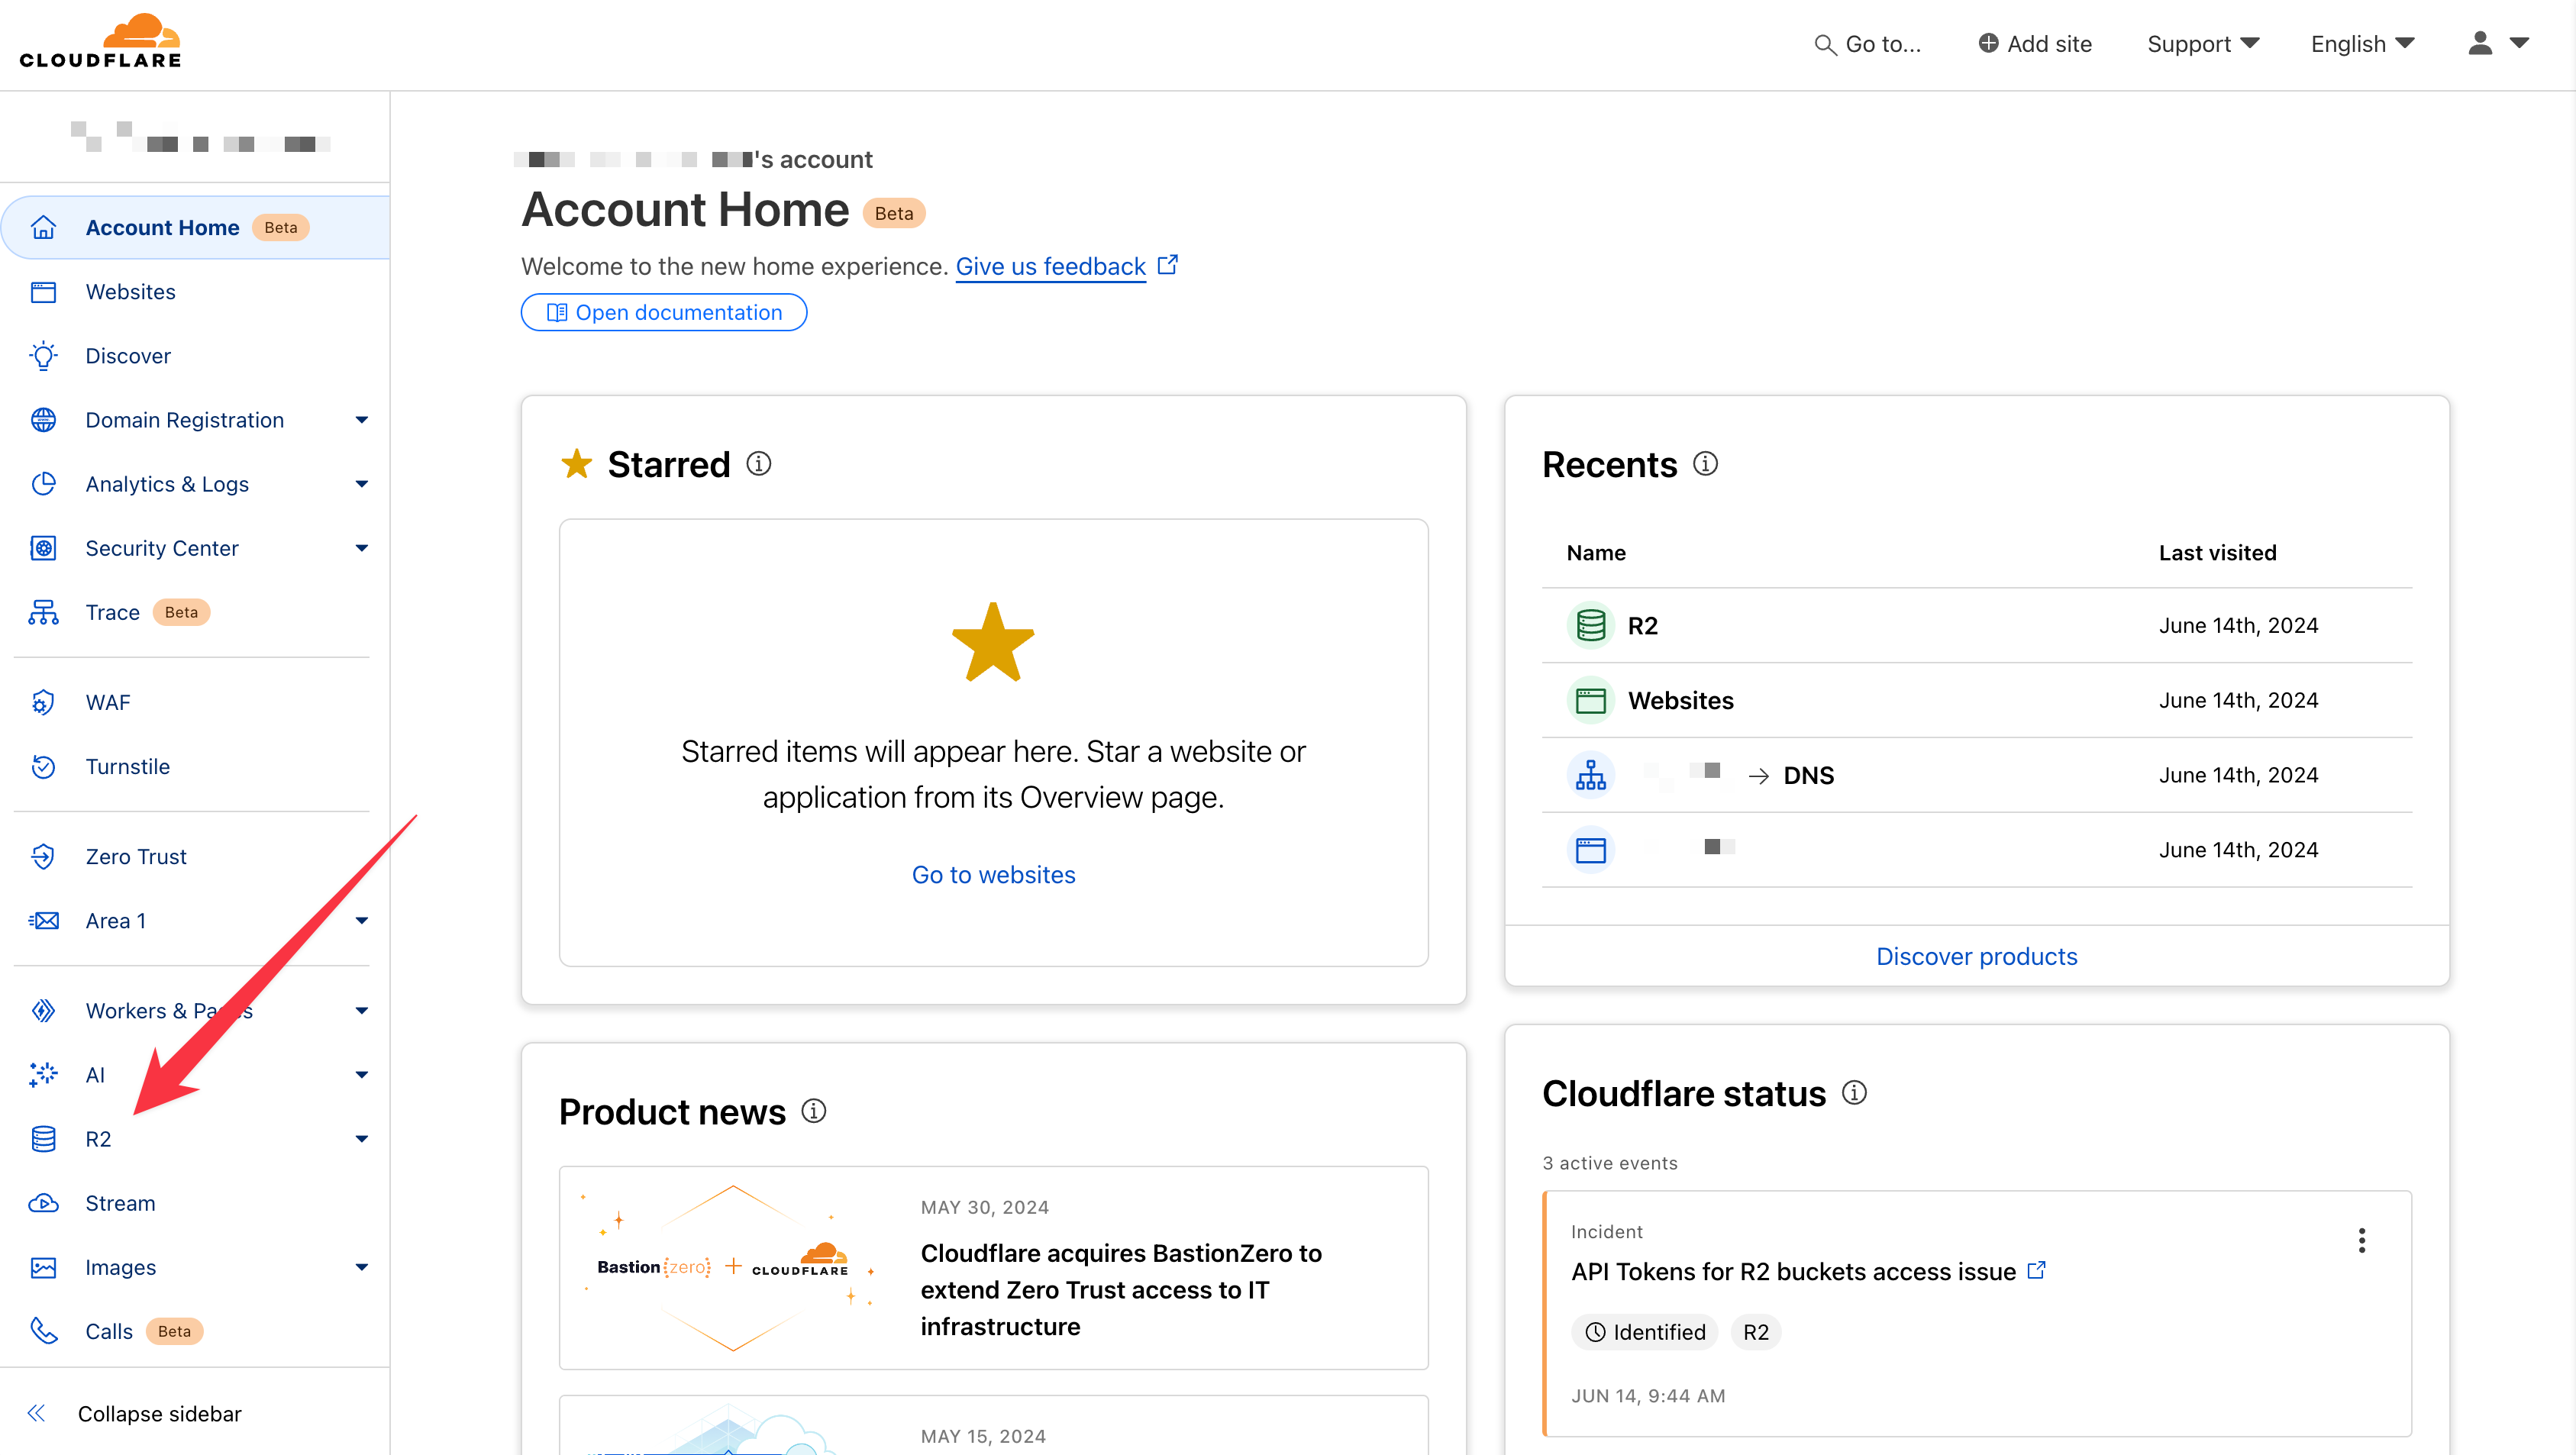
Adding a custom domain to a Cloudflare R2 bucket is actually very simple. You just need to know where to look!
1. Create or find your R2 bucket
The first thing you need to do is create or locate the R2 bucket you want to use in the Cloudflare web app.
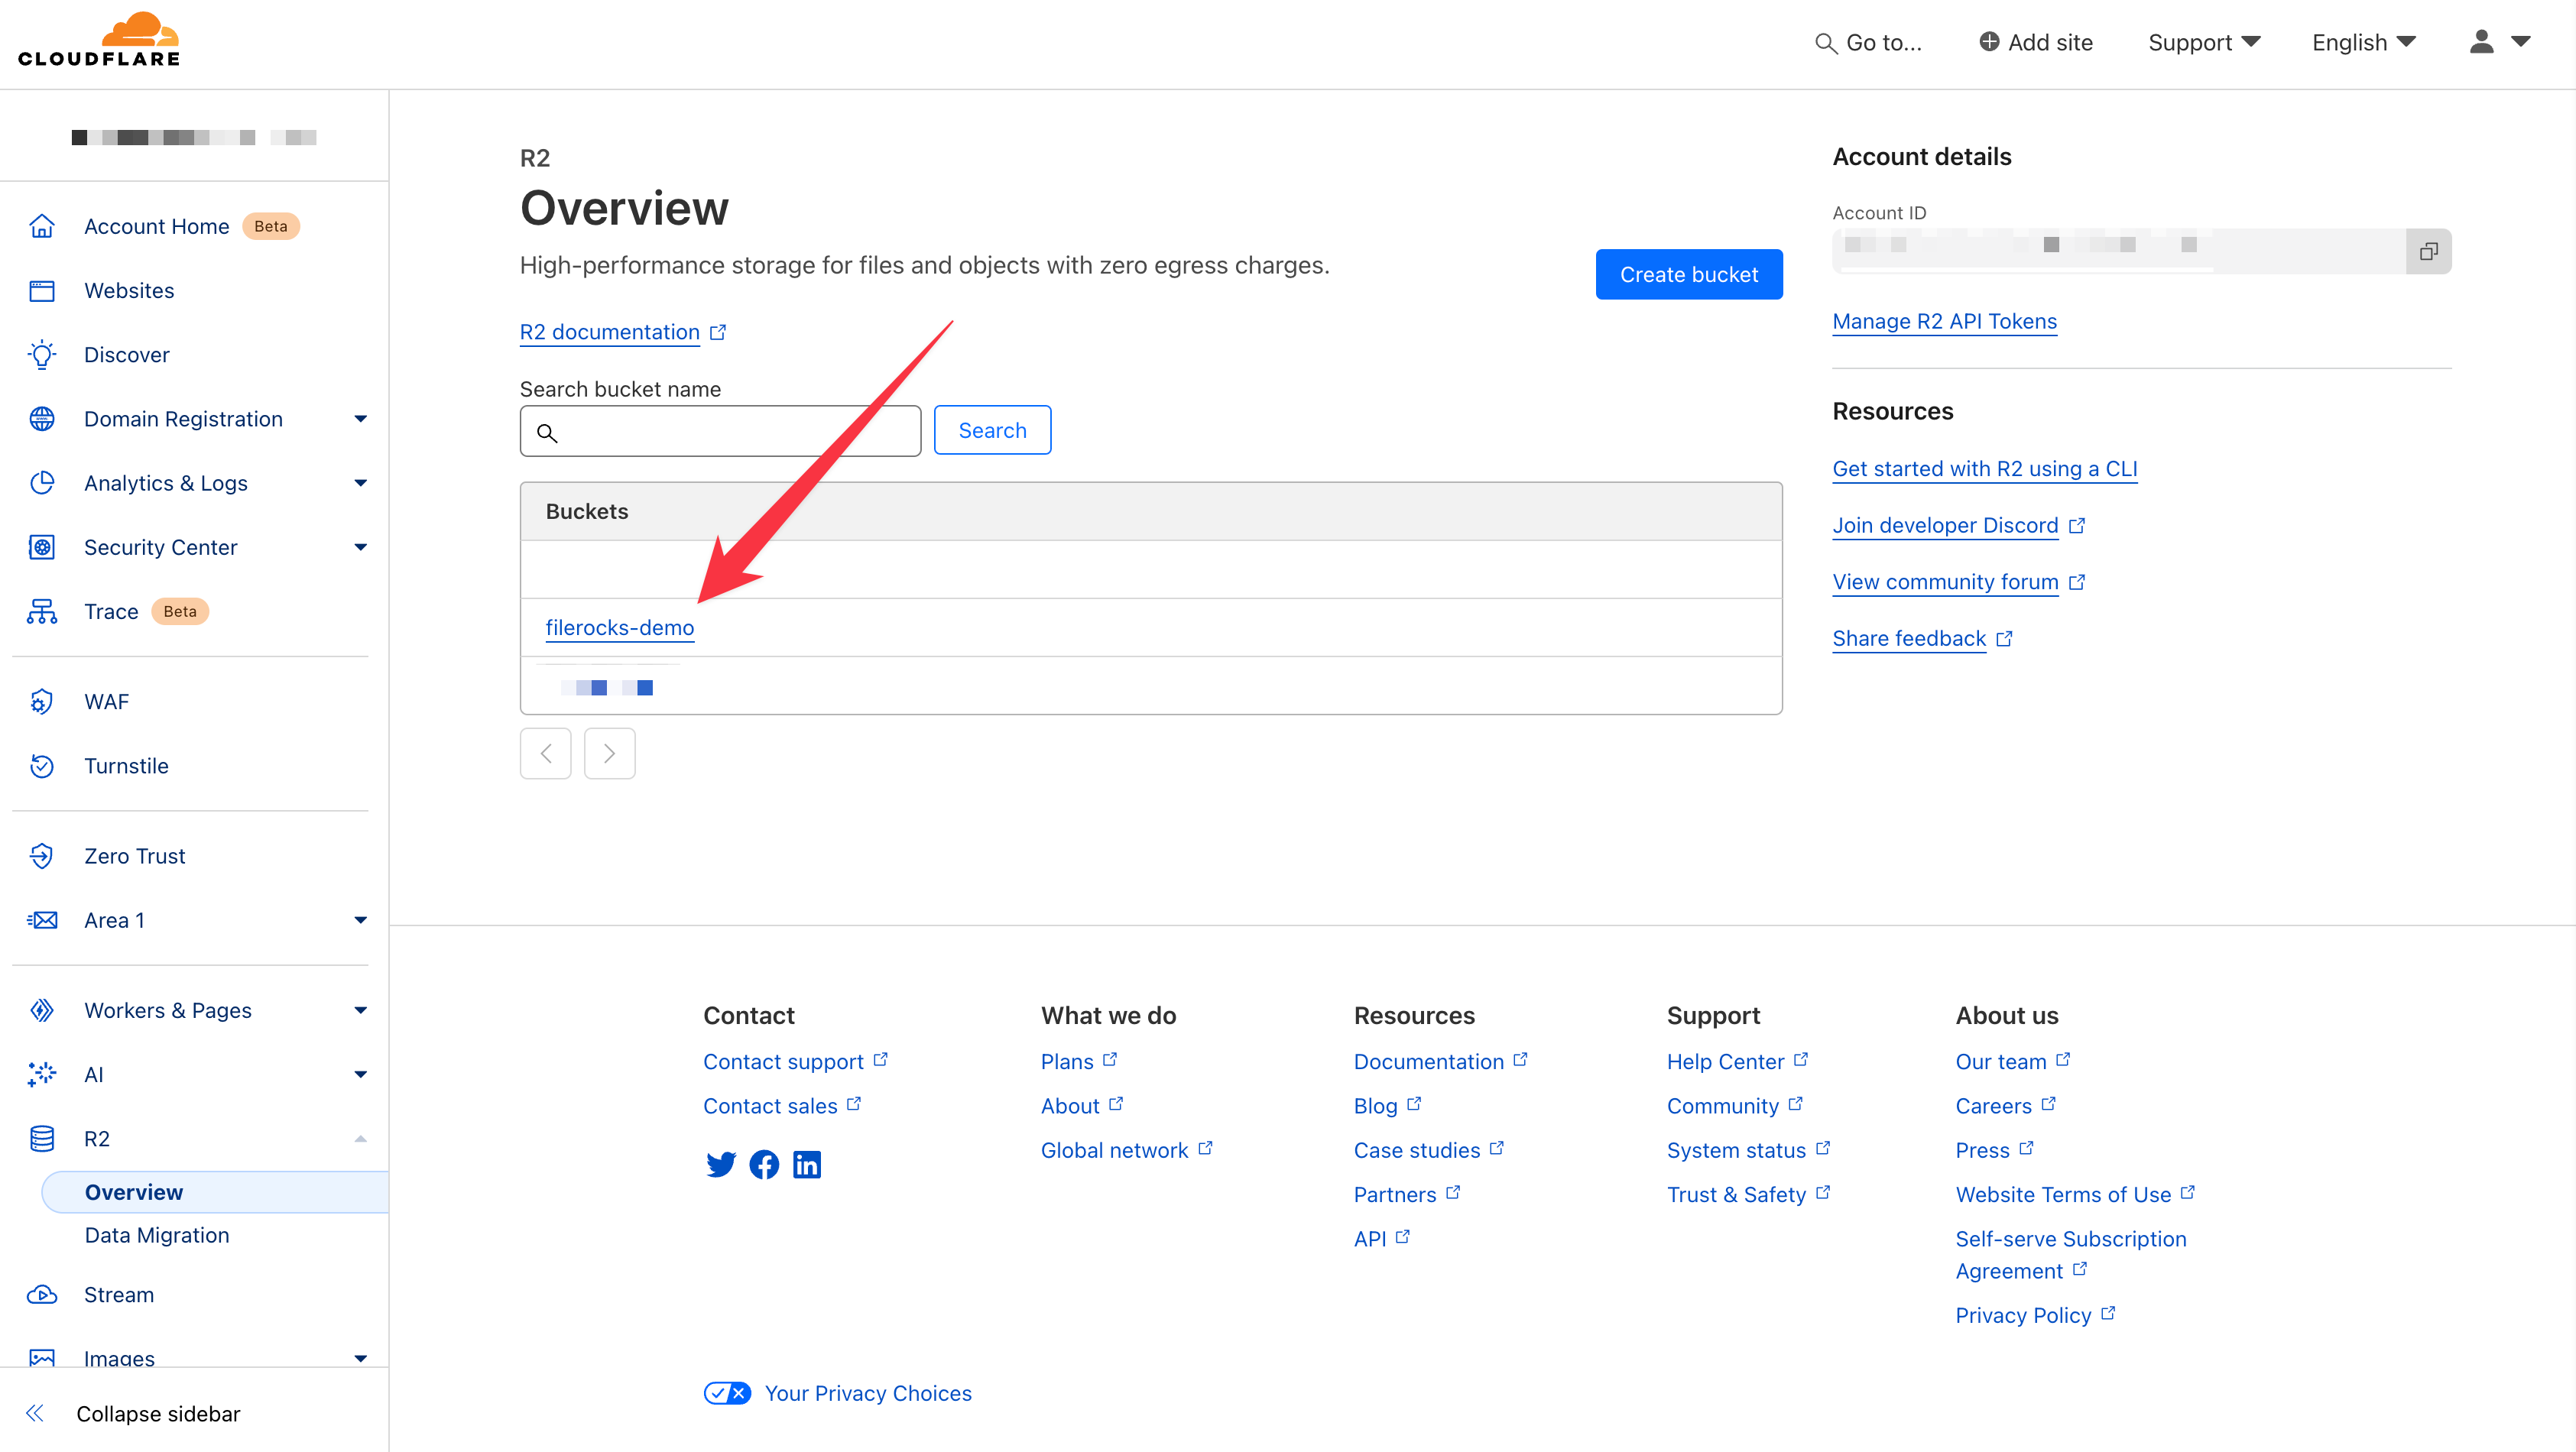
Assuming you already have a bucket, select the one you'd like to add a custom domain to:
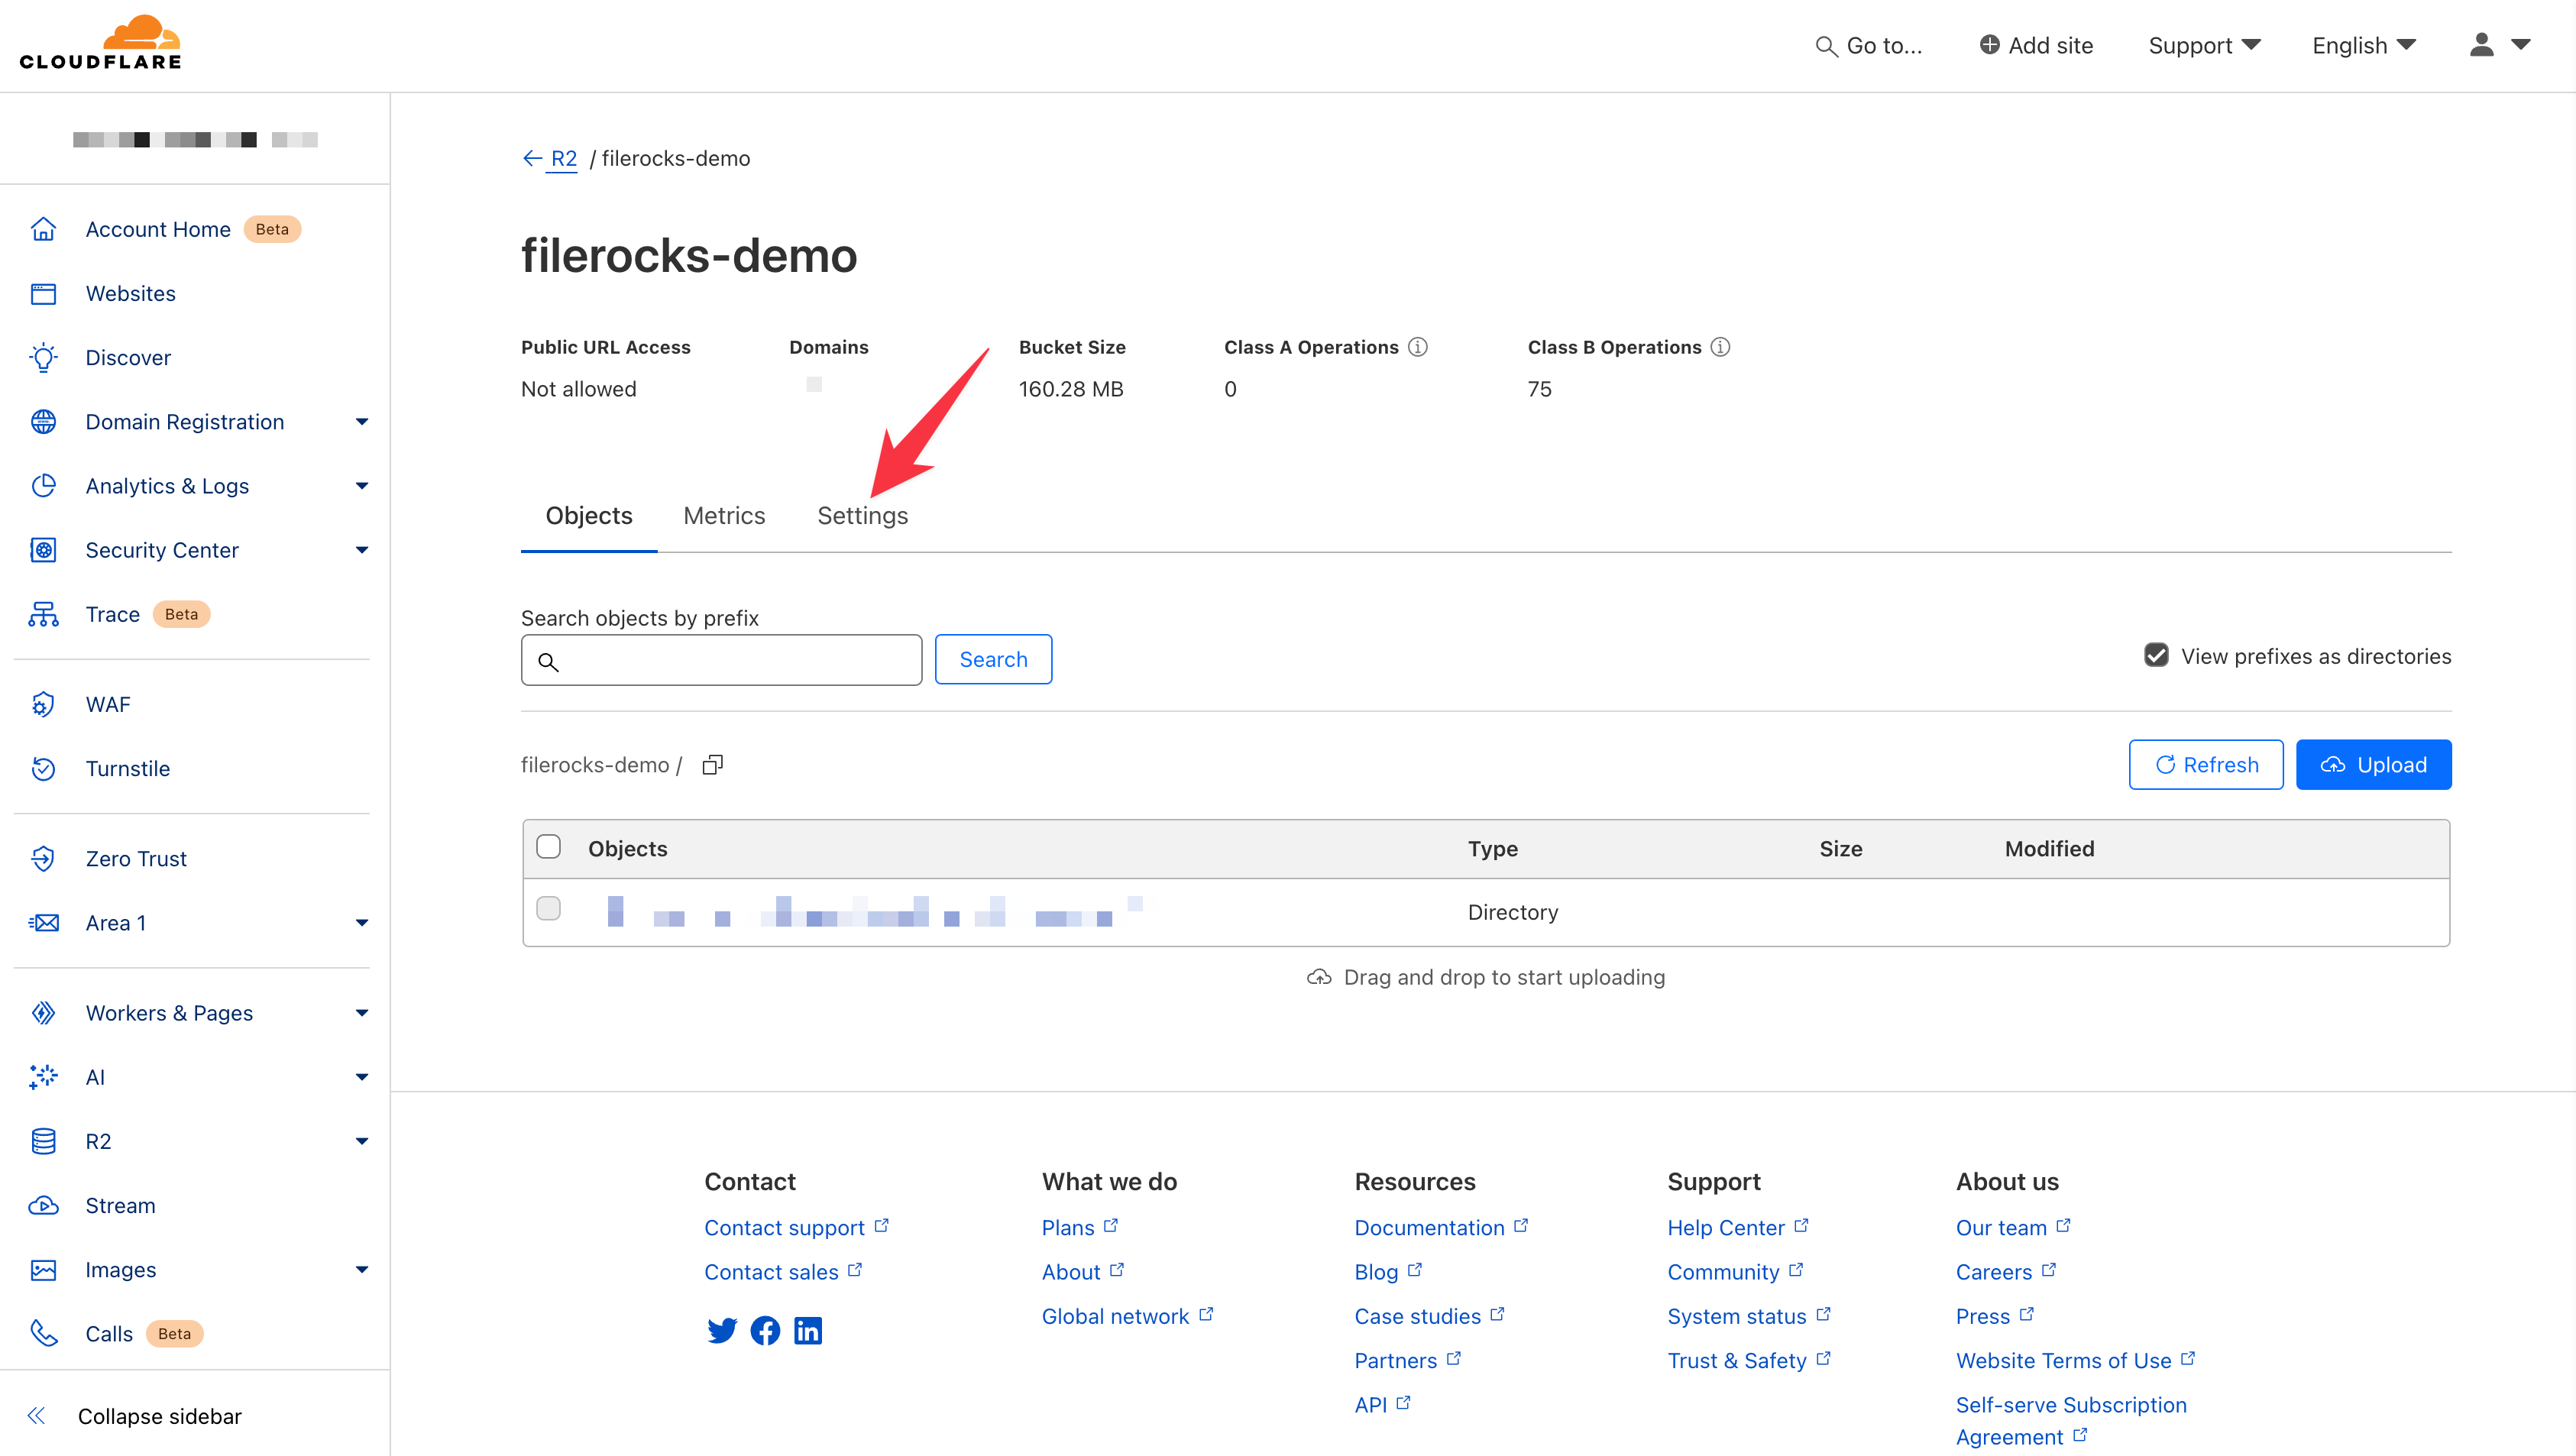
2. Go to your bucket settings
Once you're in the specific bucket's details, you can go to the Settings tab. This is where you'll find the place to add a custom domain! You're almost there!
3. Connect your custom domain
Scroll down just a little and find the Public access section. You'll see a button there that says "Connect Domain" like this:
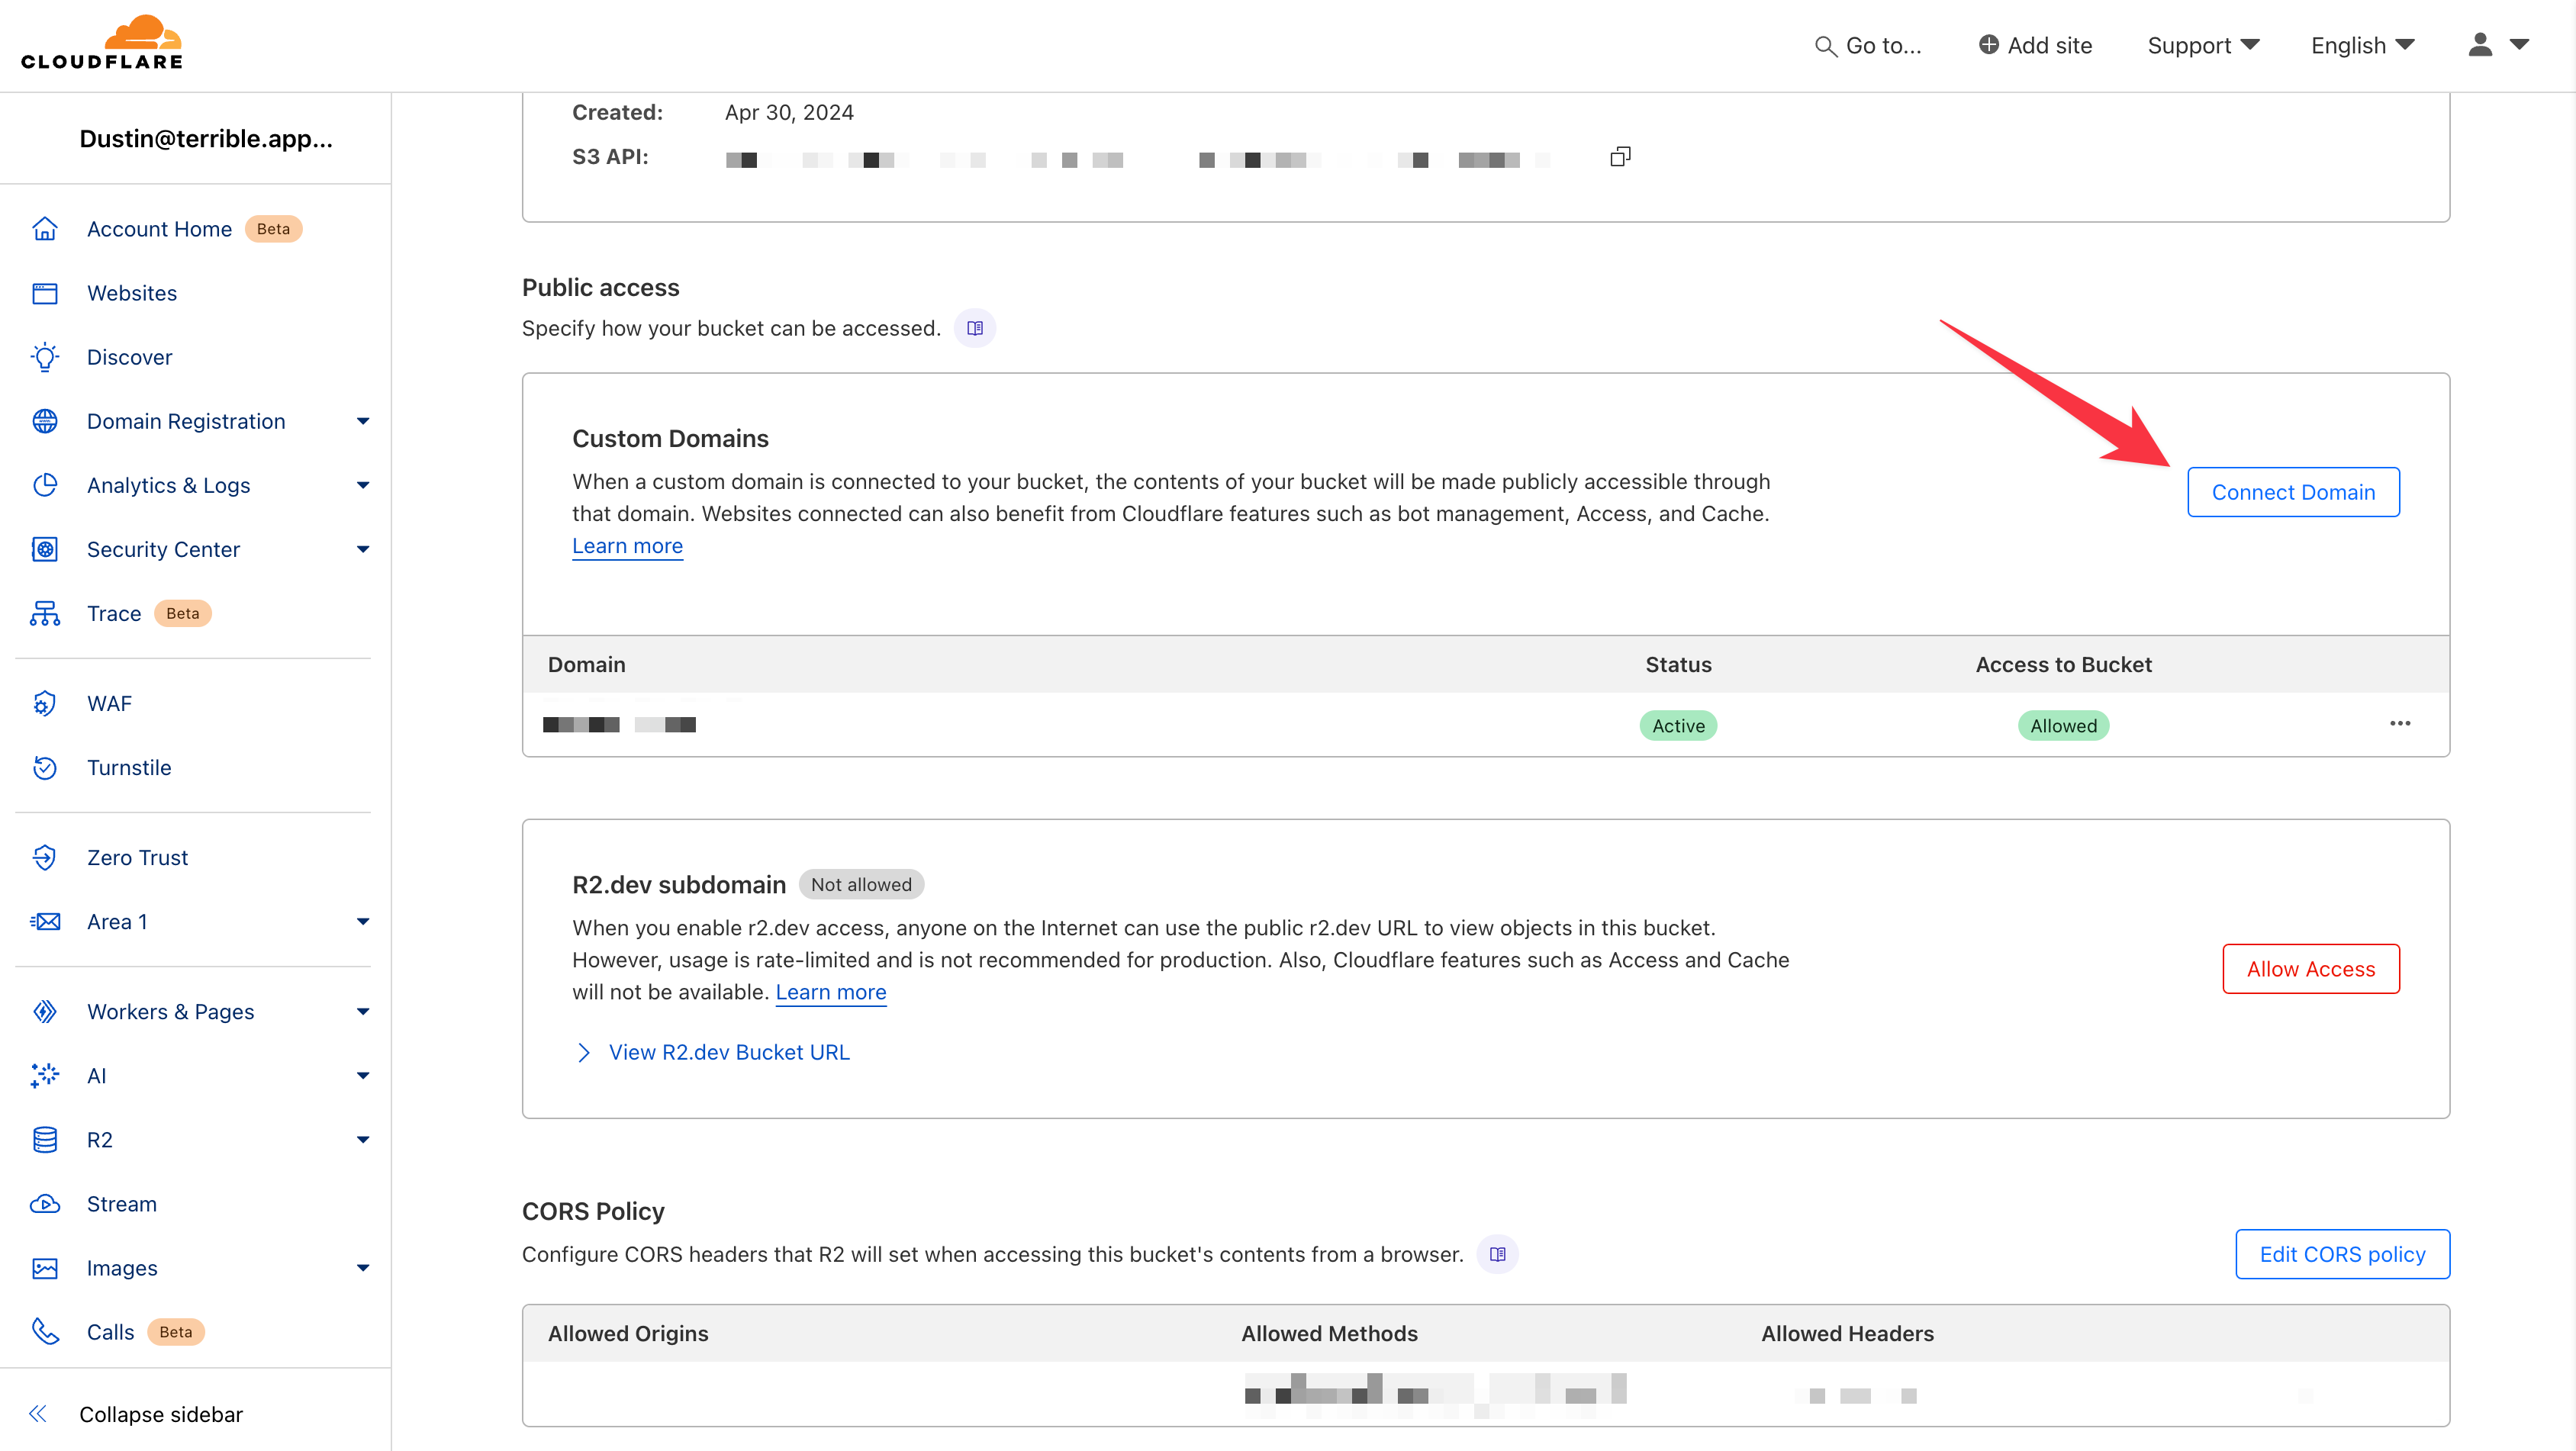
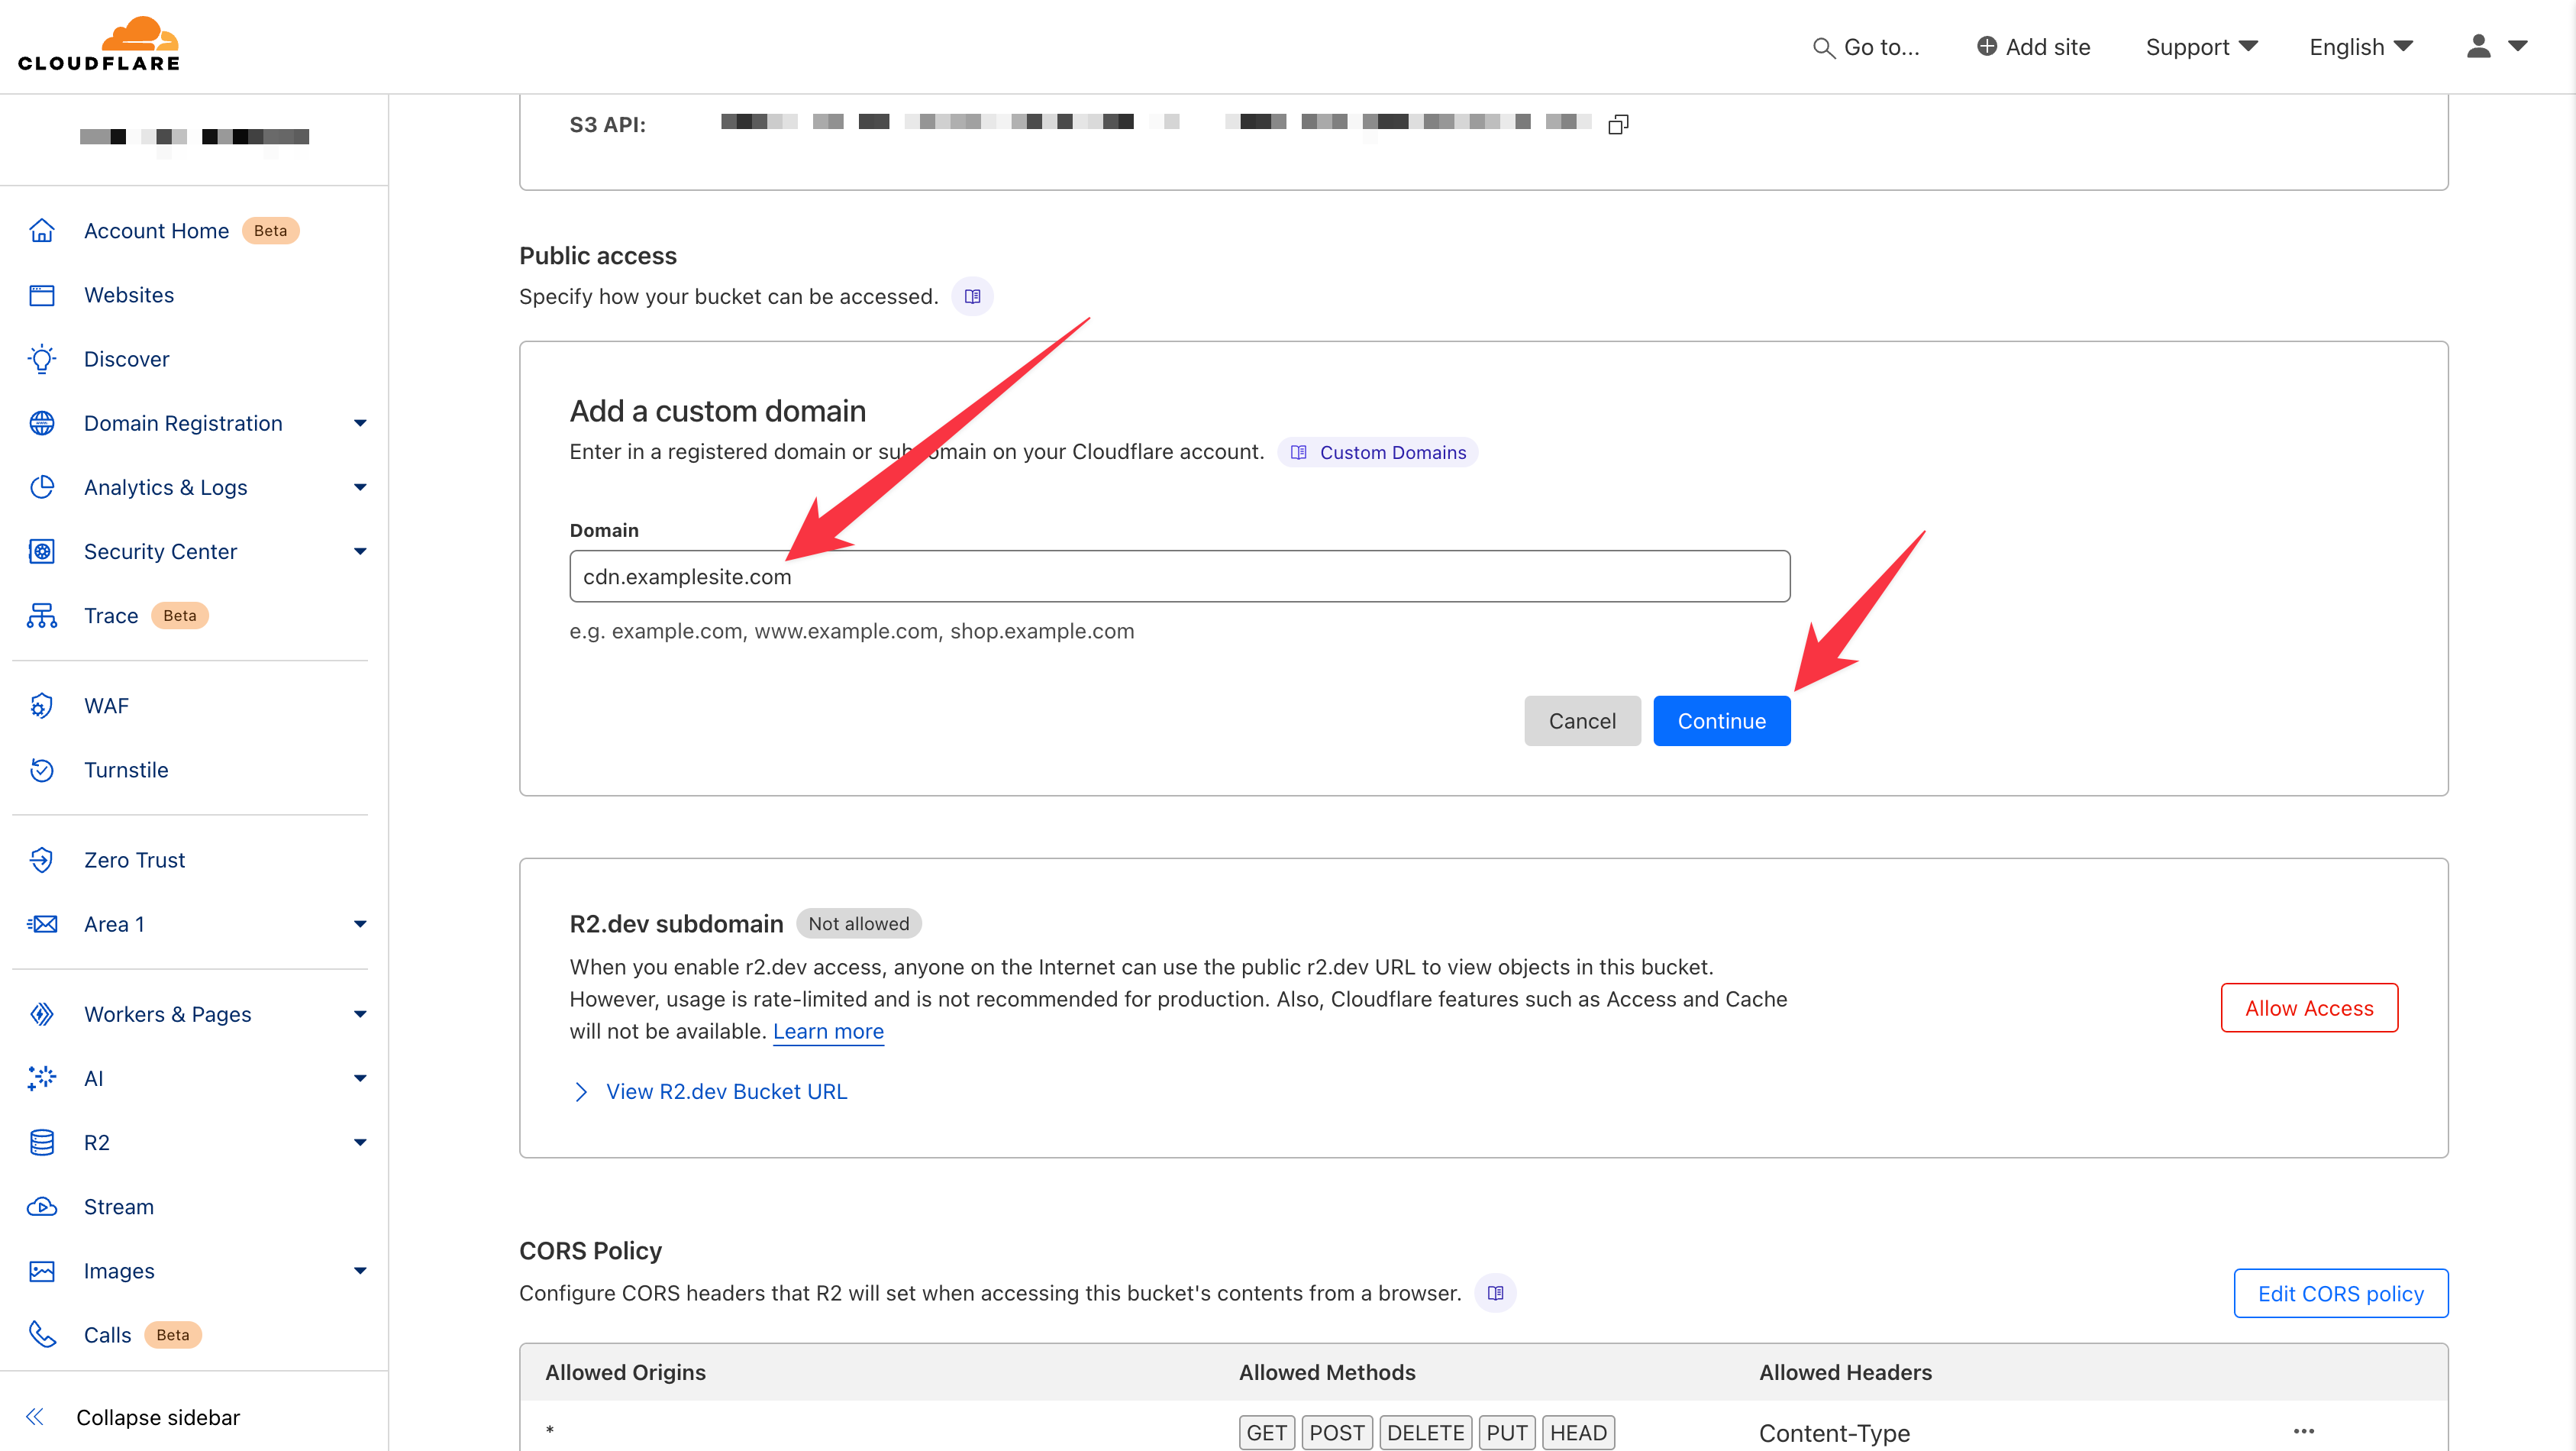
After clicking "Connect Domain", you'll be able to type the custom domain you want to add and click "Continue":
It may take a little while (a few minutes to a few hours) for Cloudflare to configure your domain's DNS properly, but once you allow some time for that…
You're done! You've successfully connected your first custom domain to a Cloudflare R2 bucket!
PS: If you're interested in managing your files without having to navigate a complex website like Cloudflare, try using file.rocks! 🤘